Using the Parts and Labor Catalog
The Parts and Labor Catalog can be accessed by clicking one of the following options on the Work screen:
| Includes Parts | Includes Labor | |
| ||
| ||
|
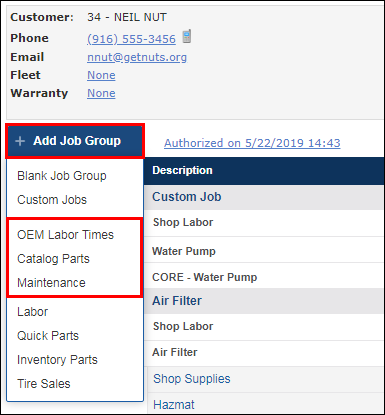
Once the Catalog is open, it is easy to move between tabs for additional parts and labor.
Add items from the Parts and Labor Catalog:
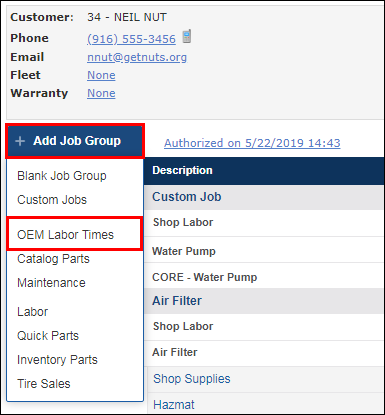
Using the OEM Labor Times option
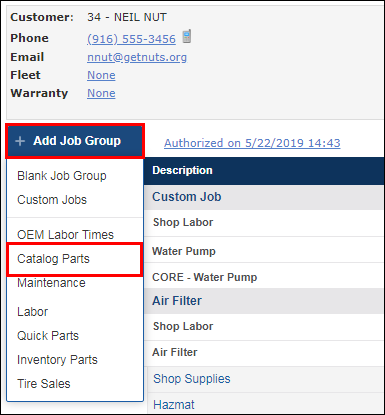
- Click Work >> Add Job >> OEM Labor Times >> select the vehicle information.
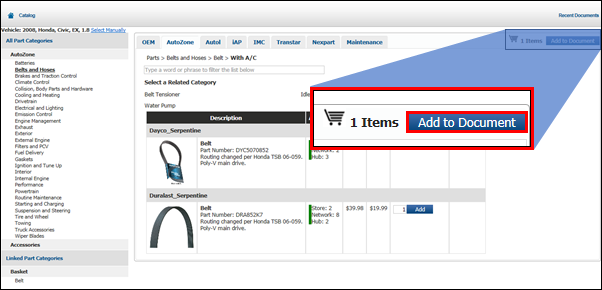
- Select a Parts Category >> locate the required parts and labor for the job >> click Add to place the items into the Shopping Cart.
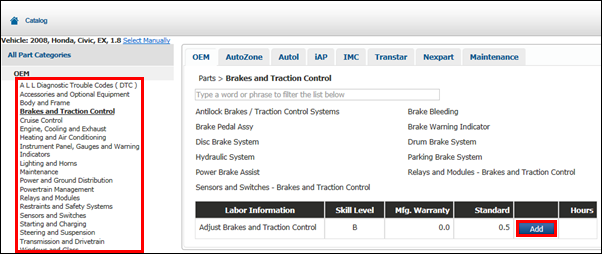
- Additional parts and labor are available from the Linked Part Categories menu.
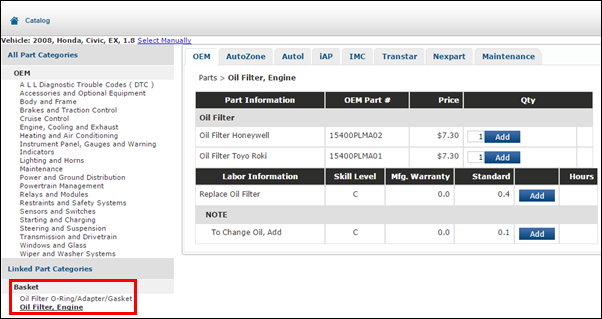
- Additional parts and labor are available from the Linked Part Categories menu.
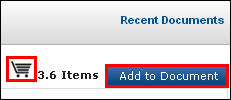
- Click the Shopping Cart icon to review and make changes to the selected items or...
- Click Add to Document to place all of the selected items onto the Work Document and return to the Work screen.
- Click Add to Document to place all of the selected items onto the Work Document and return to the Work screen.
Using the Catalog option
IMPORTANT - Before using catalogs to add parts, follow the steps in Online Parts Catalog Setup.
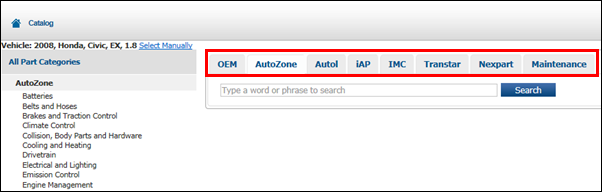
The following parts catalogs are integrated to display within ALLDATA Manage Online with a similar look and feel:
- OEM
- AutoZone
- Transtar
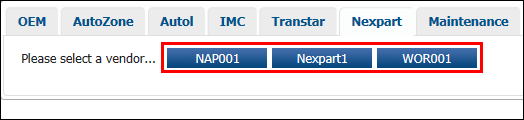
- Nexpart
The following tire and wheel catalog is also integrated into ALLDATA Manage Online but works slightly different:
- ATD (American Tire Distributors)
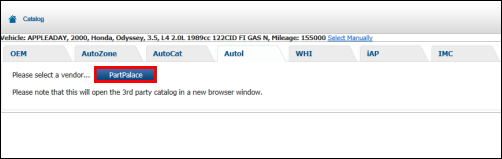
The following parts catalogs link to websites outside of ALLDATA Manage Online and will each have a different look and feel:
- Nexpart Multi-Seller
- IMC
- WHI
- TurboParts (DST)
- AutoCat+
- Federated Autoi
- IAP (Internet Auto Parts)
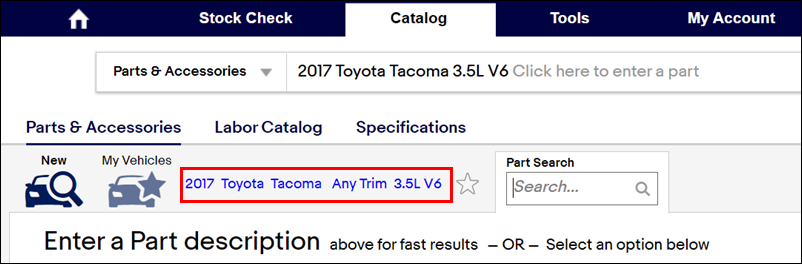
To add parts using the Catalog Parts option:
- On the Work tab, select Add Job >> Catalog Parts >> select the vehicle information.
- If no vehicle has been selected or the selected vehicle is not recognized, select the Year, Make, Model and Engine >> Select.
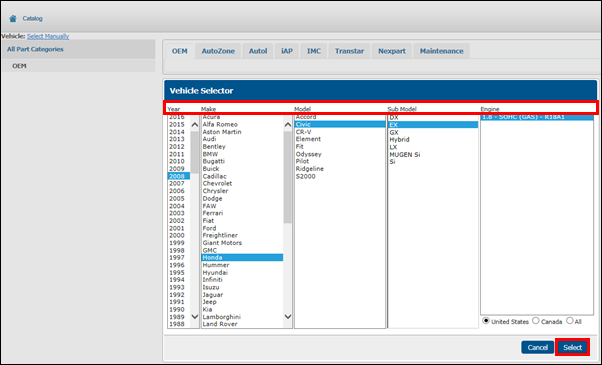
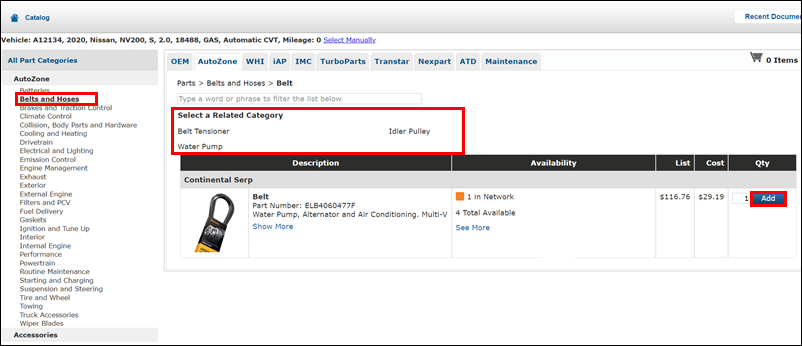
- The catalogs will load and display Part Categories for the selected vehicle.
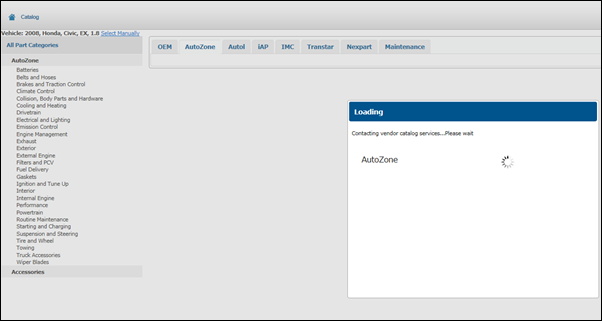
- Select a catalog tab.
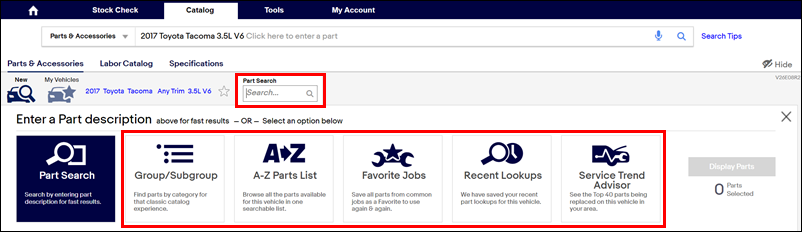
Add parts to the Manage Online Catalog Basket using one of the following methods:
Integrated Parts Catalogs
Select a Part Category >> Related Category if necessary >> click Add.
Repeat this step to add additional parts to the Manage Online Catalog Basket.
- Notes:
- AutoZone Deals
- Click View Deals to see details and requirements for available deals.

- Click Check Deals in the catalog cart to verify the requirements have been met and the deal is being applied.
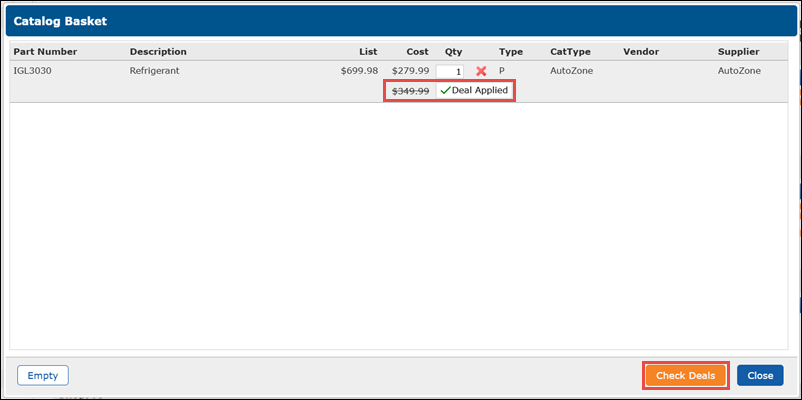
- Click View Deals to see details and requirements for available deals.
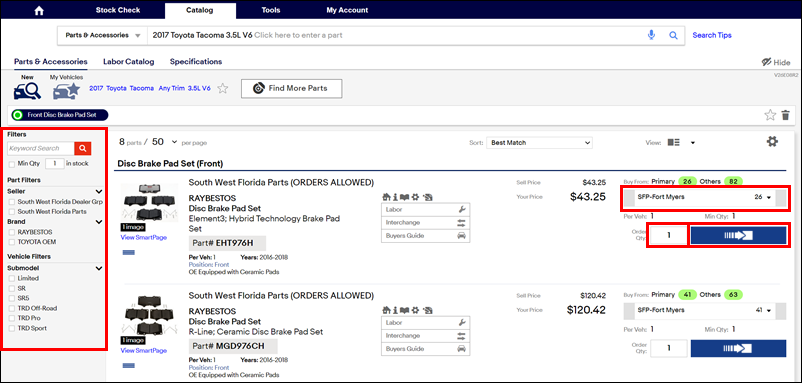
- When using an integrated catalog with multiple suppliers, click the supplier for the catalog you wish to view.
- AutoZone Deals
- Notes:
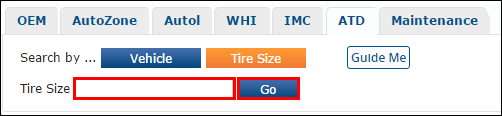
ATD Tire and Wheel Catalog
Search by Vehicle
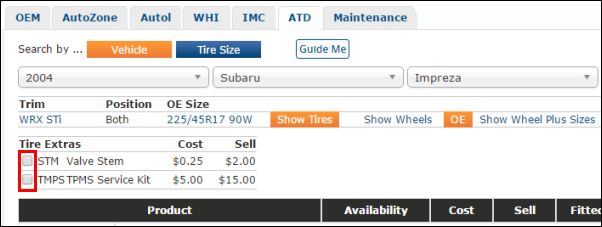
- Verify the vehicle and Trim >> click Go.

Select one of the following:
- Show Tires - A list of OE sized tires will appear.
- Show Wheels - A list of OE sized wheels will appear.

- To show additional sizes:
- Click Show Wheel Plus sizes.

- Select a size.

- Click Show Wheel Plus sizes.
Search by Tire Size
Enter the Tire Size >> click Go.
- Note: For the best results, enter numbers only. (example: 2355018 instead of P235/50R18.
Adding Tires and Wheels
After searching for tires or wheels:
Select any necessary Tire Extras (For tires only).
- Note:The quantity of extras added to the document will match the quantity of tires that have been added.
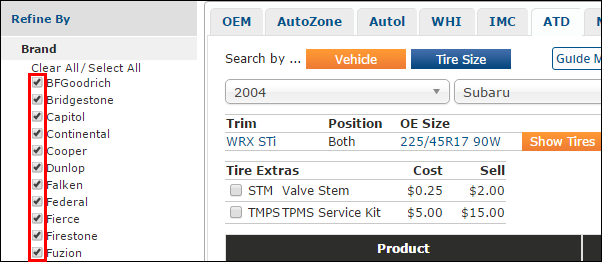
- Filter your search results by unchecking any of the boxes in the Refine By menu on the left.
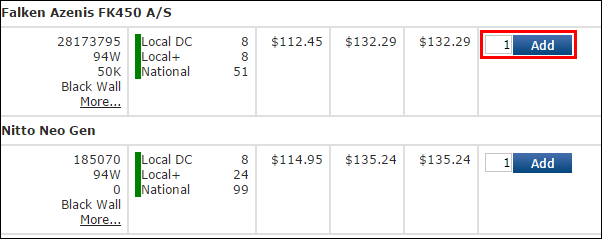
- Select a quantity (Qty) >> click add.
External Parts Catalog
Nexpart Multi-Seller
- Select the WHI tab >> Nexpart Multi-Seller.

- Verify or update additional vehicle specifics as required.
- Search or select an option to browse the catalog for parts.
Filter available parts (optional) >> select a store location >> enter a quantity >> click the add to cart button.
- Hover the cart section in the upper right corner to see a preview of the parts that will be transferred >> click the cart section.
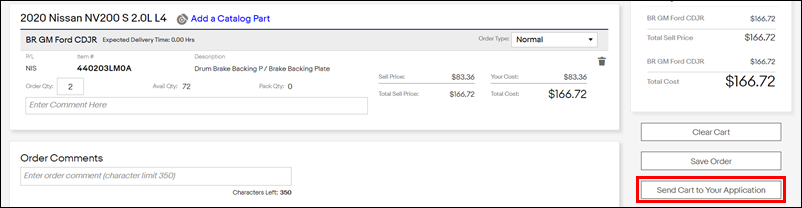
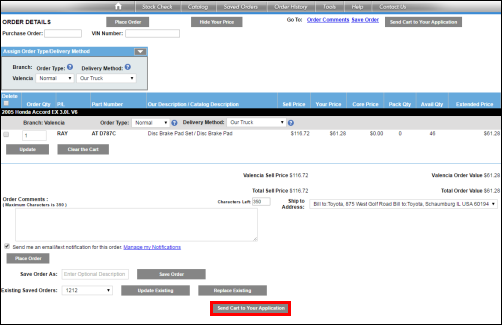
Click Send Cart to Your Application.
- The selected items will be added to the Manage Online Catalog Basket.
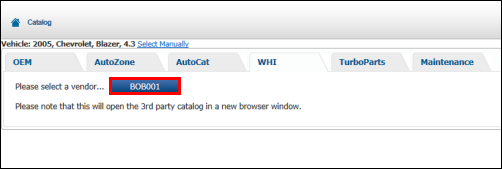
WHI
Select a supplier.
- The WHI catalog will appear in a new window or tab.
- Add all required parts to the WHI shopping cart.
- Select the WHI shopping cart.

Confirm the items to be transferred >> select Send Cart to Your Application.
- The selected items will be added to the Manage Online Catalog Basket.
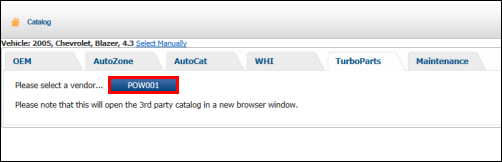
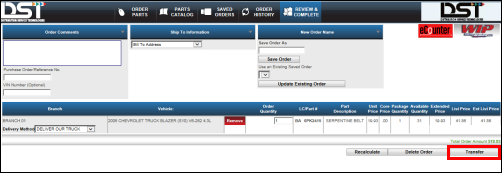
TurboParts (DST)
Select a supplier.
- The TurboParts catalog will appear in a new window or tab.
- Add all required parts to the TurboParts shopping cart.
- Select the TurboParts shopping cart.

Confirm the items to be transferred >> select Transfer.
- The selected items will be added to the Manage Online Catalog Basket.
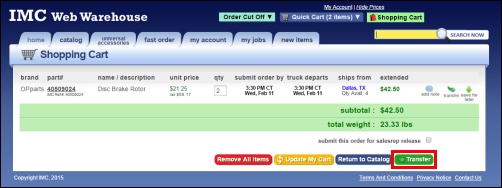
IMC
Select a supplier.
- The IMC catalog will appear in a new window or tab.
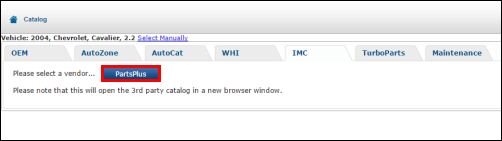
- Add all required parts to the IMC shopping cart.
- Select the IMC Shopping Cart.

Confirm the items to be transferred >> select Transfer
- The selected items will be added to the Manage Online Catalog Basket.
Federated Autoi
Select a supplier.
- The Federated Autoi catalog will appear in a new window or tab.
- Add all required parts to the Federated Autoi shopping cart.
- Select the Federated Autoi Shopping Cart.

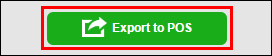
Confirm the items to be transferred >> select Export to POS.
- The selected items will be added to the Manage Online Catalog Basket.
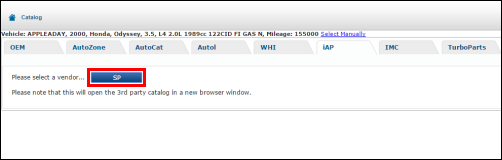
IAP (Internet Auto Parts)
Select a supplier.
- The IAP catalog will appear in a new window or tab.
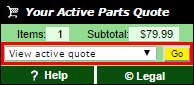
- Add all required parts to the IAP Parts Quote.
- Select View active quote >> Go.
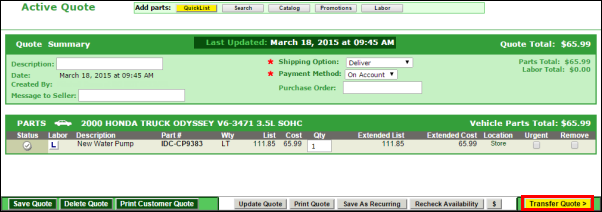
Confirm the items to be transferred >> select Transfer Quote.
- The selected items will be added to the Manage Online Catalog Basket.
- When done, select Add to Document.
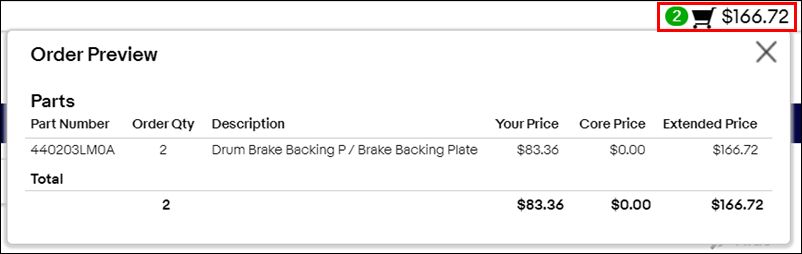
- You can select the Manage Online Catalog Basket to view the selected catalog items before adding them to the work document.
- You can select the Manage Online Catalog Basket to view the selected catalog items before adding them to the work document.
- The part entered will add to your Work Document under a new Job Grouping.
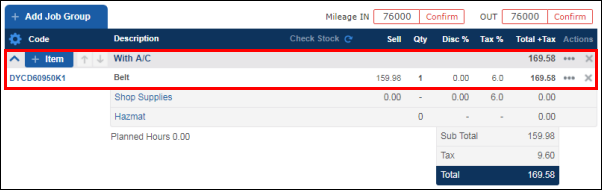
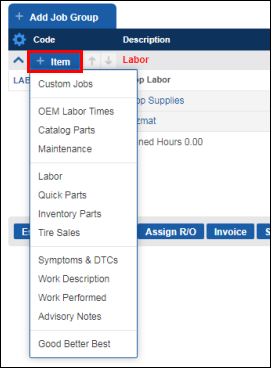
- Clicking + Item on the Job Grouping provides additional options to add to the Job.
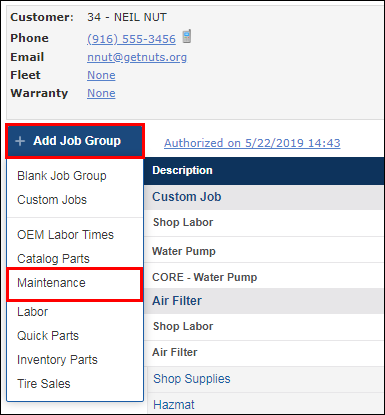
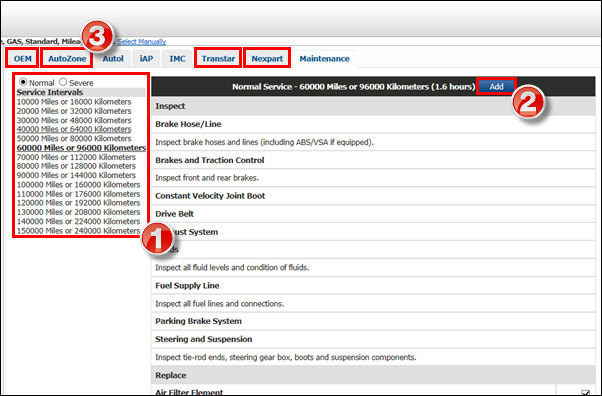
Using the Maintenance option
- To add maintenance related labor times and parts to a document, from the Work screen, select Add Job >> Maintenance >> choose the vehicle information accordingly.
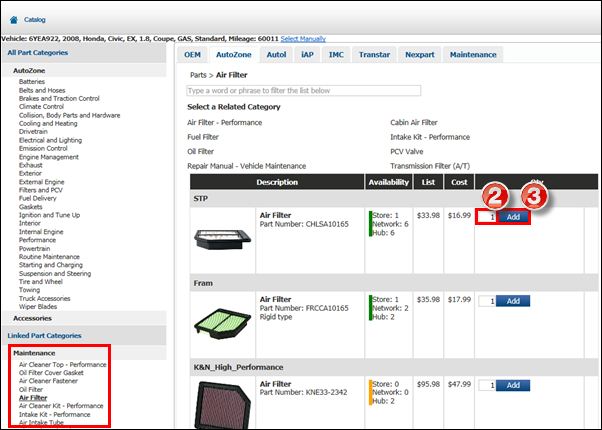
- Select a Service Interval >> click Add >> select a parts catalog to view the associated part items.
- Select a part from the Linked Part Categories menu >> enter a Quantity >> click Add.
- Click the shopping cart to review and make changes to the selected items or...
- Click Add to Document to place all of the selected items onto the Work Document and return to the Work screen.
- Click Add to Document to place all of the selected items onto the Work Document and return to the Work screen.