

Stop Guessing: How to Read and Use OBD-II Codes
We’ve all been there before. You’re casually driving along when the outline of what looks like a 4-year-old’s interpretation of a yellow submarine suddenly appears on your dashboard. While it’s thankfully not the genie-in-the-lamp oil light coming on, it’s still cause for concern, and that concern grows when it starts flashing. Sure, you could pull the bulb or throw a piece of tape over it and pretend your car isn’t trying to tell you something, but figuring out why the light is on isn’t difficult. Modern vehicles no longer fail silently, and ignoring the problem can quickly lead to bigger, more expensive issues.
What’s Happening Behind the Check Engine Light
Before we dig into that annoying light on your gauge cluster, let’s talk about what’s happening behind the light. The check engine light (CEL) comes on when your vehicle’s ECU (engine control unit) detects a fault in a system it monitors, most commonly related to emissions, fuel delivery, ignition, or other powertrain functions. In some cases, it can also be triggered by sensor data that falls outside of expected parameters.
When this happens, the system stores a Diagnostic Trouble Code (DTC) in memory. Since that code isn’t visible without a scan tool, the check engine light is essentially your vehicle’s way of raising its hand and saying something isn’t right. Think of it as the Bat Signal—not necessarily telling you exactly what failed but letting you know it’s time to take a closer look rather than ignoring it. These codes can be pulled from the OBD port. In plain English, OBD stands for On-Board Diagnostics, the system your vehicle uses to monitor itself and report faults.
The Start of On-Board Diagnostics
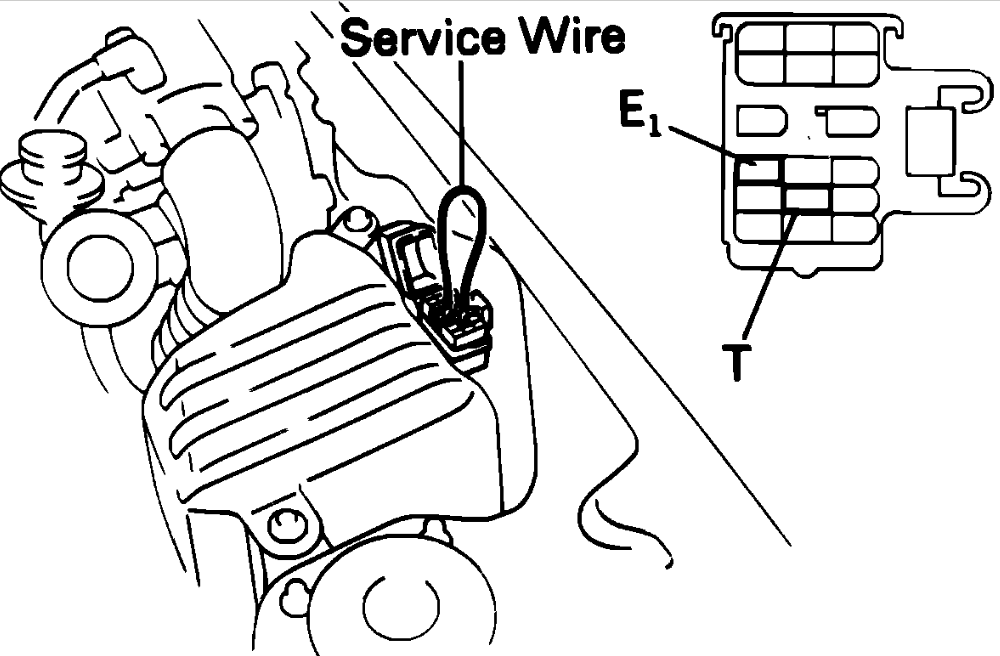
Early versions of OBD started appearing in the late 1970s and evolved through the 1980s, but there was no standard. Each manufacturer had its own way of storing and retrieving codes, which made diagnostics inconsistent and sometimes frustrating. I used to pull Toyota codes with nothing more than a paper clip, jumping terminals in the diagnostic connector, then counting the flashing CEL for each digit. It worked, but it was far from universal.
That all changed in 1996 when OBD-II became mandatory on all vehicles sold in the United States.
OBD-II introduced a standardized way of checking codes across all makes and models, largely driven by emissions regulations. It introduced a universal code structure and scan tool compatibility—a major win for repair shops and DIYers alike. That’s why a basic $30 scanner today can plug into almost any modern vehicle and give you usable diagnostic information. What started as emissions compliance turned into one of the most powerful diagnostic tools available to everyday car owners.
How to Pull Codes
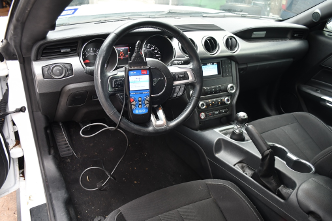
Pulling codes is as simple as plugging a scan tool into your OBD-II port, most likely located under the dash on the driver’s side. If you’re not ready to own your own scan tool, you can visit your local AutoZone, where many locations will scan your vehicle in the parking lot free of charge.
Another option is the tool rental program through AutoZone, which allows you to leave a refundable deposit, take the tool home, pull codes, and clear stored codes. This is especially helpful if you’re dealing with multiple issues or chasing down more than one code.
If you prefer to own your tools, there are plenty of scan tools available that can help you diagnose like a pro. Entry-level units are inexpensive and will read and clear codes. Mid-level tools add features like live data and freeze-frame information. Step up to a high-end unit, and you’ll get bidirectional control, allowing you to command certain components for deeper diagnostics.
Once you own your own scanner, you’re not guessing anymore. You don’t have to rely on a trip to the parts store, and you gain the ability to diagnose issues on your own terms. Fair warning, though, this may lead to you becoming the neighborhood mechanic. Editor’s note: Avoid this if possible.
Cracking the OBD-II Code
While it might seem a little overwhelming at first, the structure of an OBD-II code is straightforward. Each code starts with a letter followed by four digits, and each part tells you something specific about the issue.
The first letter identifies the system where the fault was detected:
- P = Powertrain (engine and transmission)
- B = Body (airbags, climate control, lighting)
- C = Chassis (ABS, suspension)
- U = Network (communication issues between modules)
From there, the first digit tells you whether the code is generic or manufacturer-specific. A “0” means it’s a generic code, standardized across all manufacturers, while a “1” (and sometimes higher numbers) indicates a manufacturer-specific code that can vary depending on the vehicle’s design and systems.
The remaining digits narrow down the fault.
For example, a code like P0301 breaks down like this:
- P = Powertrain
- 0 = Generic code
- 3 = System category (in this case, ignition or misfire-related)
- 01 = Identifies the specific cylinder, cylinder 1
So instead of looking like a random string of characters, the code gives you a structured starting point for diagnosis.
Common Codes and What They Really Mean
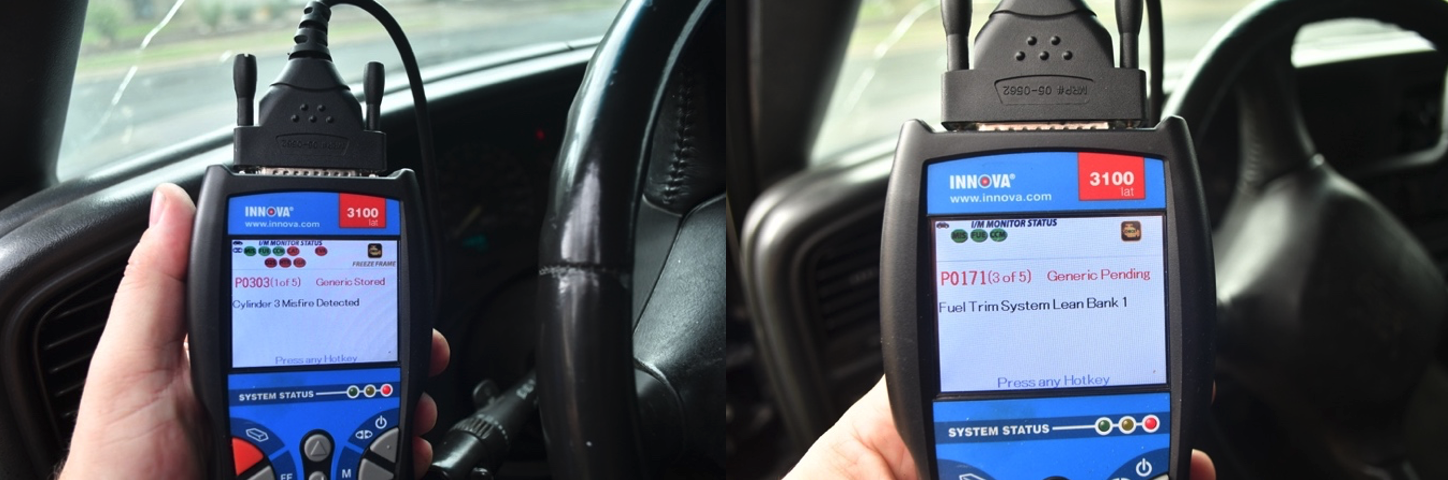
Some trouble codes show up more often than others, so knowing what they generally point to can save you time and frustration. A code like P0300 indicates a random or multiple-cylinder misfire, which could be tied to ignition components like spark plugs or coils, fuel delivery issues, or even mechanical problems. P0171, which signals a system too lean condition, often points to unmetered air entering the engine, such as a vacuum leak, but it can also be related to fuel delivery problems or a faulty mass airflow sensor.
Then there’s P0420, one of the most common codes out there, indicating catalyst efficiency below threshold. While many assume this means a failing catalytic converter, it can also be caused by upstream issues like misfires or sensor problems affecting exhaust readings. On the network side, U0100 points to a loss of communication with the engine control module, which could stem from wiring issues, poor connections, or module faults.
The key with all of these is understanding what the code is telling you. It’s not a directive to replace a specific part; it’s pointing you toward a system that isn’t operating correctly. Seeing a lean code doesn’t automatically mean replacing an O2 sensor, just like a catalyst code doesn’t guarantee the converter is bad. If you use the code as a starting point and focus on identifying the root cause, you can avoid one of the most common DIY mistakes: throwing parts at a problem instead of diagnosing it.
Jumping From Code to Cause
At this point, you’ve got the code, but that’s only half the battle. The real value comes from understanding what to do next. That’s where having access to OEM repair information makes a difference.
Tools like ALLDATAdiy take those codes and connect them to factory service data, step-by-step diagnostics, wiring diagrams, and known fixes tied to specific issues. Instead of guessing or relying on scattered advice, you’re following the same information dealerships use to diagnose and repair vehicles.
Because having the code is one thing. Knowing what it means and how to fix it is what gets the job done.
Are You Down With OBD, Ya, You Know Me
At the end of the day, that check engine light isn’t there to ruin your drive; it’s there to give you a starting point. Modern vehicles are constantly monitoring themselves, and when something falls out of line, they tell you. The difference is whether you choose to listen.
Not an ALLDATAdiy customer? Learn how a subscription could help you. ALLDATAdiy provides access to repair information on over 44,000 engine-specific vehicles, find yours. Return to see more DIY Helpful Tips.