

Technician (Limited) View
NOTE - Some features and functions in this article are only accessible at certain Shop Manager subscription levels.
| Feature / Function | Shop Manager Pro | Shop Manager | Estimator |
|---|---|---|---|
Technician (Limited) View |  |  | |
Technician View allows access to Shop Manager Pro features designed for Technicians, while limiting access to other sensitive administrative functions.
Technician View allows access to the following features:
- View basic document information (Vehicle, parts and labor line items, notes)
- Print Tech Worksheet
- Start/stop Technician Time Tracking timer (If Time Tracking is enabled)
- Add Symptoms & DTCs, Notes, and upload image/video.
- Create and manage Inspections
Key features that have been disabled for Technician View:
- Customer Information
- Part and labor pricing and ordering
- Adding/removing/editing line Items (Only Symptoms & DTCs and Notes can be added)
- Calendar
- Work in Progress Board
- Messages
- Shop Jobs
- Orders
- Inventory
- Reports
- Settings
Technician View Setup
A new user must be created with a role of "Technician" by the ALLDATA account administrator.
- Log in to my.alldata.com with a username that has an "Administrator" role.
- Open Shop Manager Pro.
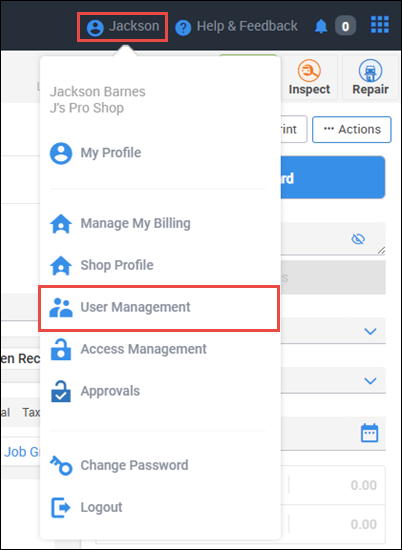
- Click your name in the header menu and select User Management.
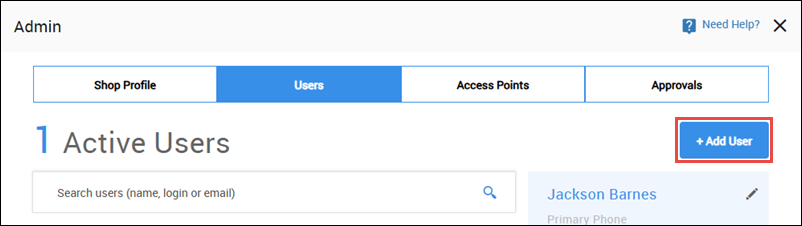
- Click +Add User.
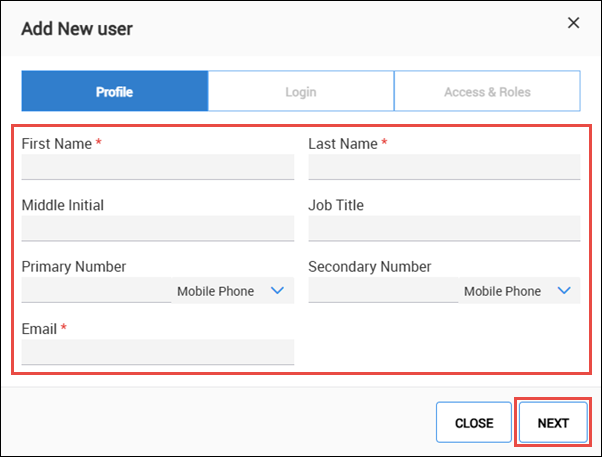
- Complete the user Profile information then click NEXT.
- Enter a Username >> Password >> Confirm Password >> click Next.
- Note: The password requirements listed on the screen will turn green as you are typing your New Password to let you know what requirements you may be missing.
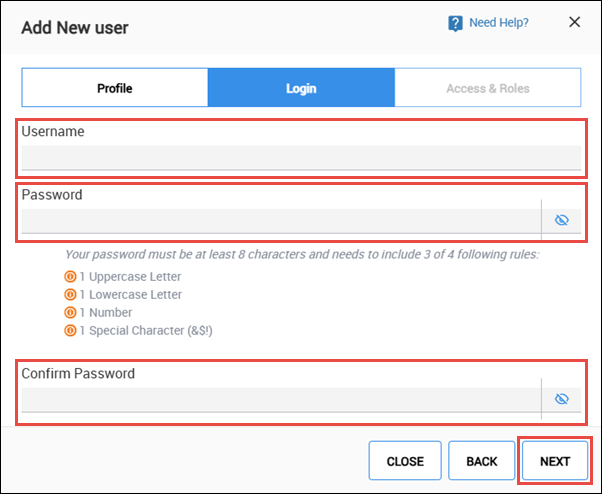
- Note: The password requirements listed on the screen will turn green as you are typing your New Password to let you know what requirements you may be missing.
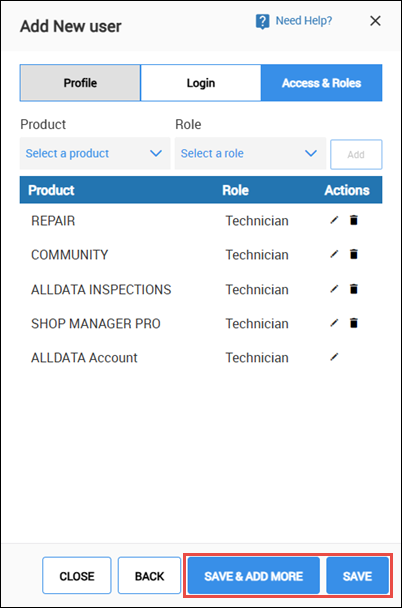
- Click Delete (trash can) to remove access for any of the subscribed products.
- To add a product back to the access list, select a Product >> choose a Role >> click Add.
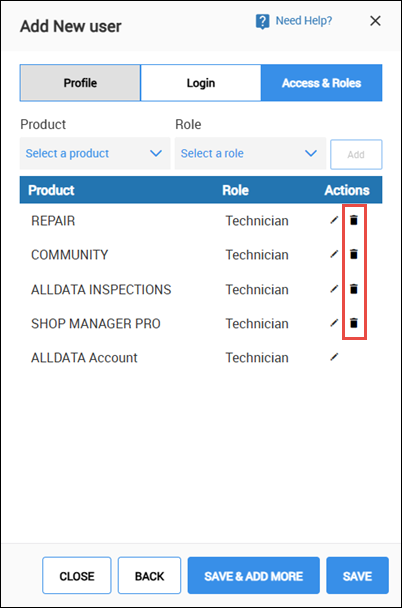
- To add a product back to the access list, select a Product >> choose a Role >> click Add.
- Verify the role of subscribed products are set to Technician and click Edit (pencil) to change the role if necessary.
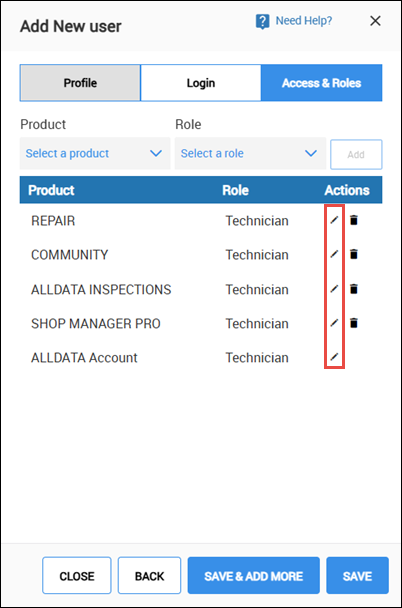
- Click SAVE to finish, or click SAVE & ADD MORE to continue adding users.