Setting Up Vehicle Inspections
IMPORTANT
- A subscription to ALLDATA Inspection is required to use this feature.
- A subscription to ALLDATA Mobile / Diagnostics is required to use the ALLDATA app integration.
Note - Manage Online is now integrated with the new ALLDATA Inspections app. For additional information about how to transition from the existing Manage Online Inspections or add ALLDATA Inspections to your account, please contact your Account Manager directly or call 800-859-3282.
Vehicle Inspections are checklists to share with customers that show the state of visually inspected items.
Making an inspection part of every customer visit will give your customers a quick understanding of the current condition of their vehicle, as well as keep a record in Manage Online of past inspections to be able to better track the vehicle's history.
The checklist may contain items such as:
- Brakes
- Fluids
- Filters
- Tire Tread Depth and Pressure
- Body Panels
- Suspension
- Lights
Creating an Inspection List
Create and customize multiple inspections that highlight as many areas of the vehicle as you choose.
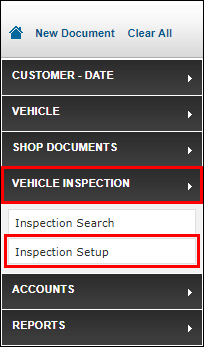
- Click Vehicle Inspection >> Inspection Setup.
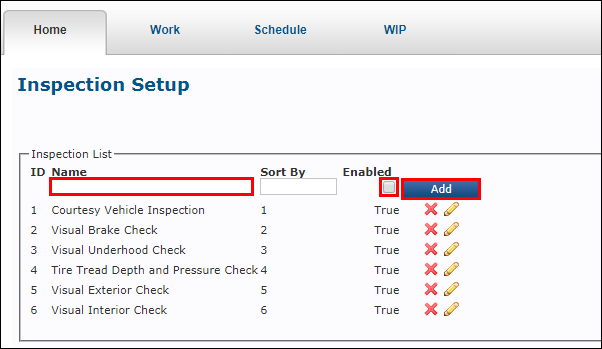
- Create Inspection List Names
- Enter a Name >> check Enabled >> click Add.
- Name: The name of the inspection.
Example: Courtesy Vehicle Health Check - Enabled: Allows the inspection to be added to a symptom and applied to the work document.
- Name: The name of the inspection.
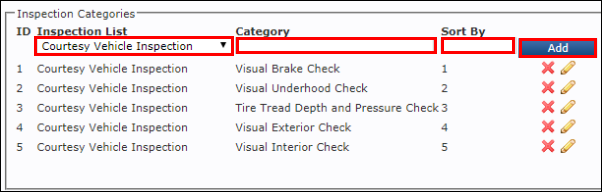
- Create Inspection Categories
- Select an Inspection List >> enter a Category >> Sort By number >> click Add.
- Inspection List: The available lists in which to add categories.
Example: Courtesy Vehicle Health Check - Category: The category that will include sub-items to inspect.
Example: Visual Brake Check - Sort By: This number will force rank the category order.
Example: 1
- Inspection List: The available lists in which to add categories.
- Select an Inspection List >> enter a Category >> Sort By number >> click Add.
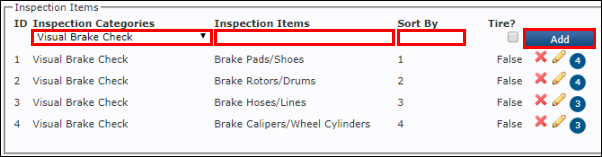
- Create Inspection Items
- Select an Inspection Category >> enter an Inspection Item >> enter a Sort By number >> check the Tire? box (optional) >> click Add.
- Inspection Categories: The category that will include sub-items to inspect.
Example: Visual Brake Check - Inspection Item: The sub-item within the inspection category to inspect.
Example: Brake Pads/Shoes - Sort By: This number will force rank the category order.
Example: 1 Tire?: Check the box if the item being checked is a tire.
- Note: This will add entry boxes on the inspection for the Outer, Middle and Inner Tread Depth.
- Inspection Categories: The category that will include sub-items to inspect.
- Select an Inspection Category >> enter an Inspection Item >> enter a Sort By number >> check the Tire? box (optional) >> click Add.
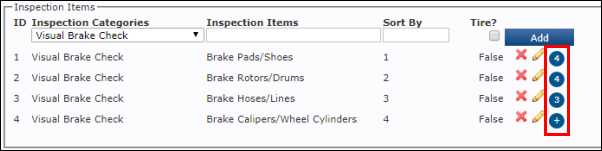
- Add Suggested Jobs to Inspection Items
Click the + icon for an Inspection Item.
- Note: If Suggested Jobs have already been assigned, the + icon will display the number of Suggested Jobs that have been selected.
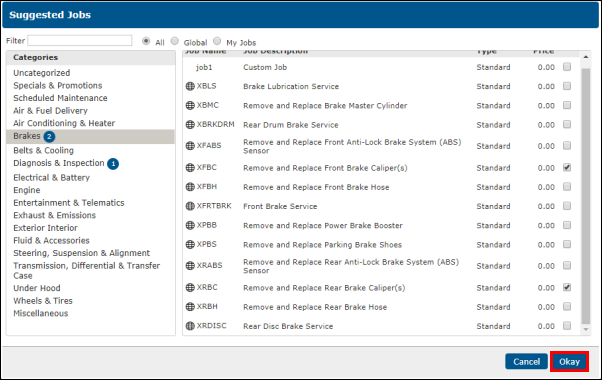
- Select the Custom Jobs that will be suggested when the the item fails inspection >> click Okay.
- Create Inspection Sub Items (optional)
- Select an Inspection Item >> enter an Inspection Sub Item >> check the Value box (optional) >> enter a Unit value (optional) >> enter a Sort By number >> click Add.
- Inspection Item: The specific component to be inspected.
Example: Brake Pads/Shoes - Inspection Sub Items: A further breakdown on the component, such as location of the part or sub-system of the part.
Example: Front - Value: Check the box to activate the Unit field.
- Unit: Enter the value that will appear on the inspection.
Example: 3mm - Sort By: This number will force rank the category order.
Example: 1
- Inspection Item: The specific component to be inspected.
- Select an Inspection Item >> enter an Inspection Sub Item >> check the Value box (optional) >> enter a Unit value (optional) >> enter a Sort By number >> click Add.

- Enter footer text (optional)
- Check your local and state laws for required text.
- This area can be used for your business address, contact information, or a "Thank You" message to your customers.
- Allows 350 characters.
- The footer text will appear at the bottom of each printed page of the inspection.

Assigning an Inspection to a Symptom
Once the inspections are created, assign them to symptoms.
- Reason: When a symptom is added to a work document, the associated inspection list will become available to fill out.
To assign an Inspection to a Symptom:
- Click Setup >> Code >> Symptoms.
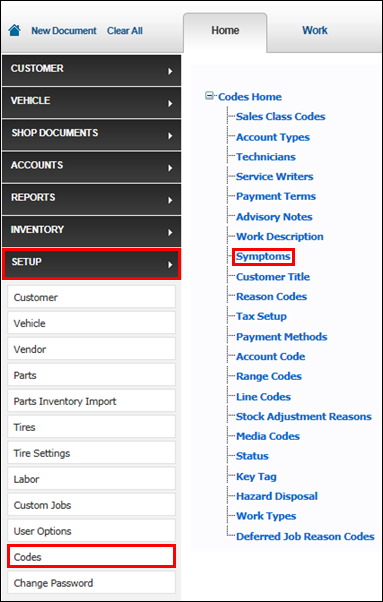
- Click Edit (pencil icon) on the system you want to link to an inspection list. >> select a Linked Inspection >> click Update.
- See Code Settings - Symptoms for additional information about adding symptom.
Adding and Updating Inspection Reason Codes
Create reason codes that allow you to quickly select common reasons for component failure. (Example: Part Damaged)
- See Code Settings - Inspection Reason Codes.
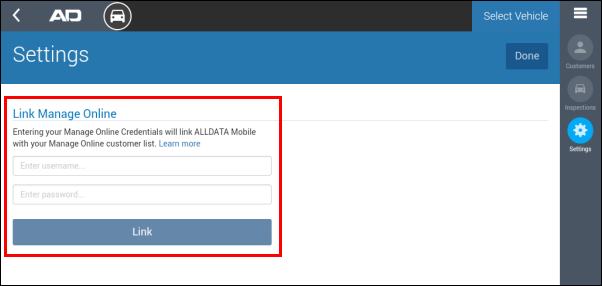
Linking your Manage Online Account (ALLDATA App Integration)
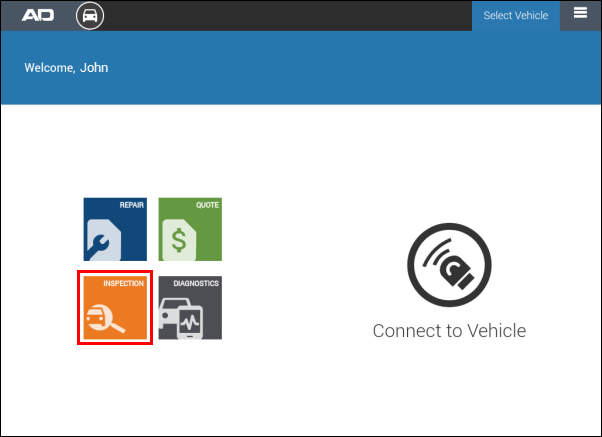
- Open the ALLDATA app.

Select Inspection.
- When opening Inspection for the first time, the Link Manage Online screen will display.
- Fill in your Manage Online username and password >> tap Link.