Register Your Twilio Number (A2P 10DLC registration)
IMPORTANT
- Due to text messaging carrier regulation changes, all phone numbers used to send text messages from an application to a person (A2P) must be registered or texts will be blocked.
- A Twilio account is required to send texts from MANAGE Online. Learn how to enable Twilio messaging.
- A one time fee and monthly ongoing fees will be charged for registration with the carriers. Fees vary by use case.
- The registration process for toll-free numbers is currently administered by Twilio support. Learn more about Twilio's toll- free number registration process.
The instructions below outline the registration process for 10DLC (10 digit long code - 'local numbers') from within the Twilio console.
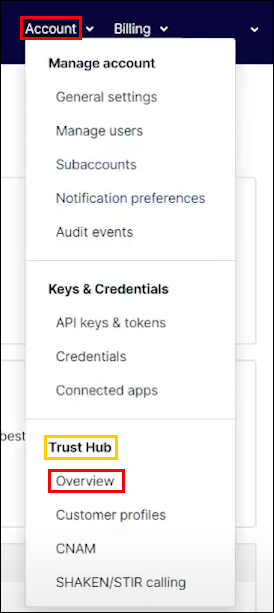
- Log in to your Twilio Account .
- Click Account >> Trusthub >> Overview.
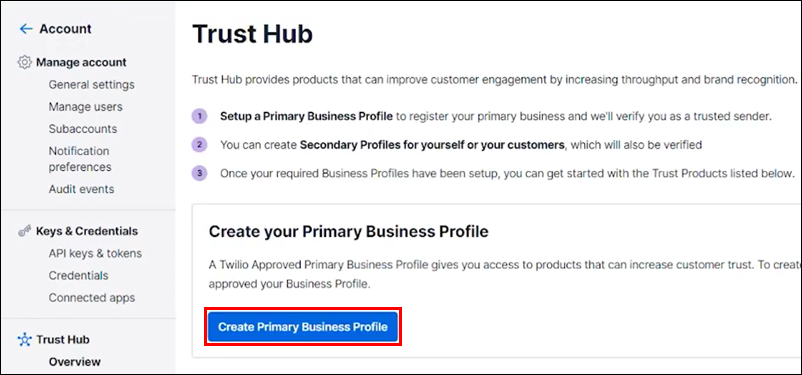
Create your Business Profile
- Click Create Primary Business Profile.
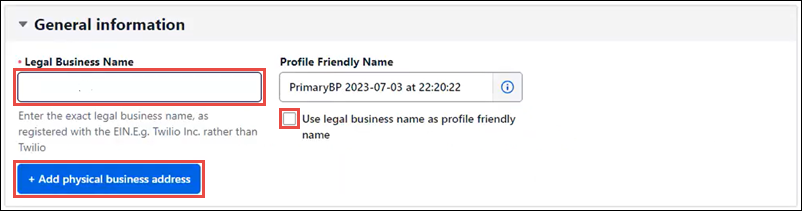
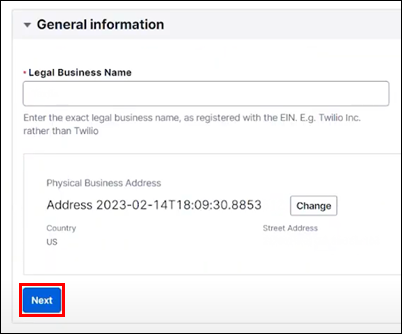
General information
- Enter your Legal Business Name >> check Use legal business name as profile friendly name >> click + Add physical business address.
Complete the Physical Business Address page:
- Click Select from saved address.
- Select your address from the list.
- Click Save.
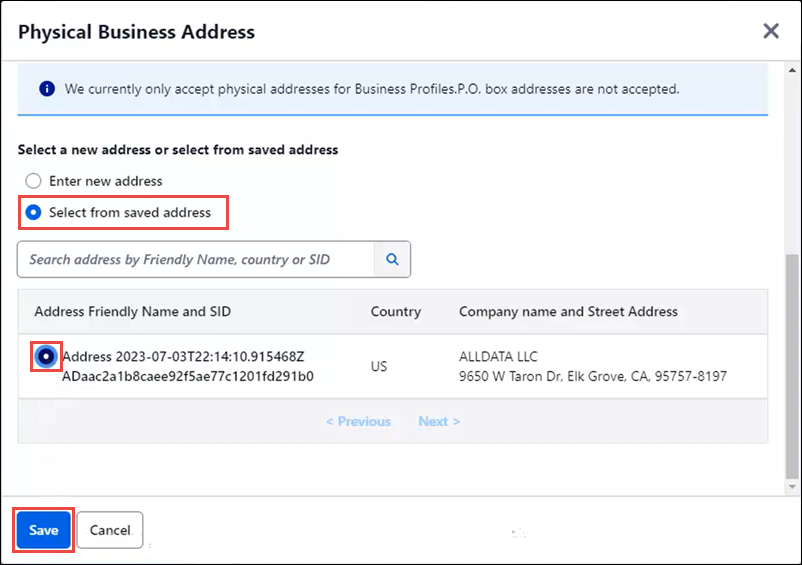
- Click Next.
- Enter your Legal Business Name >> check Use legal business name as profile friendly name >> click + Add physical business address.
Business Information
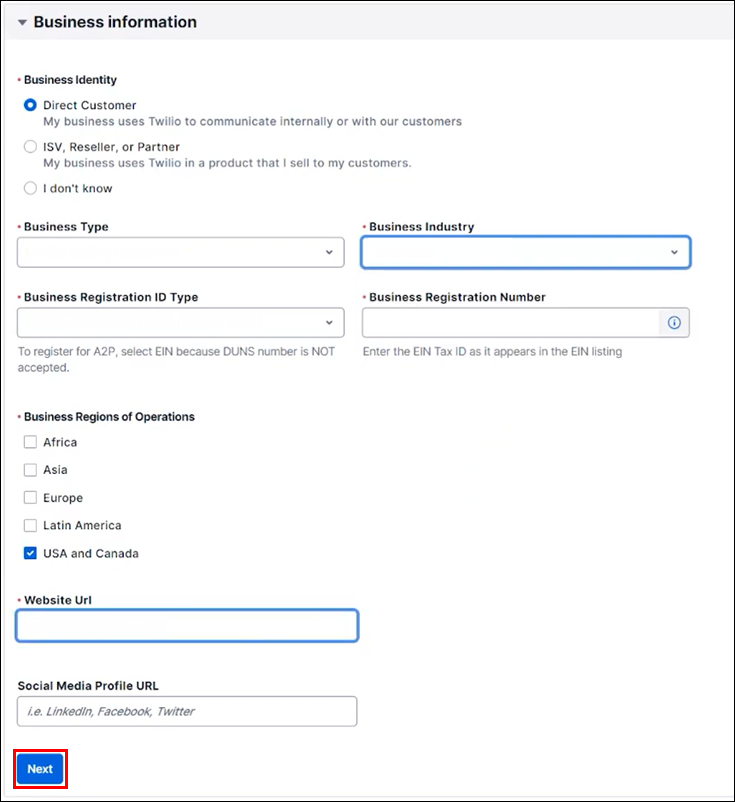
- Select Direct Customer as your Business Identity.
- Choose the Business Type that your company operates as.
- Complete the remaining fields in the Business information tab that are applicable to your Business Type.
People to Contact
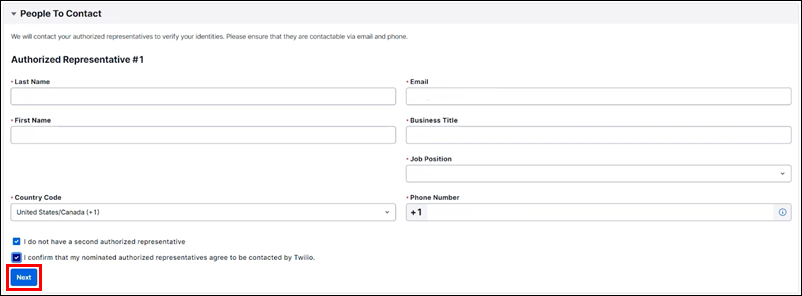
- Enter the information of authorized representatives for you company then click Next.
- This information will be used to verify your identity.
- Enter the information of authorized representatives for you company then click Next.
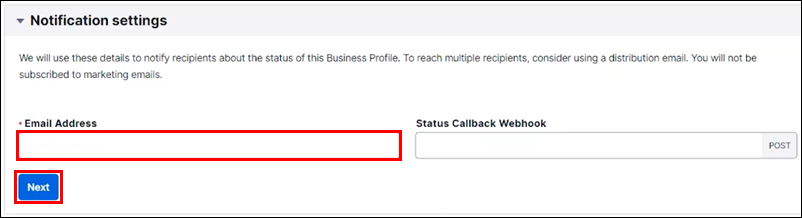
Notification settings
- Enter an Email Address for updates about your registration then click Next.
- Enter an Email Address for updates about your registration then click Next.
Terms of Service and Privacy Policy
- Click the checkbox to choose to agree.
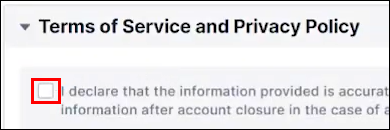
- Click the checkbox to choose to agree.
- Click Submit for review.

- Click Create Primary Business Profile.
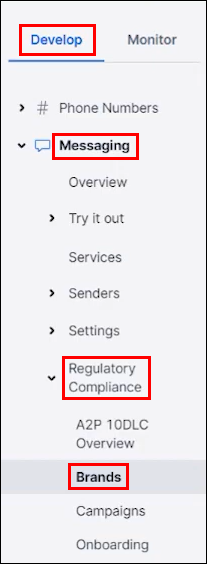
Register A Brand
- In the left menu navigate to Develop >> Messaging >> Regulatory Compliance >> Brands.
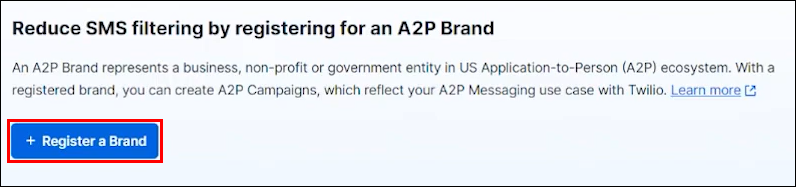
- Click +Register a Brand.
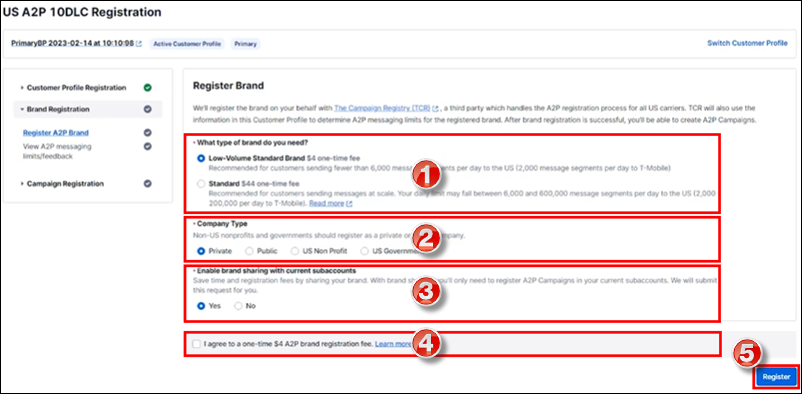
- Complete the Register a Brand page.
- Select a brand type.
- Notes:
- Most MANAGE Online users will fall under the Low Volume Standard Brand
- A one time registration fee associated with your registration type will be listed here
- Notes:
- Select the type of company your business operates as.
- Choose to enable brand sharing with subaccounts.
- Note: This is only relevant for larger companies with multiple Twilio accounts. This will not be applicable to the majority of MANAGE Online users.
- Check the box to agree to the one-time fee.
- Click Register.
- Select a brand type.
- In the left menu navigate to Develop >> Messaging >> Regulatory Compliance >> Brands.
Register A Campaign
- Complete the campaign registration page
- Available A2P Campaign use cases - Typical MANAGE Online use case will fall under the Low Volume Mixed option.

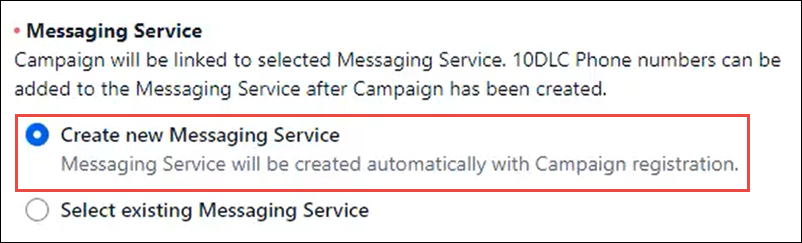
- Messaging Service - Select Create new messaging service.
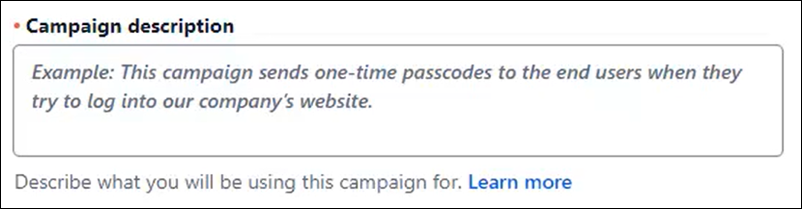
Campaign description
- Example: "Shop will send updates to customers related to the repair of their vehicle. Messages may have embedded links"
Sample message #1 & #2
- Examples:
- Just a reminder that you have an appointment booked for your [MAKE] [MODEL] on [DIARYJOBDATE] at [DIARYJOBTIME]
- Dear [TITLE] [LASTNAME], your [MAKE] [MODEL] is ready to collect. Total Bill $ [VALUE]
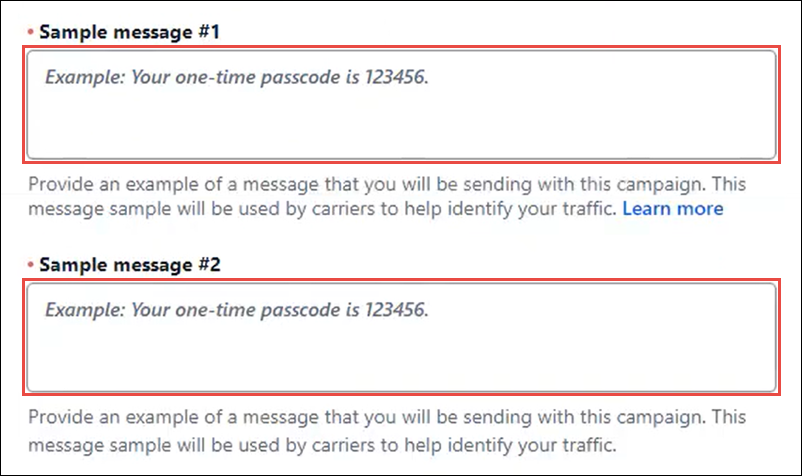
- Examples:
- Message contents - Check both boxes in order to add your shop's phone number to your texts and send repair order authorizations from MANAGE Online.

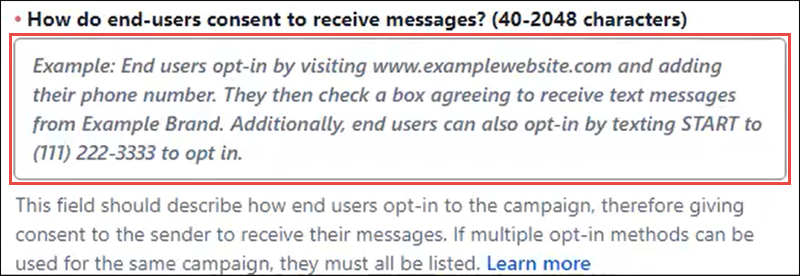
How do end users consent to receive messages?
- Example: “Cell phone number is collected from customer when vehicle is brought in for service.”
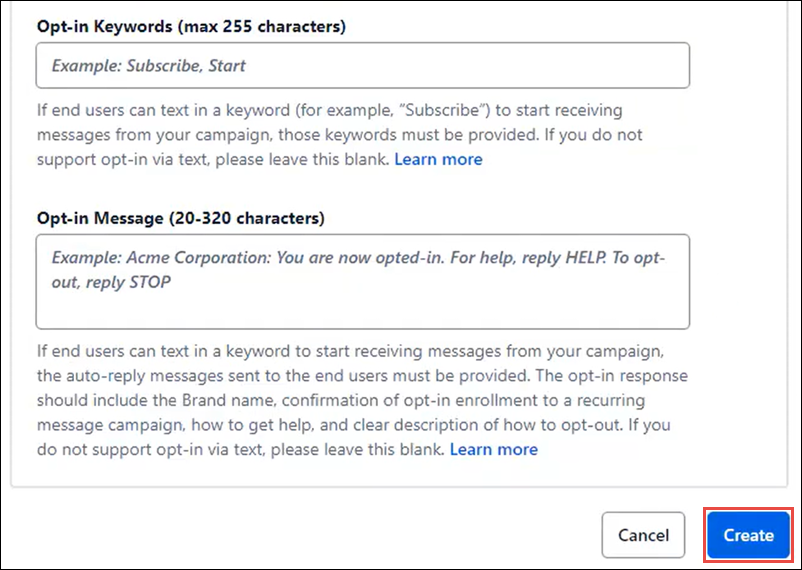
- Opt-in Keywords - Not Required
- Opt-in Message - Not Required
- Click Create.
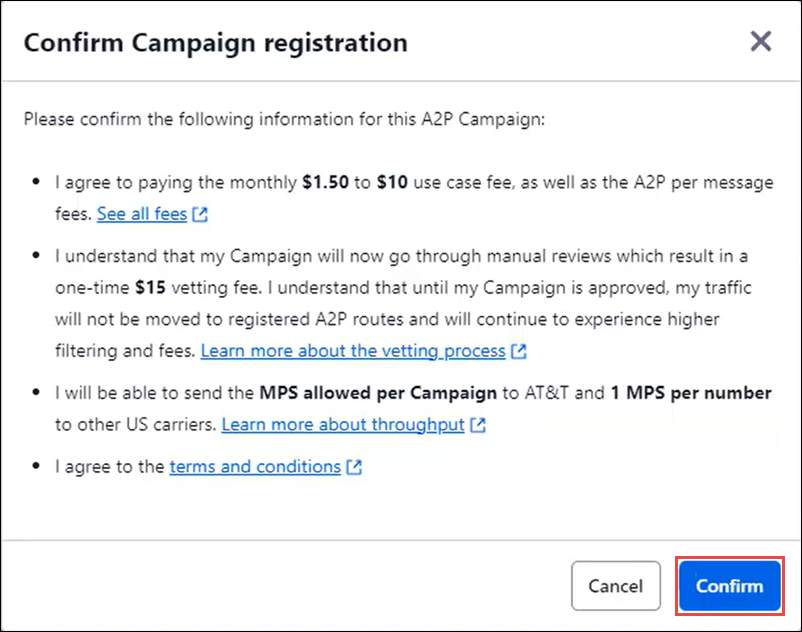
- Review the provided information and both one-time and monthly fees associated with registration >> click Confirm.
- Available A2P Campaign use cases - Typical MANAGE Online use case will fall under the Low Volume Mixed option.
- Click Continue.

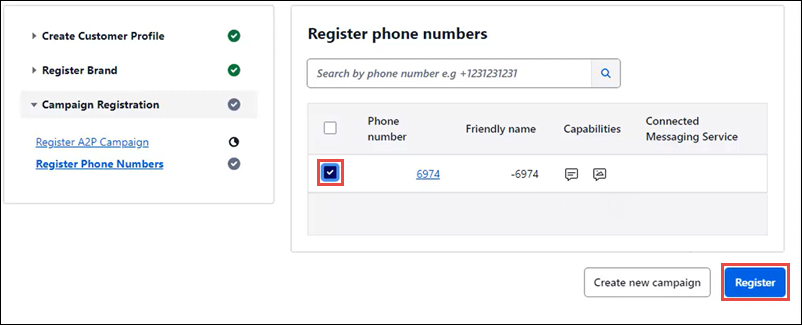
- Check the box next to the phone numbers you want to register >> click Register.
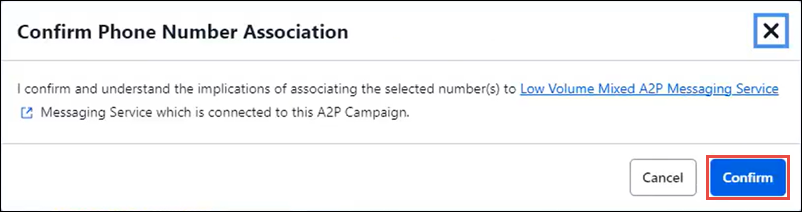
- Review the provided information >> click Confirm.
- Complete the campaign registration page