
Battery Health Care Made (Somewhat) Simple
At ALLDATA’s Tech-Assist center, hardly a day goes by that we don’t hear about a slew of automotive problems caused by low system voltage.
It is extremely important that the battery be tested every time a vehicle comes into your shop. To not do so is to risk a dissatisfied customer and, potentially, vehicle damage.
There are multiple ways to test a battery. Some work well, some only get part of the job done, and some can mislead a technician. In this article we will look at some different methods and their advantages and disadvantages.
I cannot stress enough the importance of determining early in the diagnostic process the health of the battery and the battery connections
Battery types
While there are several battery construction methods, lead-acid “wet-cell” and absorbed glass mat (AGM) batteries are the two most commonly used in automotive applications. Lead-acid has been around since 1859 and is the most popular. AGM has been in automotive use since the 1980s and is growing in popularity, especially for “start-stop” vehicles since the AGM battery will bounce back to full potential quicker than lead-acid batteries. AGM batteries are also superior when installed in vehicles that are exposed to heavy vibration or extreme cold.
Lead-acid can leak and must remain upright. AGM batteries are non-spillable and can be mounted in any position. All batteries should be securely mounted in the proper location for both safety and for longer battery life.
Charging a lead-acid battery should be done with training and a good battery charger with microprocessor control of the charging process. Cheap chargers can do more harm than good.
Charging an AGM battery is more complex than charging a lead-acid battery. If the AGM battery is more than 50 percent discharged, special procedures are involved. In all cases, AGM batteries prefer slow charging at voltages below 14.0 volts. Using a charger with an AGM setting is your best bet.
Don’t be in a hurry to bring any battery back to a full charge; be especially careful charging an AGM battery. For the safety of the vehicle electronics, disconnect the battery from the vehicle and remove it from the vehicle to dissipate heat build-up in the battery.
Further concerns regarding lead-acid battery
Due to the sulfuric acid in the electrolyte, the lead-acid battery is prone to sulfur coating the lead plates inside the battery case. We call this process “sulfation.” 80 percent of battery failures are related to sulfation.
The cause of this harmful sulfation can be traced to:
- Batteries stored for as little as a few days with less than a full charge
- Running a conventional lead-acid battery down to a low charge state (deep-cycling)
- Temperatures more than 100°F/38°C
- Parasitic loads beyond the manufacturer’s limits (usually over 50 milliamps)
- Undercharging by the vehicle’s charging system
- Overcharging by the vehicle’s charging system or by using poor quality battery chargers
 Caveats
The best battery in the world won’t work well if the connections are poor or the cables have internal corrosion. Battery terminal ends must have a solid connection to the posts and to the wires. Acid leaking from the battery case can travel inside the cable insulation through capillary action. The wire may look good on the outside but may have deep corrosion inside the insulation.
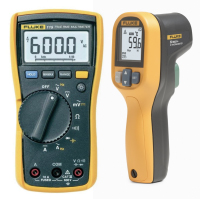 Voltage drop testing with a Digital Volt Ohm Meter (DVOM) and loaded wire testing will reveal poor connections or damaged wire (see WHAT’S LOAD GOT TO DO WITH IT? article). If the circuit in question is carrying more than 20 amps, a poor connection will produce measurable heat when the circuit is activated. A careful touch test, or an infrared thermometer, will point out such bad connections.
Jump starting: use extreme caution
Be aware that the modern vehicle’s charging system is NOT designed to charge a deeply discharged battery. Jump-starting a dead vehicle and letting the alternator charge the battery will damage the vehicle charging system and the battery. Instead, remove the discharged battery and charge with a quality battery charger that performs a three-step charging process: initial high-rate charging, absorption charging at a declining rate, and finally, float charging at less than 1 AMP.
Jump starting also carries a risk of voltage spikes and reverse-polarity hookups. If a donor-vehicle is used, it too may be damaged.
Testers and testing methods
 AC conductance/capacitive reactance testers have become popular. Small, light, inexpensive, and cool-running, they have garnered a following. Their primary disadvantage is that they don’t load the battery the way the starter motor does and because of this factor they don’t always identify a marginal battery.
They do measure battery capacitive reactance which will often point out the deterioration of a battery earlier than traditional methods. Because they don’t pull significant amps out of the battery the test can be repeated if needed and there is no need to recharge the battery after testing. Some capacitance testers also measure starter current draw and charging system output once you have started the engine.
Geek alert: Instead of a DC load, the instrument injects an AC signal into the battery. A frequency of between 80-100 Hz is chosen to minimize the reactance. Analysis of the reaction to the frequency injection gauges the condition of the battery.- DC Load Testing is an old and reliable battery test that dates to the Model T. The tester applies a load of half the battery’s cold cranking amp (CCA) rating for 15 seconds. If the battery voltage remains above 10 volts, the battery is thought to be “GOOD.” The load simulates the current flow through the starter motor, which is the highest current draw the battery experiences on a typical car or truck.
The problem is that unless the battery is above 12.5V, the DC load test is invalid. And the tester is heavy, large, and can get very hot, posing a safety risk. Because load testing pulls quite a few amps from the battery, you should recharge the battery after the testing is completed.
These first two testing methods have their pluses and their minuses (intentional battery humor), but they don’t determine the full condition of the battery.
There is, however, another way to test a battery that produces a comprehensive health report.  Comprehensive Battery Test is an alternative method that quickly and effectively determines battery condition that I teach in college automotive programs. It’s (almost) as easy as A-B-C. It does require one additional piece of equipment: an inductive current clamp meter.
- Measure battery open circuit voltage (OCV)
First, you will want to let the battery cool to between 50°F and 95°F/10°C and 35°C and allow it to remain in that temperature range for an hour.
Grab your DVOM and measure the OCV across the posts. A fully charged battery should measure 12.66 volts. If the voltage is below that figure, slow charge the battery until OCV measures 12.66 volts.
If the voltage is higher than 12.66 but less than 12.8 volts, you’re seeing normal surface charge. Are you measuring over 12.8 volts? That battery is low on distilled water and should be filled if possible. - Cranking voltage test
Disable the fuel system. Leave the DVOM test leads connected to the battery posts and crank the engine three times and record the average of the three voltage readings. If battery cranking voltage is more than 10.0 volts, the battery can stay in service. If the average cranking voltage is below 10.0 volts, the battery is at the end of its lifespan. Replace it. - Recharge current test
Connect an inductive current clamp meter to the battery negative cable. Take care to ensure that all the battery cables are inside the current clamp. Restore the fuel system operation, start the engine, and measure battery recharge current once the engine reaches idle speed. The charging current should decrease to below 10 amps within 5 minutes after the engine reaches idle speed. A slightly discharged battery may take more than 5 minutes, but the charging amps should decrease. A battery that continues to draw over 20 amps is a candidate for replacement. And it will shorten the life of the charging system.
- Measure battery open circuit voltage (OCV)
If the battery passes this three-step test you can return it to service, confident that it is up to the task.
Final thoughts
I cannot stress enough the importance of determining early in the diagnostic process the health of the battery and the battery connections. I’ve witnessed too many vehicle problems that were solved by replacing the battery, cleaning the connections, and repairing battery cable corrosion damage. I am confident that if you employ the inspections listed here, you will fix more vehicles more effectively.
Happy testing!
Want to see how ALLDATA can improve shop efficiency? Check out our suite of products, each designed to contribute to both shop efficiency and productivity.
If you would like to read more articles like this one please subscribe to ALLDATA News.