Completing an Inspection
- Create a New Document and add your customer and vehicle information.
- Click Add Inspection.

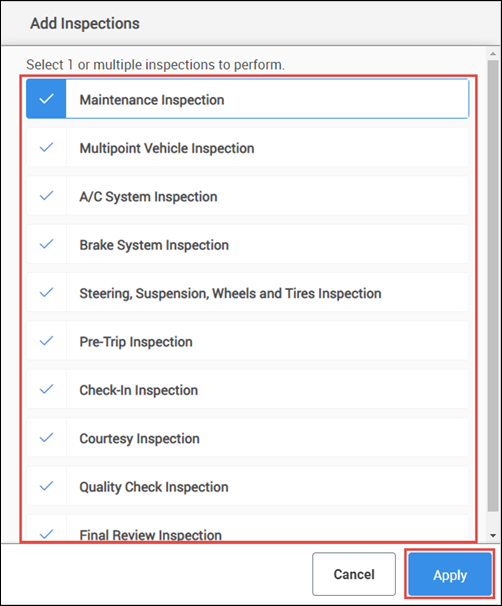
- Select one or multiple inspections then click Apply.
- Click the dropdown icon to expand the Inspection you would like to perform.

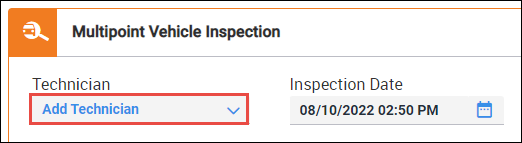
- Select a Technician or type a new technician's name.
Perform the inspection:
Basic Inspection Sections
Red/Yellow/Green Lines
Mark each inspection line item as one of the following:
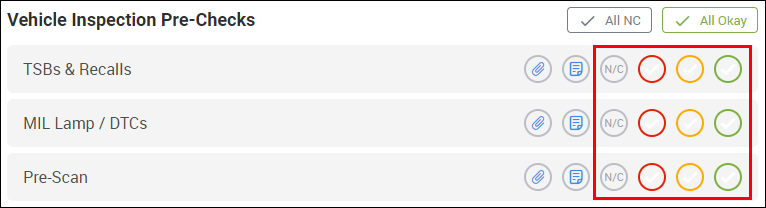
- Red - Service Now
- Yellow - Service Soon
- Green - Okay
- N/C - Not Checked
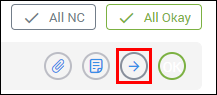
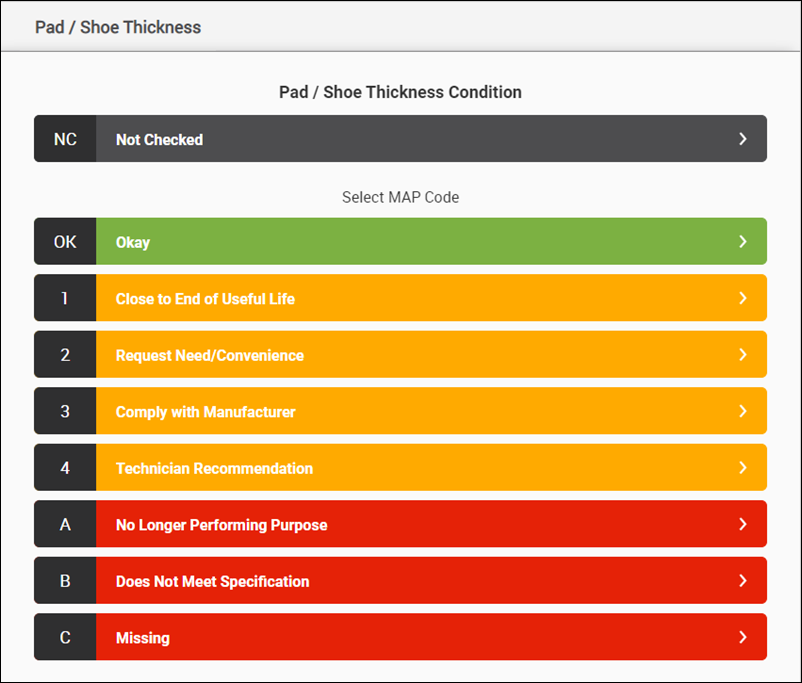
- Note: If MAP Conditions have been enabled in the Settings >> Inspections, the red and yellow options will be replaced with an arrow button that will allow you to select additional sub options.
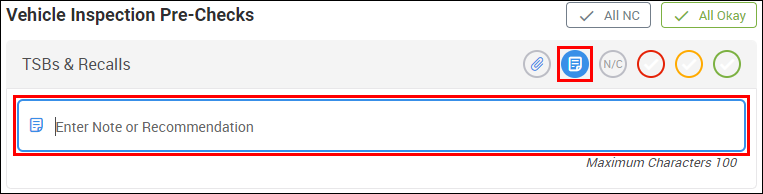
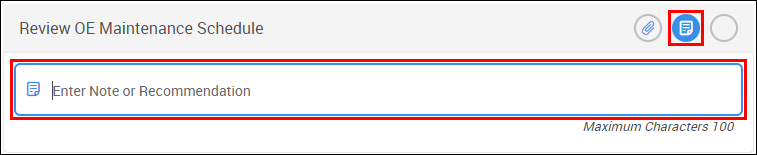
- (Optional) In addition to selecting a status, you can add the following:
- Note - Click the note icon and enter a note or recommendation.
Image/Video - Click the attach icon >> click ADD MEDIA then follow the on screen prompts to attach an image or video.
- File Compatibility
- Images - Maximum size: 25MB - Format: JPG, JPEG, GIF, PNG, APNG, HEIC - Limit: 3 Images per line
- Video - Maximum size: 200MB - Format: MP4, MOV, AVI, MPEG, MKV, WEBM - Limit: 1 Video per line
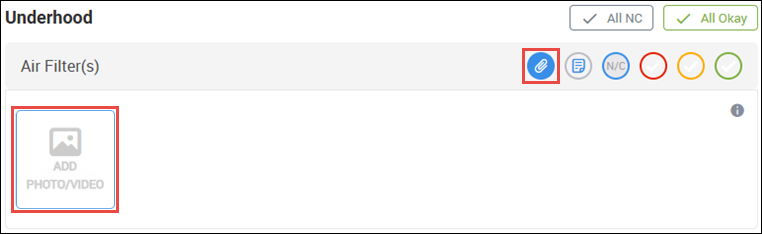
- File Compatibility
- Note - Click the note icon and enter a note or recommendation.
Item Inspected (Single Check Mark) Lines
- Check the empty bubble if this item was completed/inspected.

- (Optional) In addition to selecting a status, you can add the following:
- Note - Click the note icon and enter a note or recommendation.
Image/Video - Click the attach icon >> click ADD MEDIA then follow the on screen prompts to attach an image or video.
- File Compatibility
- Images - Maximum size: 25MB - Format: JPG, JPEG, GIF, PNG, APNG, HEIC - Limit: 3 Images per line
- Video - Maximum size: 200MB - Format: MP4, MOV, AVI, MPEG, MKV, WEBM - Limit: 1 Video per line
- File Compatibility
- Note - Click the note icon and enter a note or recommendation.
Yes/No Toggles
Choose whether an item is applicable to the inspection.
- Note: Additional options may appear depending upon what is selected.

Specialized Inspection Sections
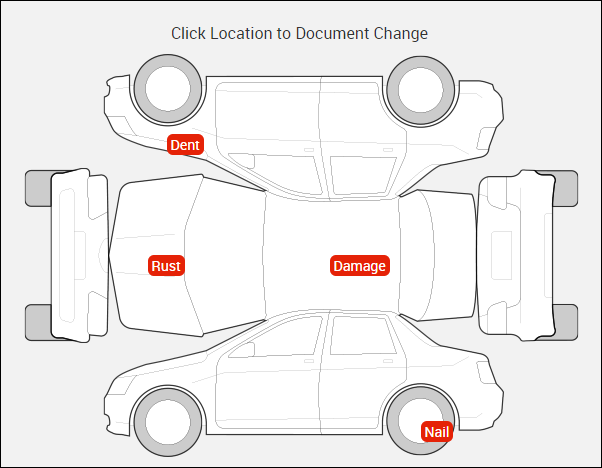
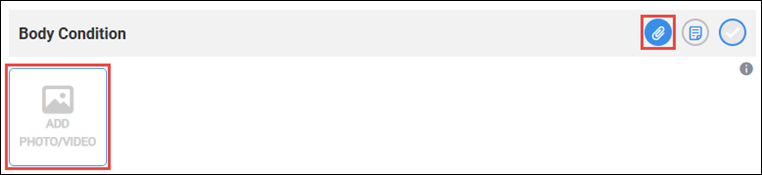
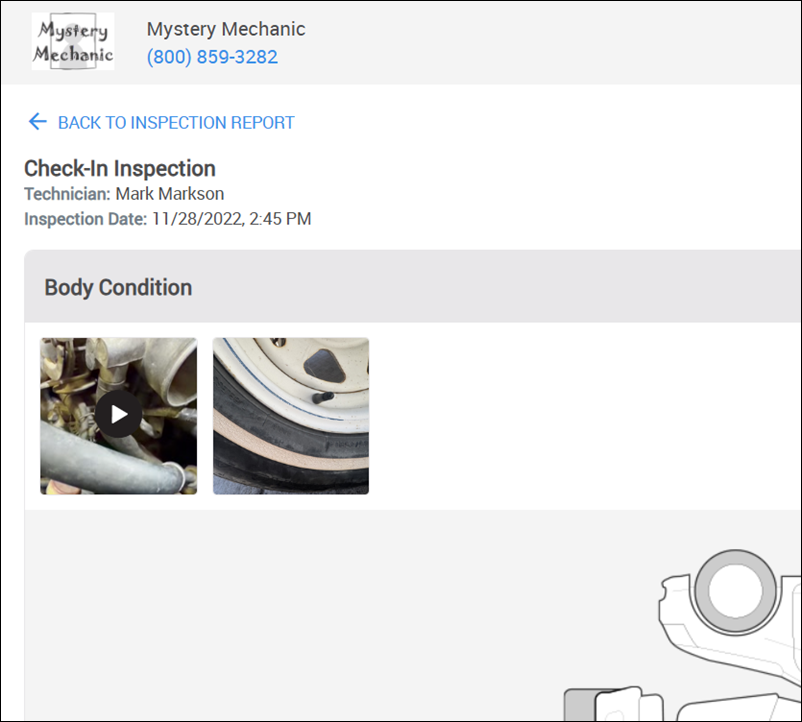
Body Condition
Note existing damage in the Body Condition section:
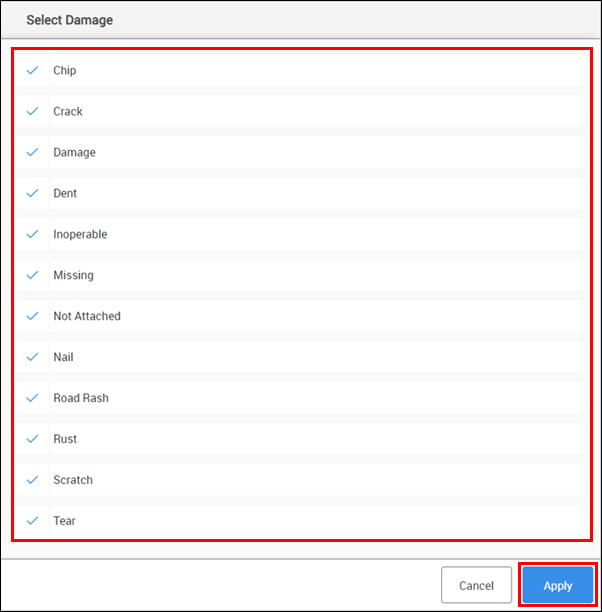
- Click a location on the vehicle diagram to mark.
- Select a damage type >> click Apply.
- (Optional) In addition to adding body conditions, you can add the following:
- Note - Click the note icon and enter a note or recommendation.

Image/Video - Click the attach icon >> click ADD MEDIA then follow the on screen prompts to attach an image or video.
- File Compatibility - (Increased file limit for this special line item)
- Images - Maximum size: 25MB - Format: JPG, JPEG, GIF, PNG, APNG, HEIC - Limit: 15 Images
- Video - Maximum size: 200MB - Format: MP4, MOV, AVI, MPEG, MKV, WEBM - Limit: 2 Videos
- File Compatibility - (Increased file limit for this special line item)
- Note - Click the note icon and enter a note or recommendation.
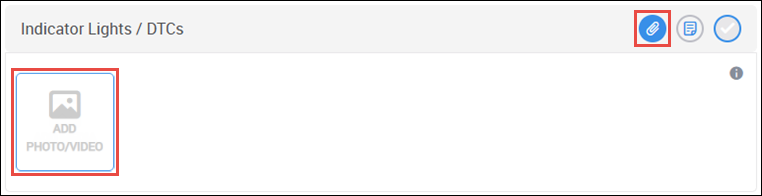
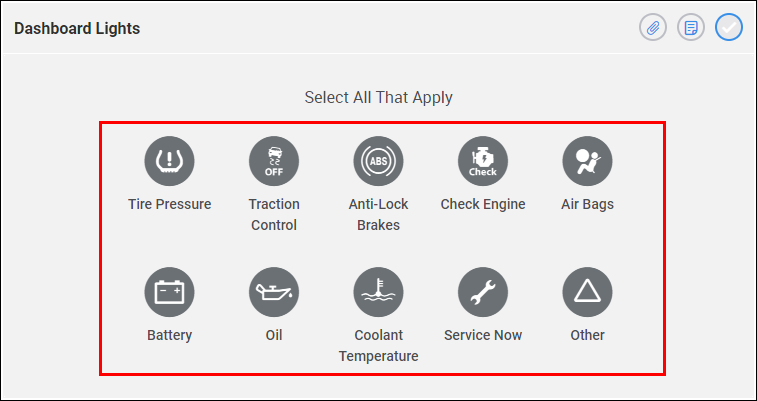
Dashboard Lights
- Select any malfunction indicators that are lit in the Dashboard Lights section. Note: Select Other and then click the note icon to enter additional details about other indicator lights.
- (Optional) In addition to adding dashboard indicators, you can add the following:
- Note - Click the note icon and enter a note or recommendation.

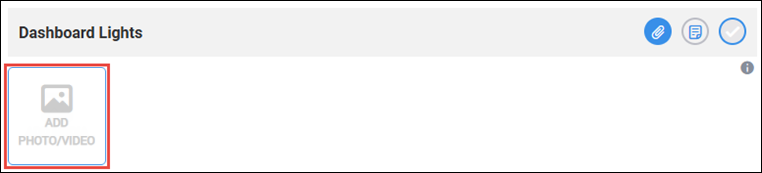
Image/Video - Click the attach icon >> click ADD MEDIA then follow the on screen prompts to attach an image or video.
- File Compatibility
- Images - Maximum size: 25MB - Format: JPG, JPEG, GIF, PNG, APNG, HEIC - Limit: 3 Images per line
- Video - Maximum size: 200MB - Format: MP4, MOV, AVI, MPEG, MKV, WEBM - Limit: 1 Video per line
- File Compatibility
- Note - Click the note icon and enter a note or recommendation.
DOT Tire Identification Numbers
Enter the DOT Identification numbers

Oil Quality
Select one of the quality options.

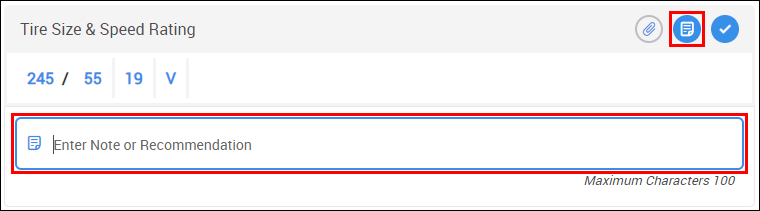
Tire Size & Speed Rating
- Click the arrow icon.

- Select a tire Tire Width from the menu and click Next.
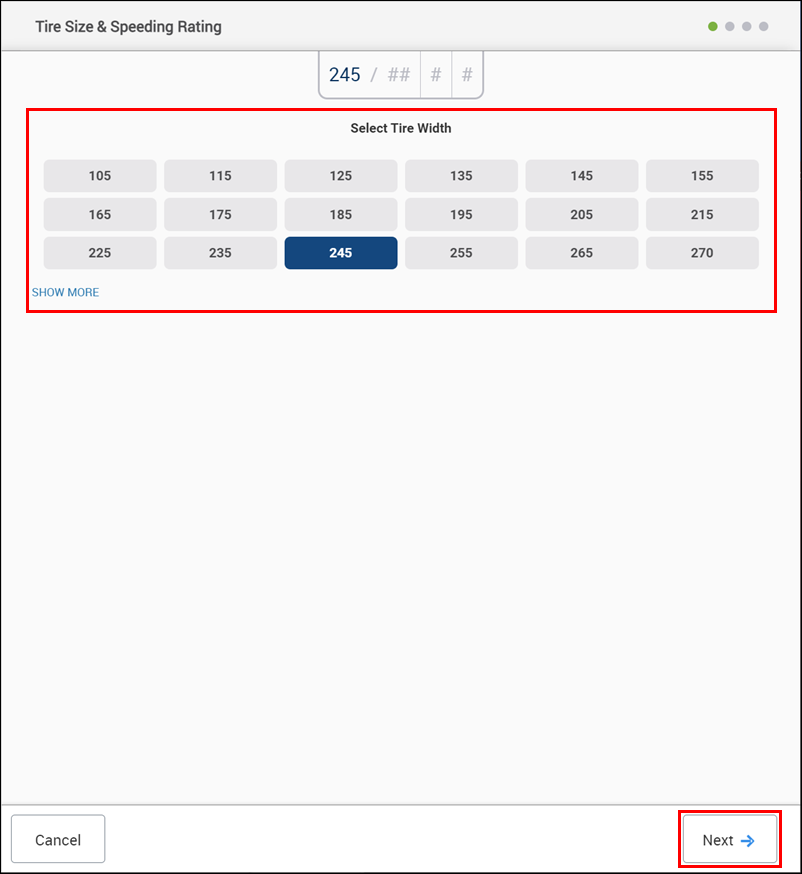
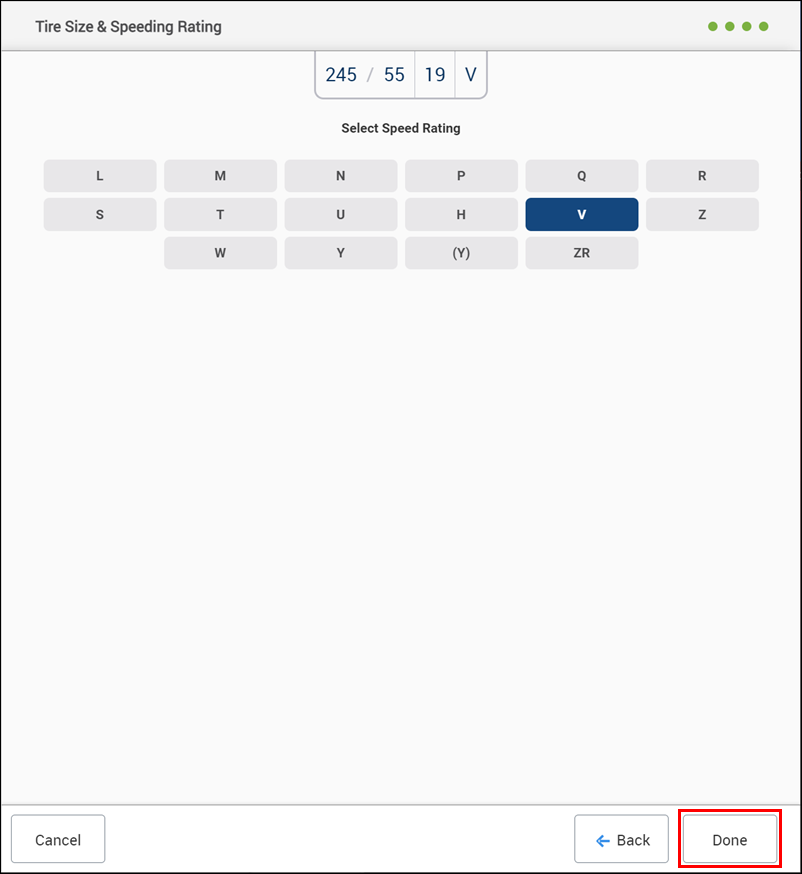
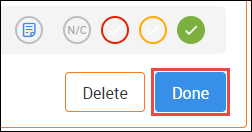
Continue selecting tire specifications and clicking next until all details have been entered >> select Done.
- Width
- Ratio
- Diameter
- Speed Rating
- (Optional) In addition to adding tire size, you can add the following:
- Note - Click the note icon and enter a note or recommendation.
Image/Video - Click the attach icon >> click ADD MEDIA then follow the on screen prompts to attach an image or video.
- File Compatibility
- Images - Maximum size: 25MB - Format: JPG, JPEG, GIF, PNG, APNG, HEIC - Limit: 3 Images per line
- Video - Maximum size: 200MB - Format: MP4, MOV, AVI, MPEG, MKV, WEBM - Limit: 1 Video per line
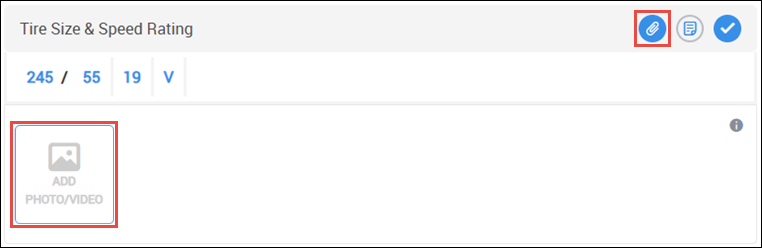
- File Compatibility
- Note - Click the note icon and enter a note or recommendation.
- Select Done.
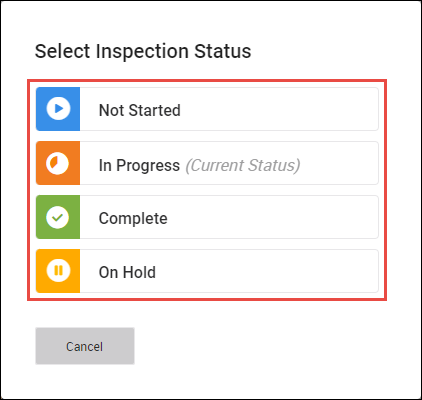
- Select an Inspection Status.
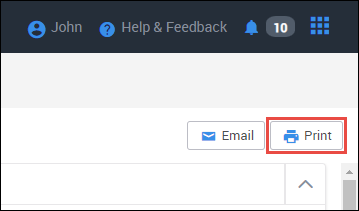
- Print or Email the Inspections.
- Print
Select the Print button.
- A PDF document will display.
Select the print option in the PDF viewer.
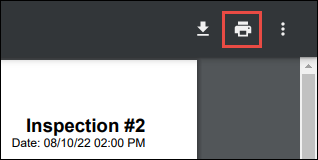
- Note: This step may vary based on the browser and settings you are using.
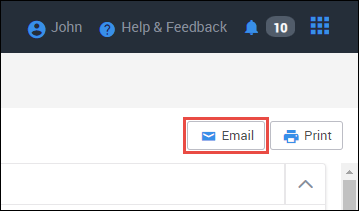
- Email
- Select the Email button.
Fill in the Send To field >> Make any additional changes to the Subject, Message and Signature sections of the email as required, then click Send.
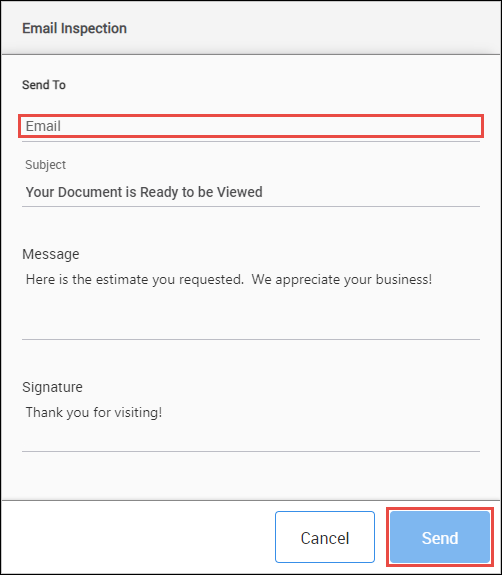
- Notes:
- Subject, Message and Signature can be set up with a default message that will automatically appear on this screen each time you send an email. Go to Settings >> Printing and Emailing to create your default messages.
- A link to an interactive web portal will be included when emailing Inspections.
- Customers can access their Inspection document and view all uploaded media, including video content.
- Customers can access their Inspection document and view all uploaded media, including video content.
- Notes:
- Select the Email button.
- Print