Using Vehicle Inspection Lists
IMPORTANT
- A subscription to ALLDATA Inspection is required to use this feature.
- A subscription to ALLDATA Mobile / Diagnostics is required to use the ALLDATA app integration.
Note - Manage Online is now integrated with the new ALLDATA Inspections app. For additional information about how to transition from the existing Manage Online Inspections or add ALLDATA Inspections to your account, please contact your Account Manager directly or call 800-859-3282.
Vehicle inspection lists are used to give customers a record of items that were visually inspected.
Within Manage Online
Assigning an Inspection List to a Work Document
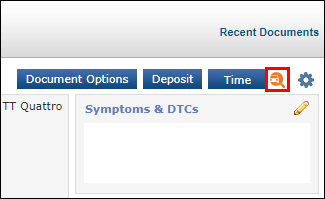
- From the work document, click the Inspection icon.
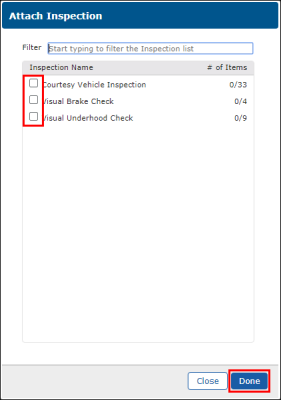
- Select an inspection list to attach >> click Done.
Entering Data into an Inspection List
- Click the Inspection icon.

- The inspection list assigned to the document will open.
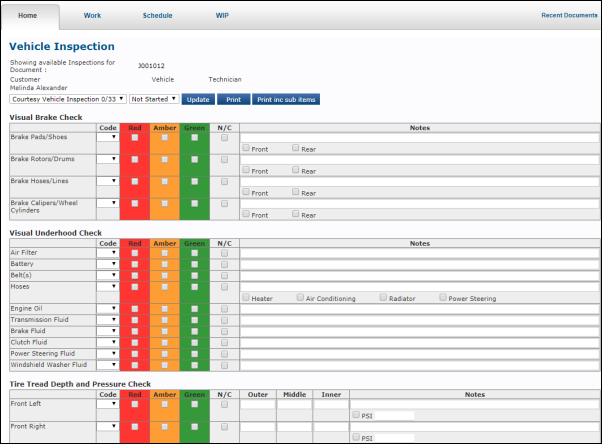
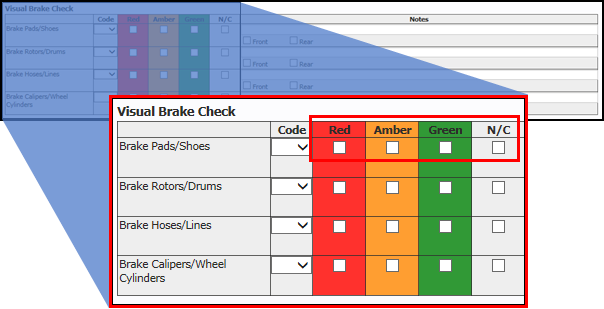
- Check the box that best represents the visual condition of each component inspected.
- Notes:
- Select a Code to further identify the selection.
To learn more, see Code Settings - Inspection Reason Codes. - If the component was not inspected, check the N/C (Not Checked) box.
- Select a Code to further identify the selection.
- Notes:
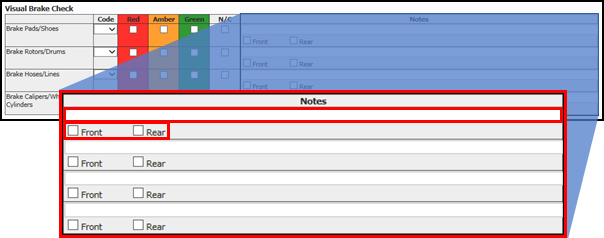
- Add any Notes and check any sub-item boxes that were inspected (optional).
- Note: Adding additional notes and checking sub-items boxes provides specific detail to visual inspections.
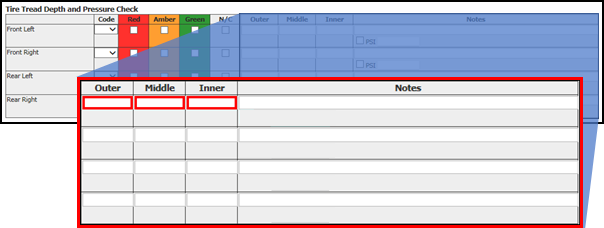
- If the Tire? option has been selected, enter the Outer, Middle and Inner tire measurements in millimeters and enter any Notes (optional) .
- Click Update.

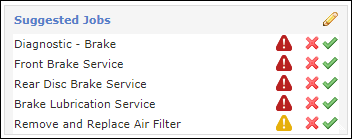
Checking an inspection as red or amber will display a list of any associated suggested jobs on the work screen.
- Note: This will include an option for a generic job with no line items in order to easily identify and track jobs converted from failed inspection items.
Searching for and Printing an Inspection List
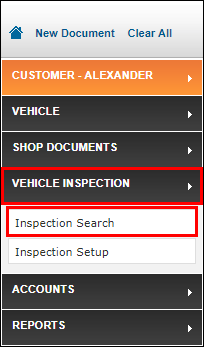
- Click Inspection >> Inspection Search.
- To better filter results, enter as much information as available >> click Search.
- Notes:
- Open inspection lists are assigned to work documents that have not been invoiced.
- Complete inspections are assigned to work documents that have been invoiced.

- Results are displayed.
- Click the magnifying glass under View to open a PDF of the basic Inspection list and notes, not including the sub items.
- To print: Depending on your browser, use the available PDF print options.
- Click the green check mark under Select to open the inspection. To print the complete inspection list, including the sub items and notes.
- To print:
- Print: Prints the inspection list with any notes, not including sub items.
- Print inc sub items: Prints the complete inspection list including notes and sub items.
- To print:
- Click the magnifying glass under View to open a PDF of the basic Inspection list and notes, not including the sub items.

Within the ALLDATA app
Start an Inspection using one of the following methods:
Add a New Customer
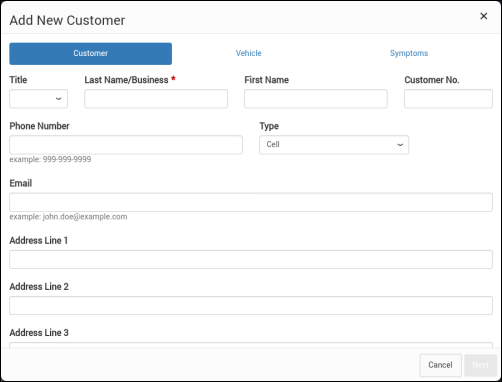
From the Customers screen, tap +New Customer then complete the following sections:
Customer
Fill in a Last Name/Business and as much additional information as possible >> tap Next.
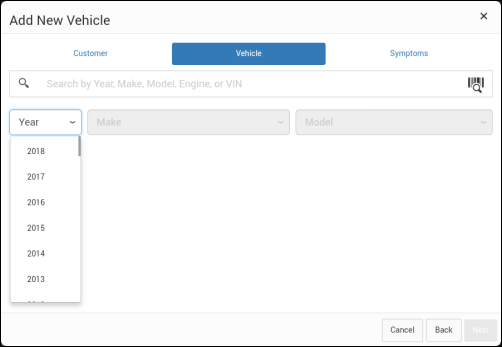
Vehicle
Select a vehicle using one of the following methods:
- Search using all or partial YMME or VIN
- Scan VIN barcode
- Select YMME from the dropdown menus
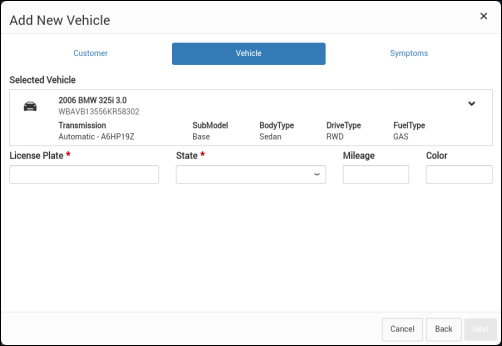
- Confirm additional vehicle details as required.
Fill in a Licence Plate, State and Mileage(optional) >> tap Next.
Symptoms
Search the symptoms list or enter a new symptom then tap the + icon to add the symptoms to the vehicle check-in.
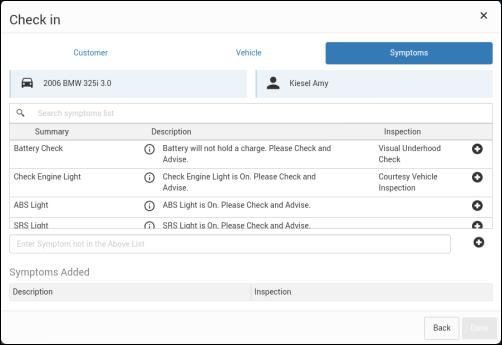
- Note: To start an inspection, a symptom that has previously been assigned to an inspection list must be added.
- Tap Done.
- The Customer, Vehicle, and Estimate (including existing symptoms) will be saved and can now be accessed from Manage Online.
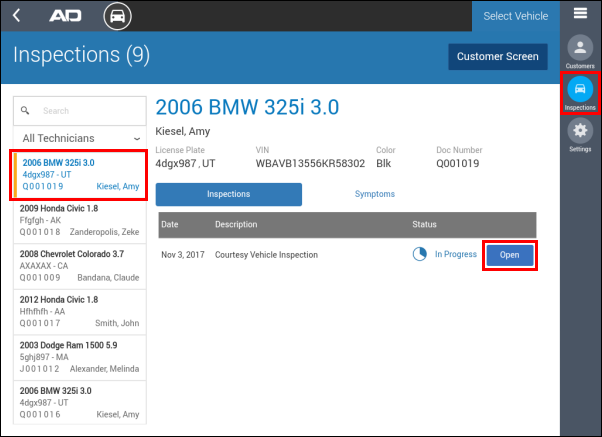
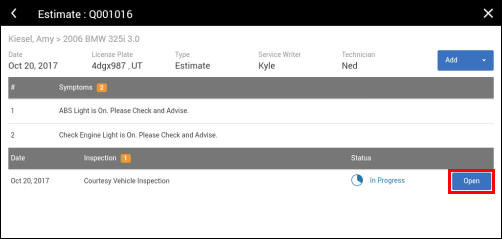
- Tap Inspections, from the right-hand menu >> Select the recently created document from the list >> Select Open, next to the inspection you would like to complete.
Select an Existing Customer
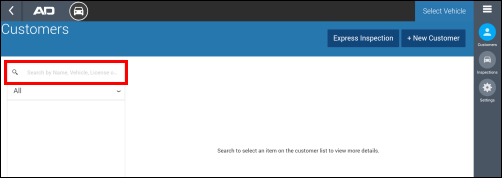
- Use the search box to search for existing customers then select a customer from the search results list.
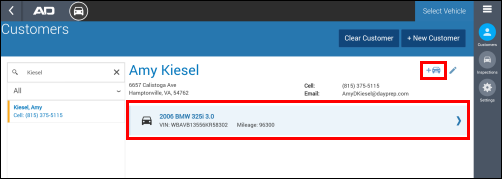
- With the customer selected, select the vehicle you would like to inspect or tap + vehicle to add a new vehicle.
- Tap Open on an existing document or tap Add Document and add symptoms to start a new document.

- From the Estimate screen, tap Add to assign a technician and service writer or add more symptoms.
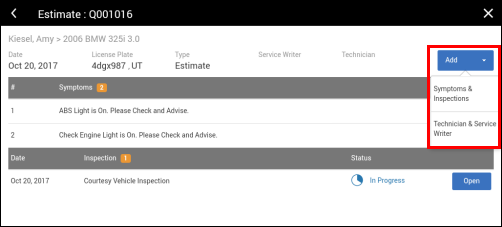
- Select Open, next to the inspection you would like to complete.
Create an Express Inspection
Express Inspection is the quickest way to start an inspection by requiring only the minimum amount of customer information.
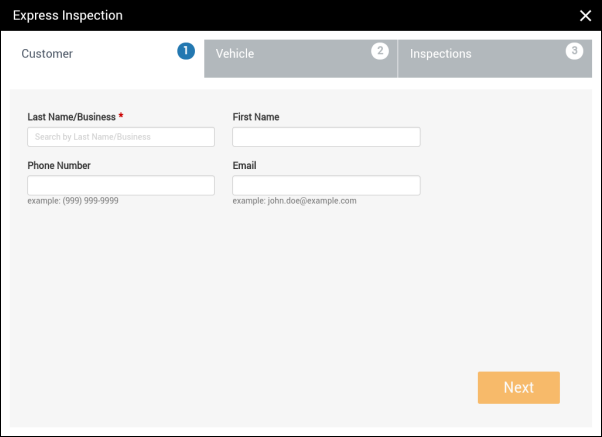
From the Customers screen, tap Express Inspection then complete the following sections:
Customer
Fill in a Last Name/Business and as much additional information as possible >> tap Next.
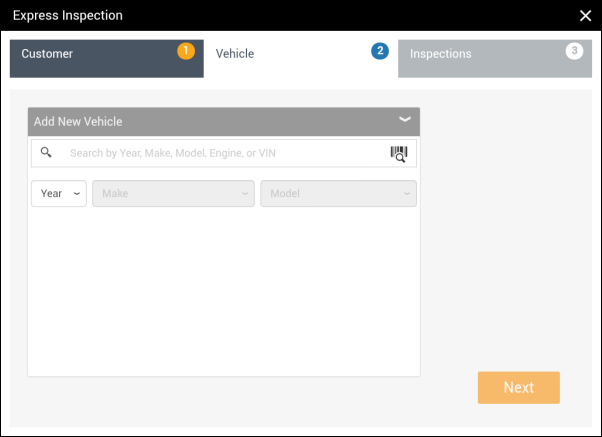
Vehicle
- Select an existing vehicle or tap Add New Vehicle then select a vehicle using one of the following methods:
- Search using all or partial YMME or VIN
- Scan VIN barcode
- Select YMME from the dropdown menus
- Confirm additional vehicle details as required.
- Fill in a Licence Plate, State and Mileage(optional) >> tap Next.
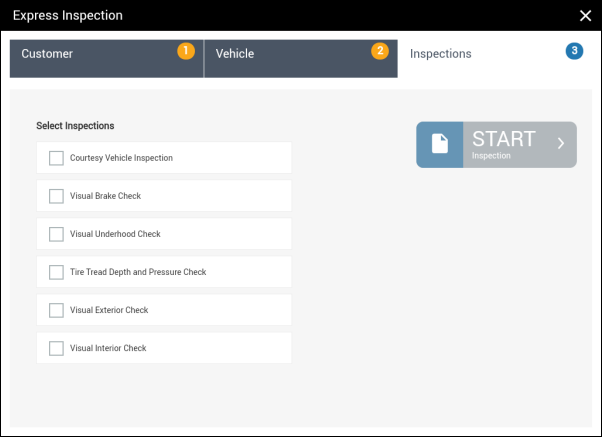
Inspections
Select an inspection to include on the work document >> tap Start.
Complete the Inspection
Select the bubble that best represents the visual condition of each component inspected (Red, Amber or Green).
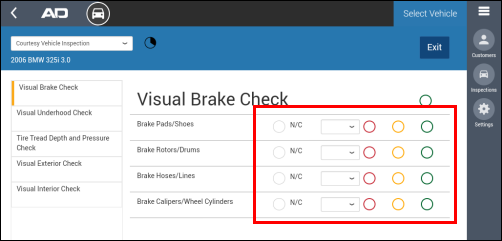
- Notes:
- Select a Code from the dropdown menu to further identify the selection.
To learn more, see Code Settings - Inspection Reason Codes. - If the component was not inspected, select the N/C (Not Checked) bubble.
- Select a Code from the dropdown menu to further identify the selection.
- Notes:
Add any Notes and check any sub-item boxes that were inspected (optional) >> tap Done.
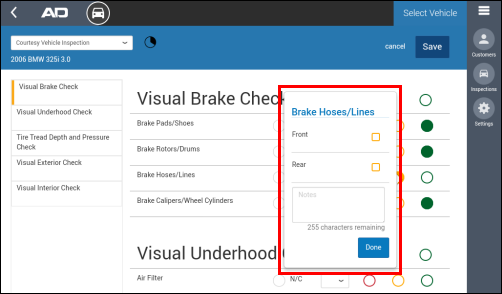
- Note: Adding additional notes and checking sub-item boxes provides specific detail to visual inspections.
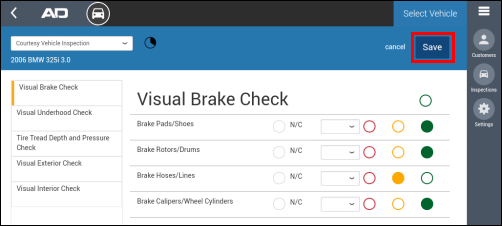
- Tap Save.
Set the applicable inspection status and tap OK.
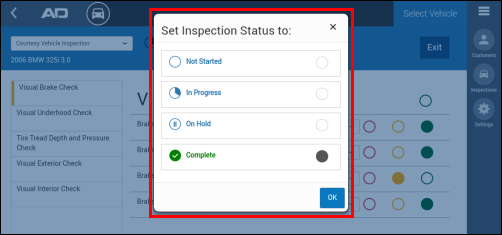
- Results of the inspection can now be accessed and printed from Manage Online. See the Within Manage Online section of this article for more information.
- Checking an inspection as red or amber will also display a list of any associated suggested jobs when opening up the estimate in Manage Online.
- Note: This will include an option for a generic job with no line items in order to easily identify and track jobs converted from failed inspection items.


