Managing Inventory
NOTE - Some features and functions in this article are only accessible at certain Shop Manager subscription levels.
| Feature / Function | Shop Manager Pro | Shop Manager | Estimator |
|---|---|---|---|
Inventory Management |
Manage and track your parts Inventory
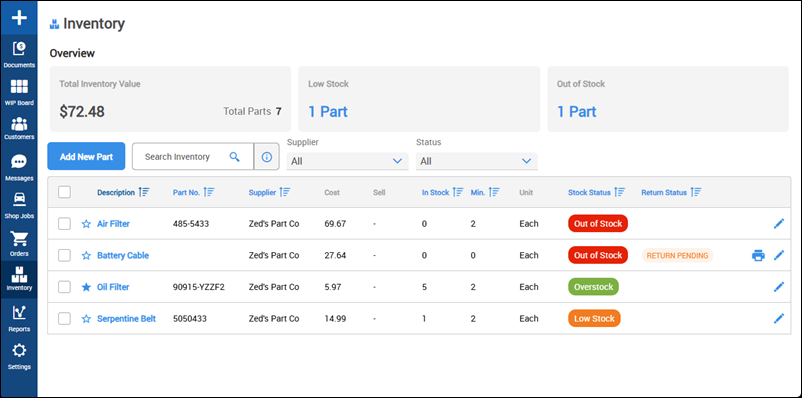
Add Parts to Inventory
- Go to the Inventory screen.
- Click Add New Part.

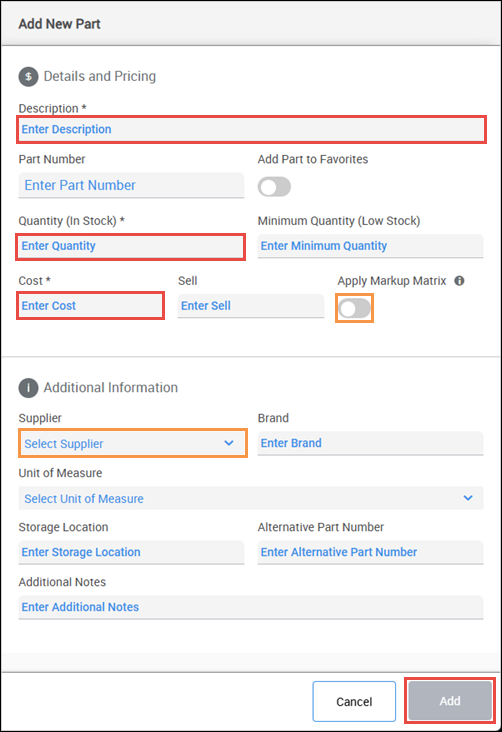
Fill in as much information about the part as you can, then click Add.
- Required Fields:
- Description
- Quantity
- Cost
- Additional Notes:
- Apply Markup Matrix
- Enabling this option will override the manually entered Sell price and automatically calculate the markup price when the part is added to the document.
- This option is only available after setting up and enabling your Parts Markup Matrix in Settings >> Labor, Taxes, Markups & Fees.
- Select Supplier
- Dropdown options can be added in Settings >> Catalogs & Suppliers.
- Apply Markup Matrix
- Required Fields:
Return a Part to the Supplier
- Click edit (pencil icon) on the part you want to return.

- Click Return.
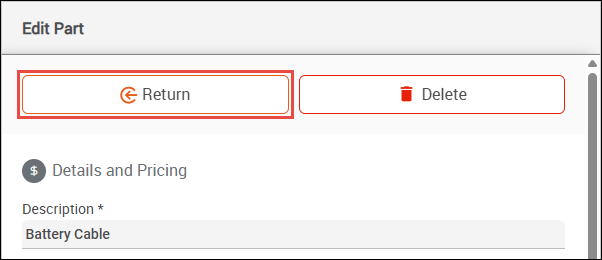
- Verify the Quantity to Return >> Select Reason for Return >> Select Return Status >> fill in additional Return Information (If applicable) >> click Return.

- A Return document will be generated to save or print.