Adding Loan Car and Detailing Information
Add Loan Car and Detailing (Car Wash) information to the Work document.
- Loan Car: Indicate that a customer requires a Loan Car while their vehicle is being serviced.
- Also known as a Rental Car or Courtesy Vehicle
- Detailing: Indicate that a vehicle requires detailing and assign the level of detailing.
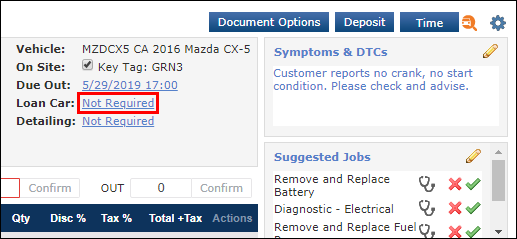
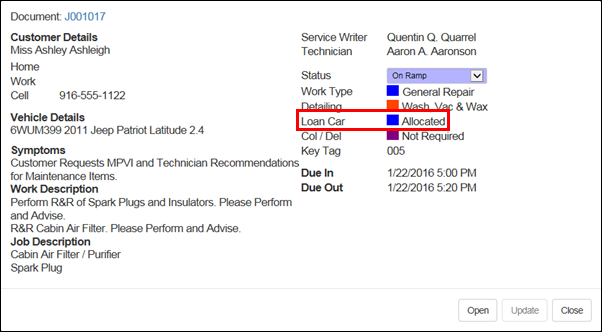
Loan Car
- Click Not Required.
- Click the Loan Car Required check box >> select a Status >> click Update.
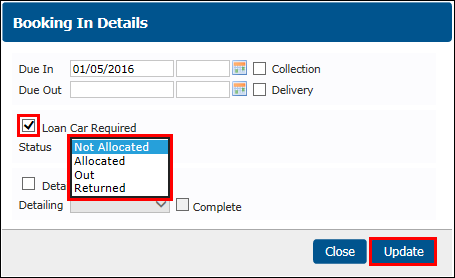
Loan Car Statuses:
- Not Allocated: A Loan Car has NOT yet been assigned to the customer.
- Allocated: A Loan Car HAS been assigned to the customer but is not yet being used.
- Out: A Loan Car is allocated and is currently being used by the customer.
- Returned: A Loan Car was allocated and is now returned.
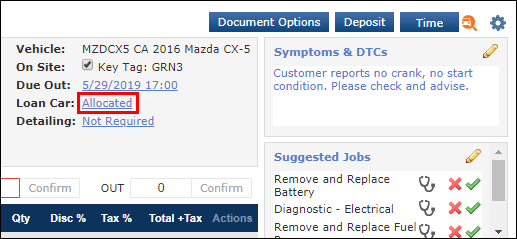
- The Loan Car status can be updated at any time.
- Notes:
- Loan Car Statuses will not appear on the printed Estimate, Repair Order, or Invoice.
- The Loan Car status will appear on the WIP screen.
- The Loan Car status will also appear in the WIP screen Customer Details.
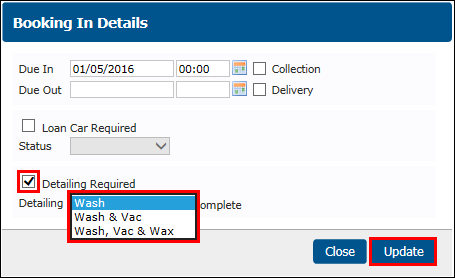
Detailing
- Click Not required.

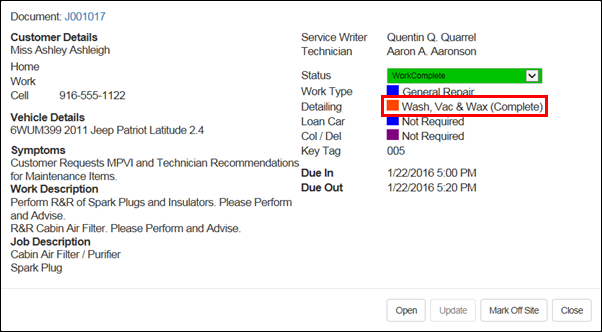
- Click the Detailing Required check box >> select a Detailing option >> click Update.
- The Detailing option can be edited at any time (see instructions below).
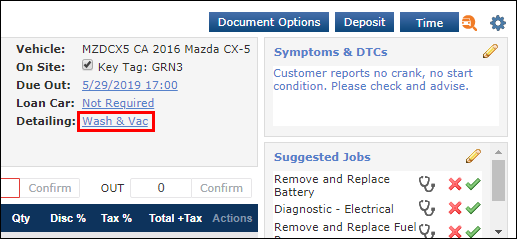
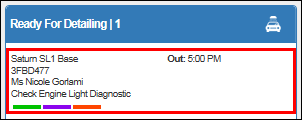
Once the Repair Order status has been changed to Work Complete, this R/O will also appear in the Ready for Detailing container on the WIP (Work In Progress) screen.

Marking the Detailing as Complete from the Work Document
- Click the Detailing option.
- Click the Complete check box >> Update.
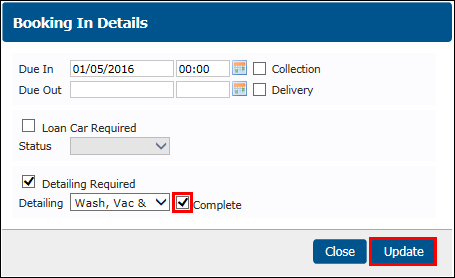
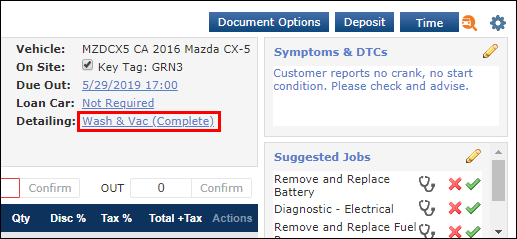
- The Detailing option will now appear as Complete on the Work document.
- Notes:
- Detailing Statuses will not appear on the printed Estimate, Repair Order, or Invoice.
- The Repair Order will no longer show on the WIP screen.

- The Detailing option will also appear as Complete in the Repair Order details on the WIP screen.
Marking the Detailing as Complete from the WIP Screen
- In the Ready For Detailing Status container, double-click the Repair Order.
- Click Detailing Complete.

- Notes:
- Detailing Statuses will not appear on the printed Estimate, Repair Order, or Invoice.
- The Repair Order will no longer show on the WIP screen.
- The Detailing option will also appear as Complete in the Repair Order details on the WIP screen.