

Appointments Calendar Booking Portal
NOTE - Some features and functions in this article are only accessible at certain Shop Manager subscription levels.
| Feature / Function | Shop Manager Pro | Shop Manager | Estimator |
|---|---|---|---|
Appointments Calendar |  |  | |
Let customers book appointments directly from your website through a customized online scheduling portal, with every booking automatically synced to your Shop Manager calendar, saving time and capturing more service opportunities.
Setup
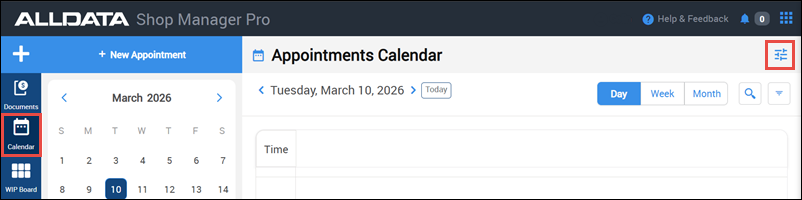
- Click Calendar >> Appointment Preferences.
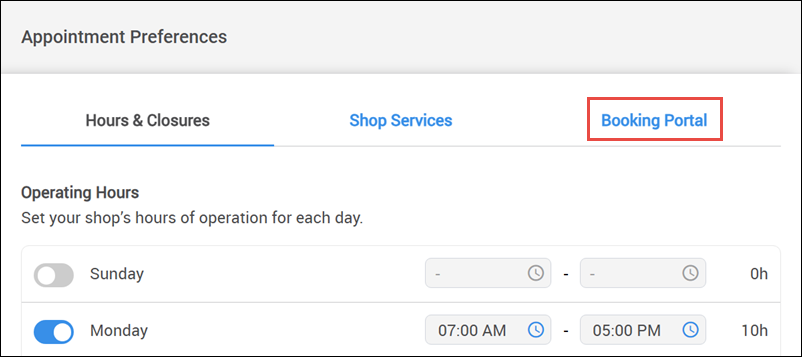
- Select the Booking Portal tab.
Online Booking Settings
Note: If you haven't already, check out the Appointments Calendar support page for information on the Hours & Closures and Shop Services settings tabs.
Set booking timing and quantity limits
Review the default Online Booking Settings and make any necessary changes.
- Default Appointment Duration (Minutes) - The appointment length that is automatically selected when a customer books an appointment.
- Advance Booking Timeframe (Months) - Set how far in advance customers can schedule appointments.
- Maximum Overlap Per Slot (Appointments) - Specify the maximum number of appointments that can be booked in the same time slot.
- Minimum Advance Notice - Set the minimum amount of time required between booking and the appointment start time.
- Daily Online Limit (Appointments) - Set the maximum number of appointments that can be booked each day through the self-service booking portal.
Show Transportation Preferences
Choose to offer customers alternative transportation options for when dropping off their vehicle for service.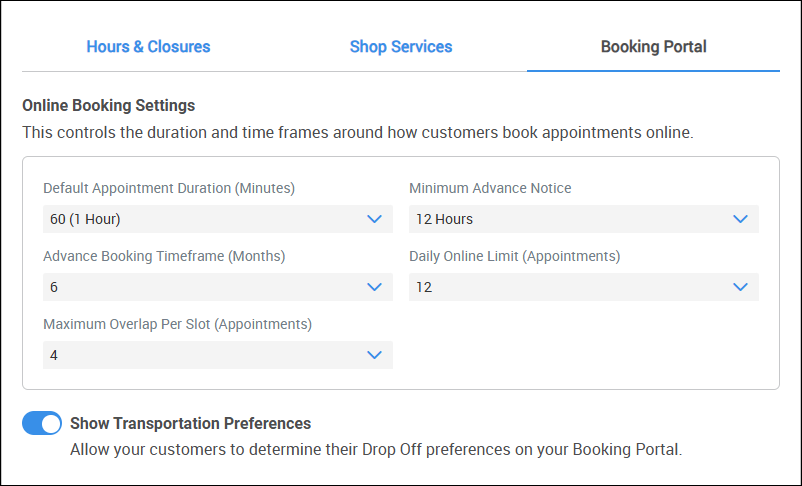
Embed Instructions
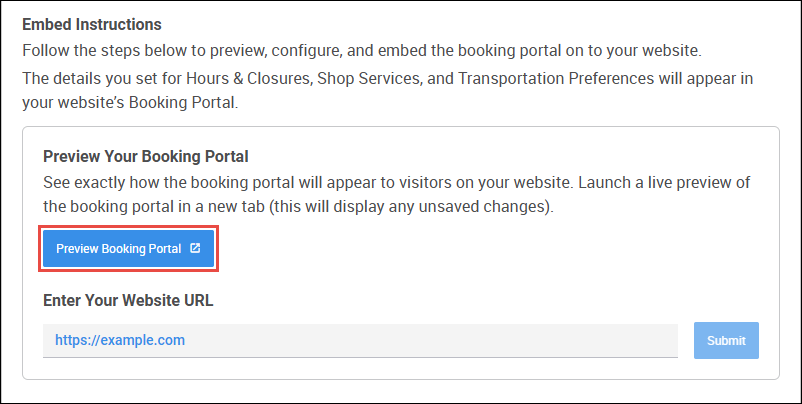
Preview Your Booking Portal
Prior to embedding the Booking Portal code on your website, see how it will appear to customers when it goes live.
- You can make changes to how your operating hours, holiday closures, available shop services, and transportation options are displayed by making adjustments on the Hours & Closures and Shop Services tabs within the Appointment Preferences menu.
Enter Your Website URL
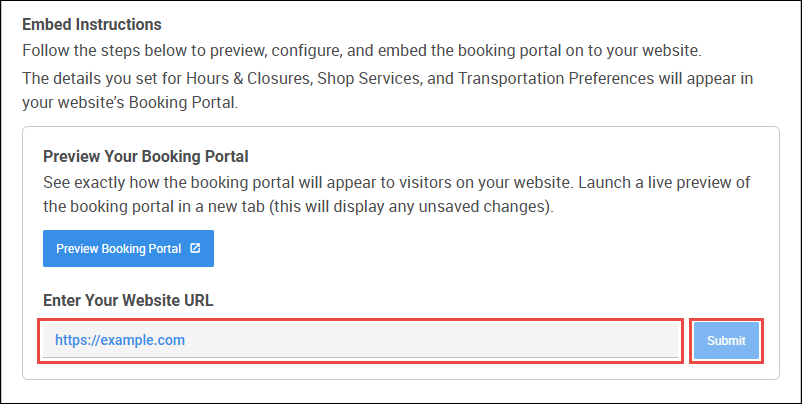
This is the first step in getting your embed code set up on your website.
Type in the URL of your website.
- This will help to secure the connection between your website and Shop Manager Pro.
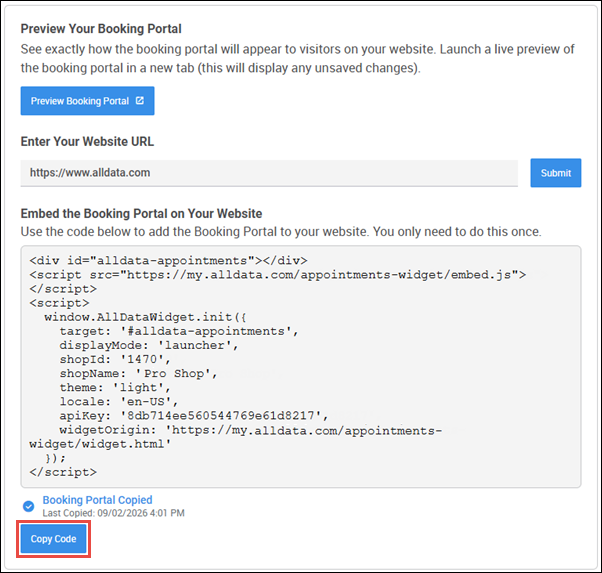
- Click Copy Code to copy your code to your device's clipboard and paste directly into your website's HTML code or into an email to deliver to your web developer, etc.
Create Appointments (Customer Workflow)
- Click the Book Appointment link from your website.
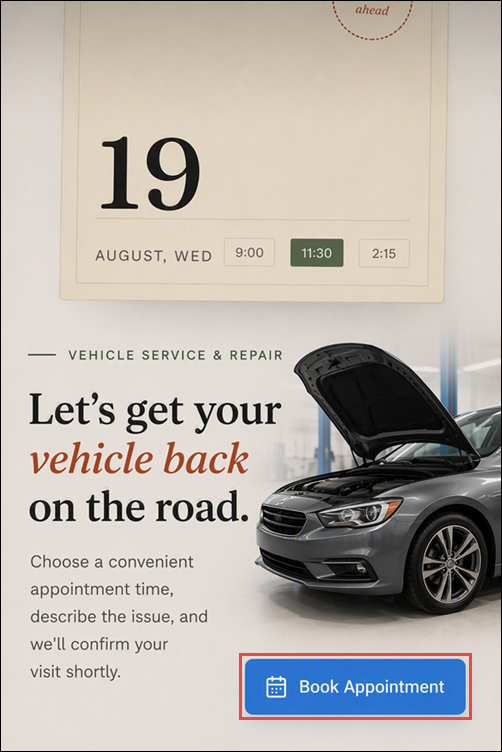
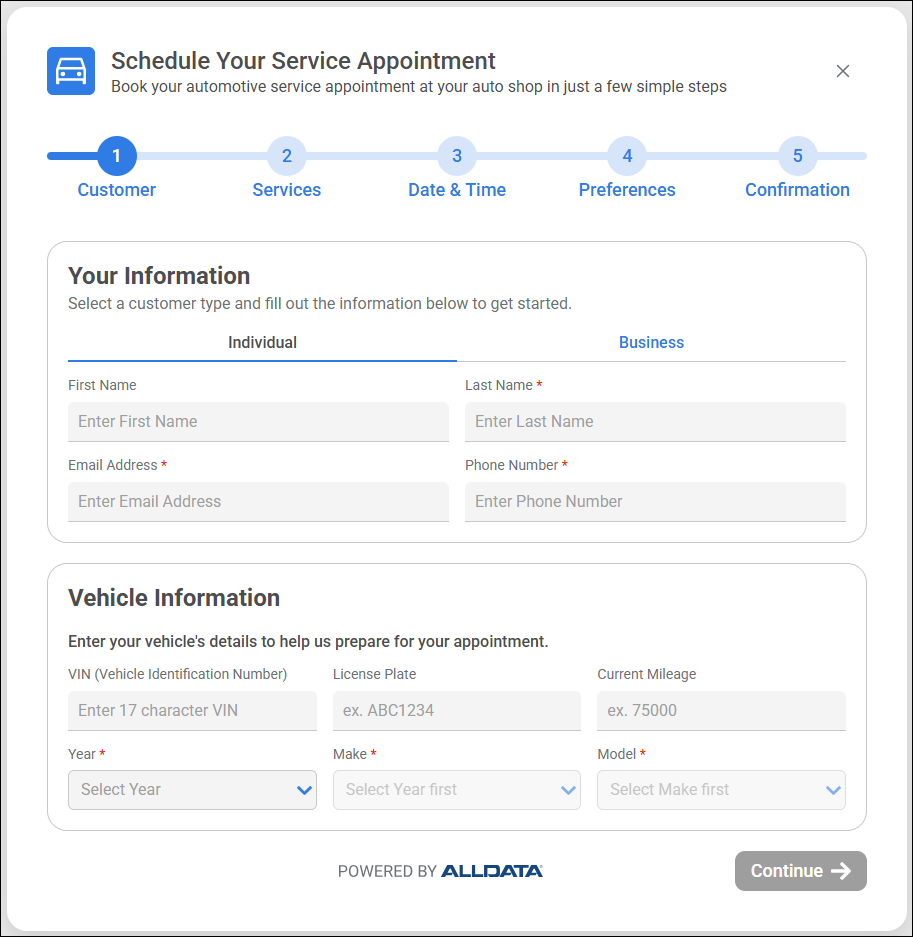
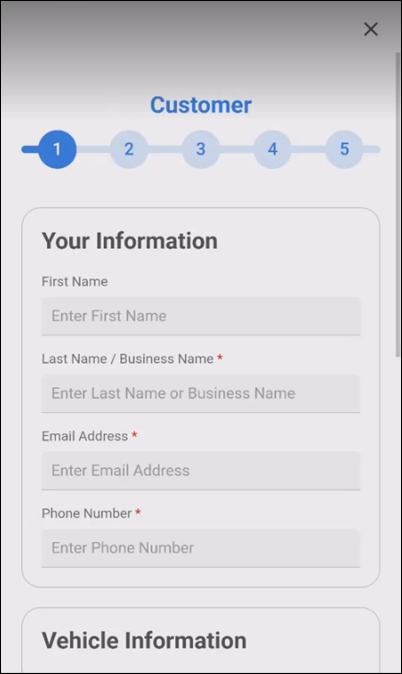
- Complete the 5 form sections:
- Customer - Contact and Vehicle Information
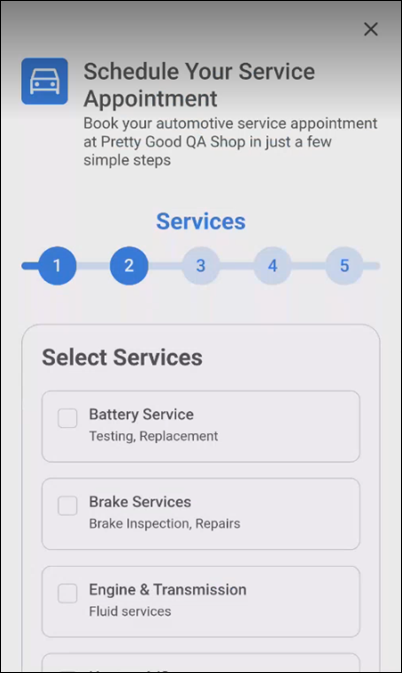
- Services - Select from predefined service options and include a description of the concern.
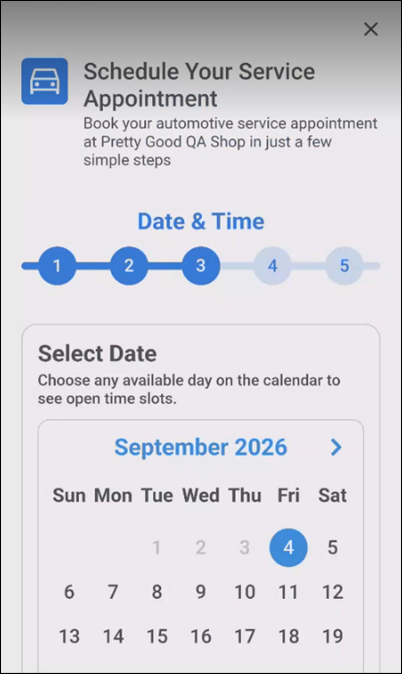
- Date & Time - Choose an available time slot for your preferred appointment date.
- Preferences - Select your Vehicle Drop-off Preferences (if enabled) and select Communication Preferences.
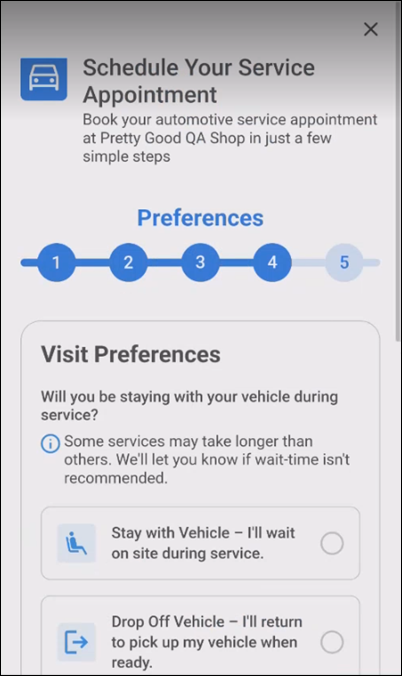
- Confirmation - Review Appointment Details and Things to Know.
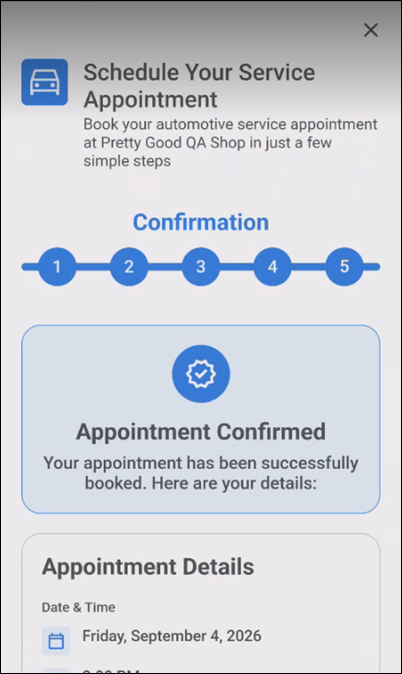
- Customer - Contact and Vehicle Information
Verification and Check In
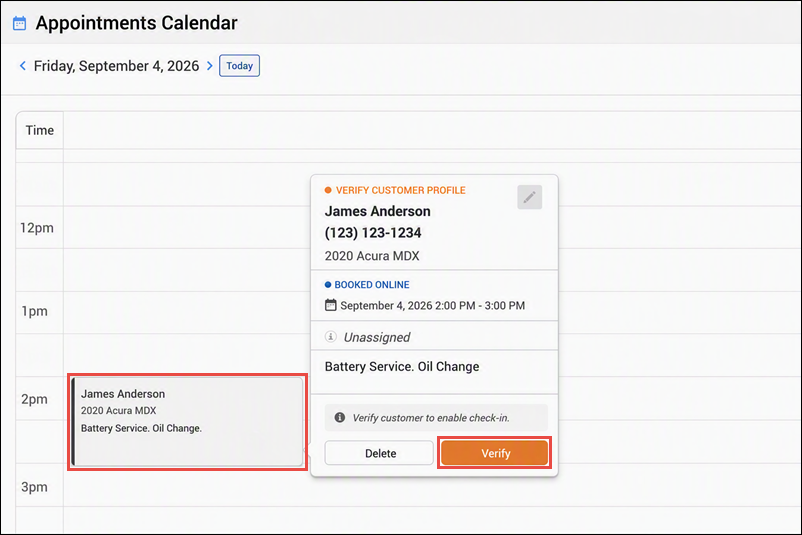
If the information the customer entered is not an exact match to a customer profile already in your database, you will be given the opportunity to verify that the appointment is associated with the correct customer record.
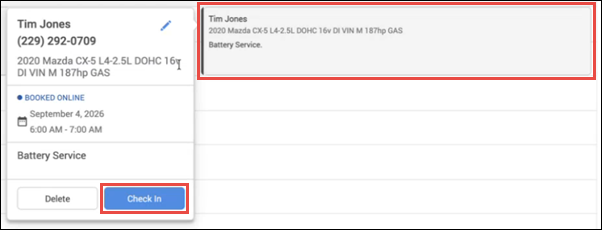
- Select the scheduled appointment from the Appointments Calendar >> click Verify.
- Choose to create a New Customer or select from the list of Related Customers found in your database.
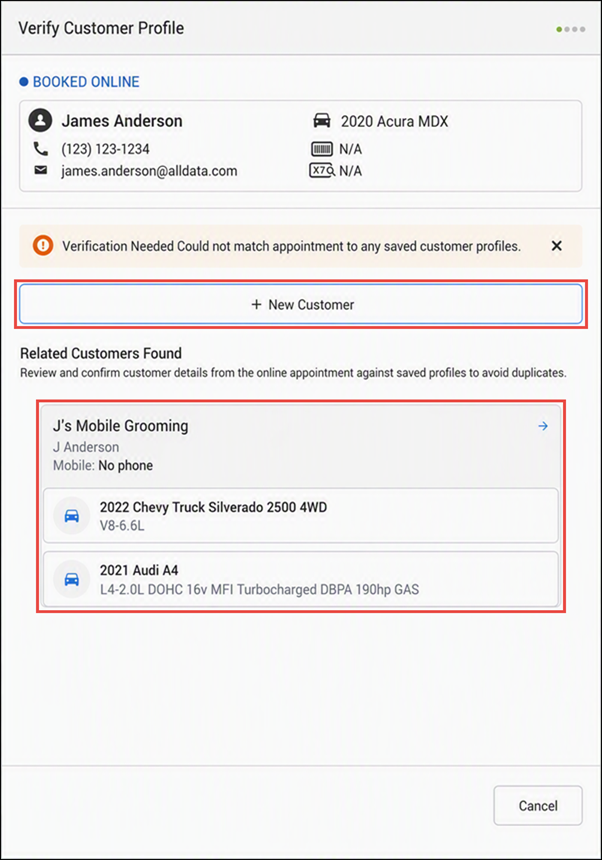
- If a related customer is selected, verify and update their contact info or create a new customer profile.
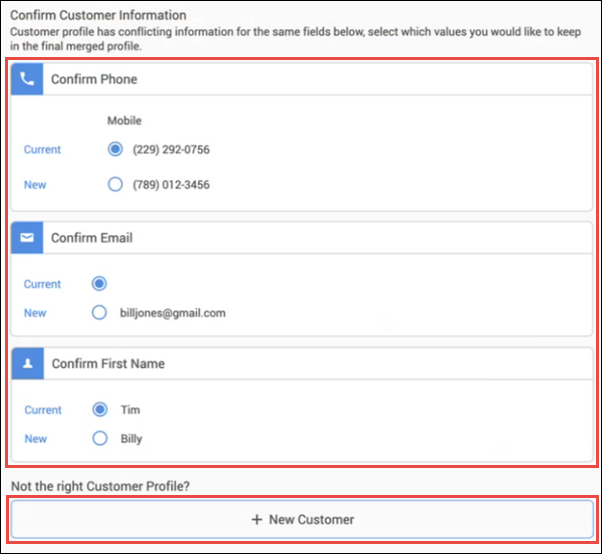
- Once the customer contact has been fully verified, select the appointment and click Check In to start a new document.