Setting Up the Work in Progress Screen
The WIP (Work In Progress) screen gives an at-a-glance view of the status of all active Repair Orders.
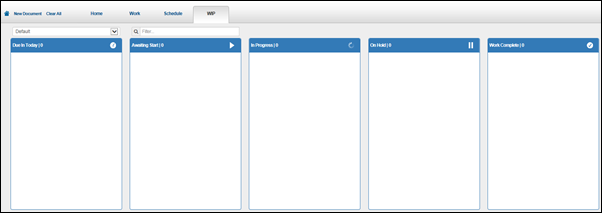
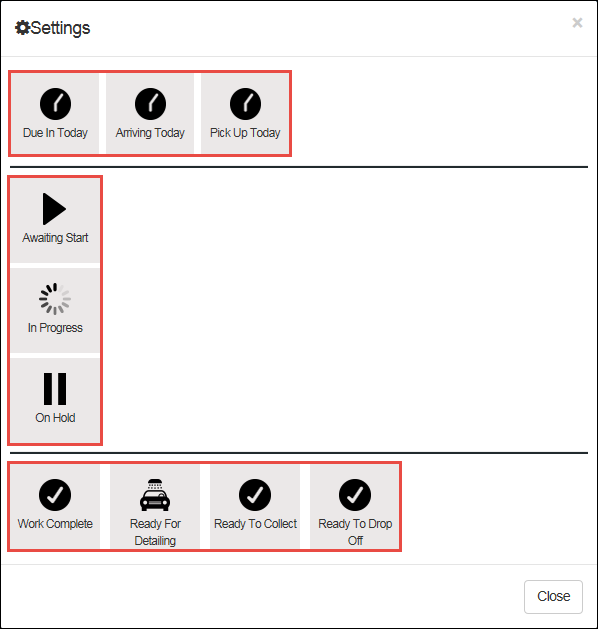
- The WIP screen comes with a default template that includes the five most basic Status codes.
- Additional templates can be created for each role in the shop (examples: Owner, Service Writer, Tech, etc.) that show just the Statuses that are the most helpful for that role.
The process below explains all of the types of Status codes, how to customize them, and how to create new templates for the WIP screen.
Step 1: Setting Up Status Codes
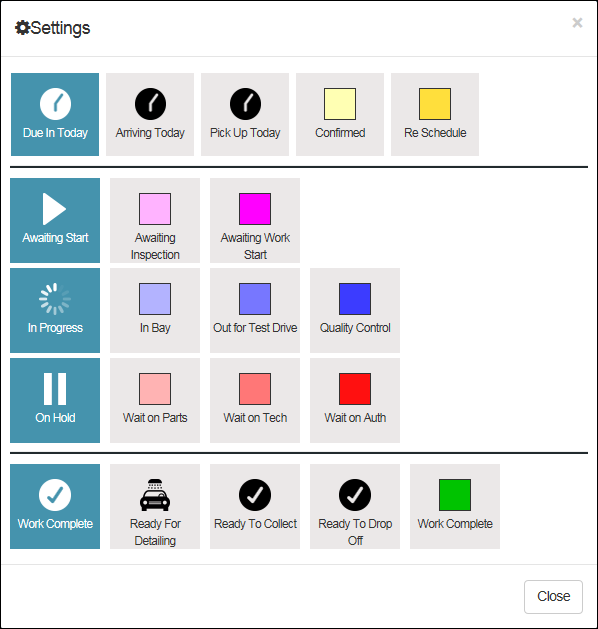
There are two types of Status codes:
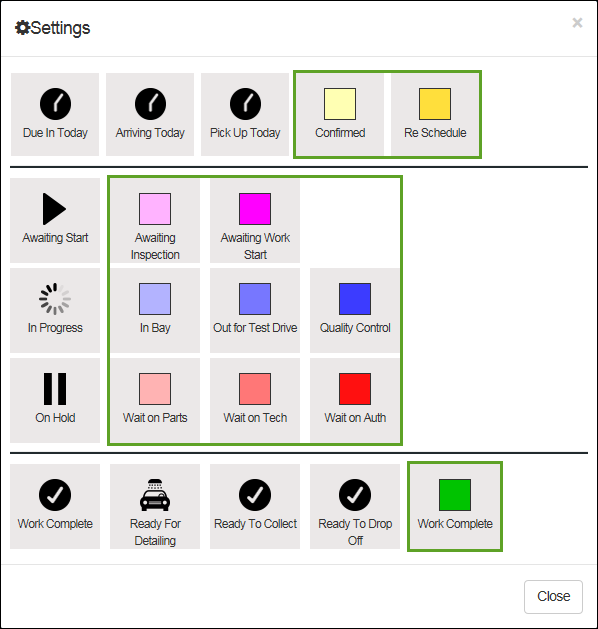
- Preset Statuses (outlined in red below)
- Are identified by a black and white symbol
- Can NOT be edited
- Customizable Statuses (outlined in green below)
- Are identified by colored squares
- CAN be edited
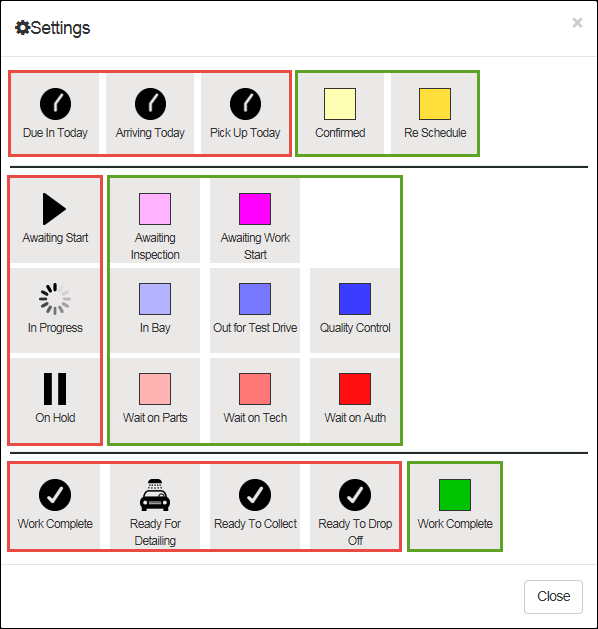
A. Preset Status Codes
These codes cover the most typical tasks performed by most shops.
- To see the explanation for each code, see Definitions of the WIP Preset Status Codes.
B. Customizable Status Codes
A set of default customizable Status codes are included with Manage Online. You ca also create your own.
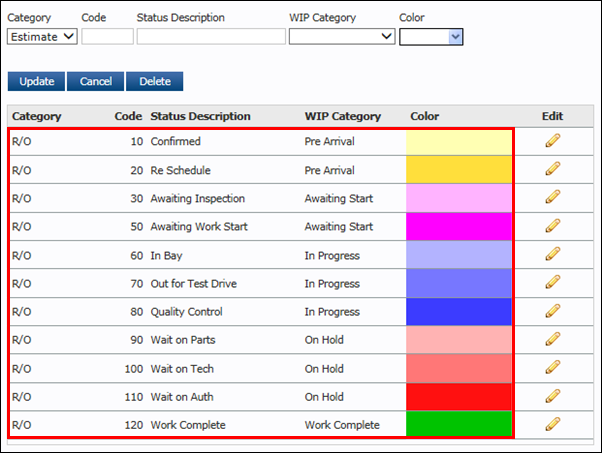
The default Status codes are also available to be added to a WIP screen.
Step 2: Creating Additional WIP Templates
Note: Creating additional templates is optional, but highly recommended, in order to get the maximum benefits from the WIP screen.
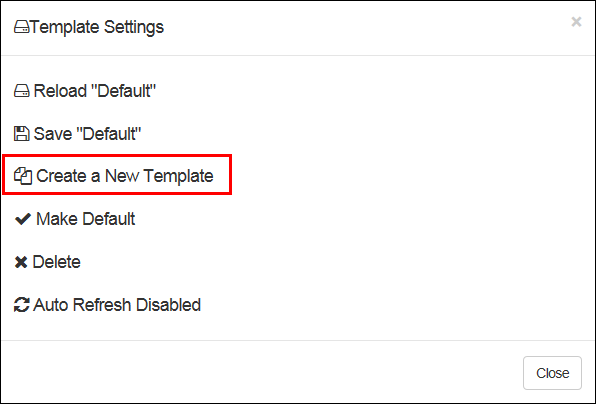
A. Creating a New Template Name
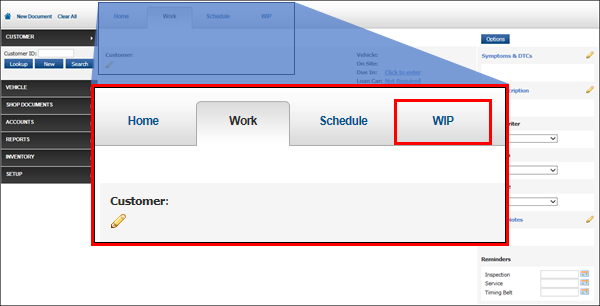
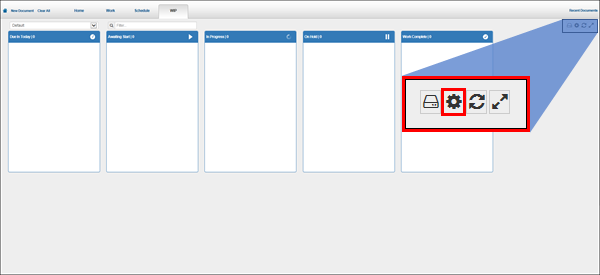
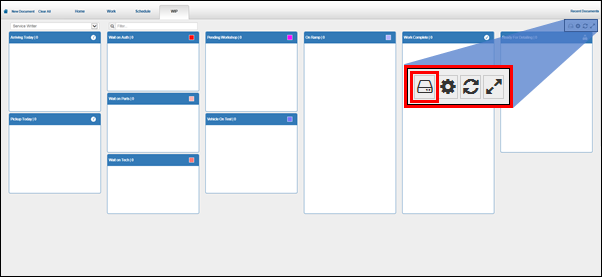
- Click WIP (Work In Progress).
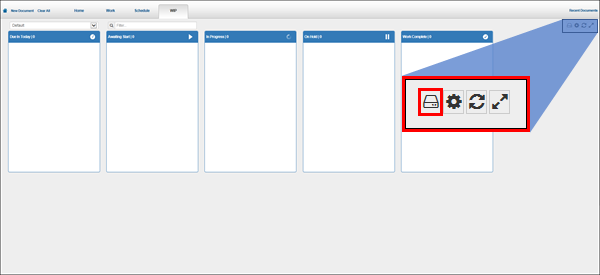
- Click the Template Settings icon.
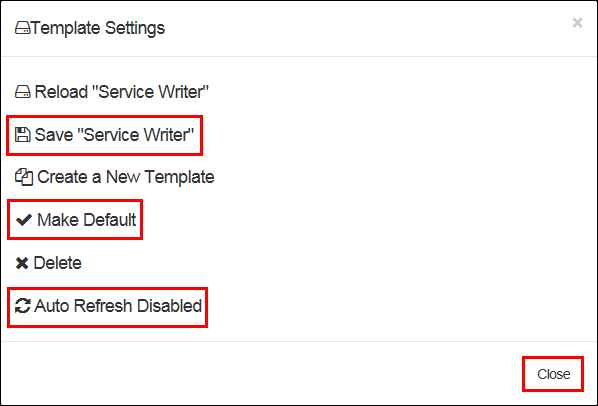
- Click Create a New Template.
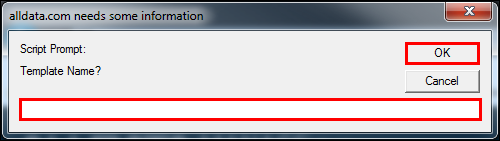
- Enter a Template Name for the WIP screen view (example: Service Writer) >> click OK.
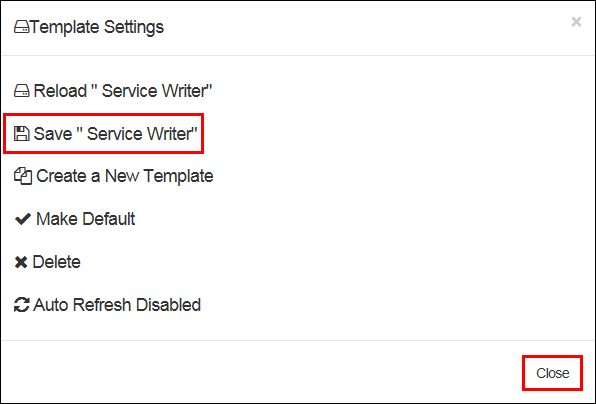
- Click Save "{Screen name}" >> Close.
B. Customizing the Screen View for a New Template
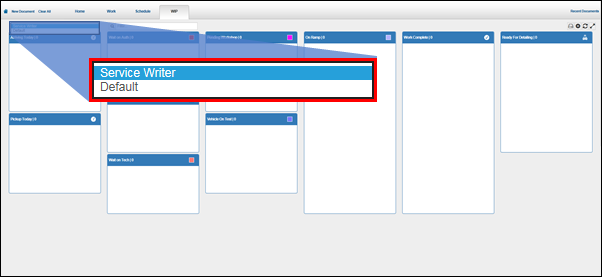
- If you created more than one template, select the template you would like to customize.
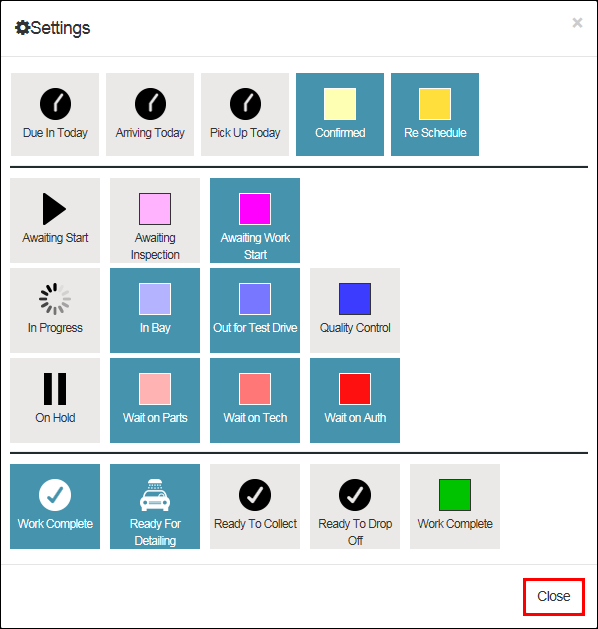
- From the WIP screen, click the Settings icon.
- Note: On the screen that opens, the Statuses that are currently selected will have a blue background.
- The five Statuses that appear in the default template are in blue in the first column.
- The five Statuses that appear in the default template are in blue in the first column.
- Note: On the screen that opens, the Statuses that are currently selected will have a blue background.
- Click a Status to add it to the new template >> click any blue Status to remove it from the template >> once complete, click Close.
- To organize the WIP screen, click and drag the blue headers on the status containers to any position on the screen.
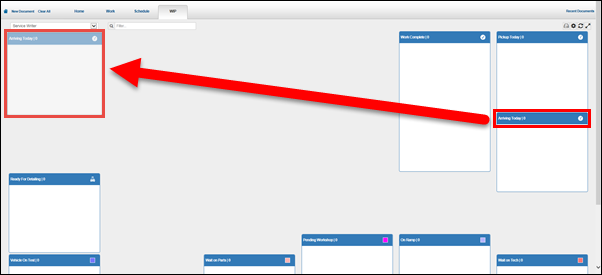
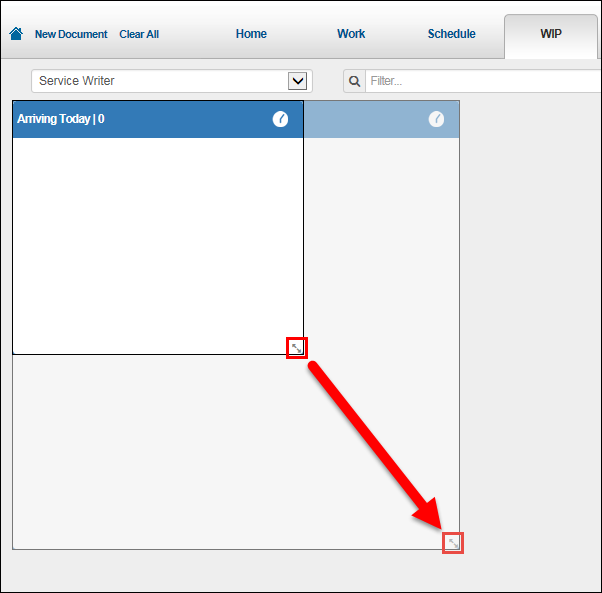
- Click and drag lower-right corner of the status containers to adjust the sizes.
- Once the new template is organized, click the Template Settings icon.
- Click Save "{Template name}" >>
- If you want this screen to appear as the default, click Make Default >>
- If you want all screens to auto-refresh every five minutes, click Auto Refresh Disabled so that it changes to Auto Refresh Enabled >>
- Click Close.
- The new template has been saved and can now be selected from the WIP drop-down menu.
Step 3: Additional Set Up Options
- See the Due In / Due Out and Remaining minutes sections in User Options - Schedule.
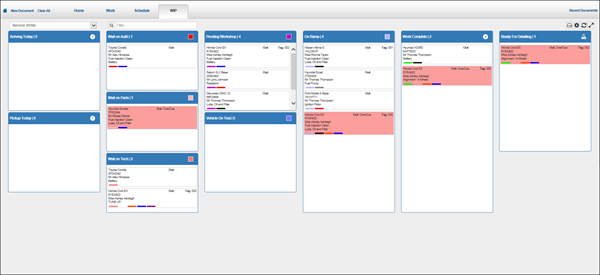
Examples: Customized WIP Screens
Next step: Using the Work in Progress Screen