Adding Detailed Customer and Vehicle Information
This article explains the value and purpose of each Customer and Vehicle field.
Customer Setup
Filling out as much customer information as possible allows you to:
- Communicate efficiently with your customers
- Capture complete reporting information
- Gather information about your customers' needs
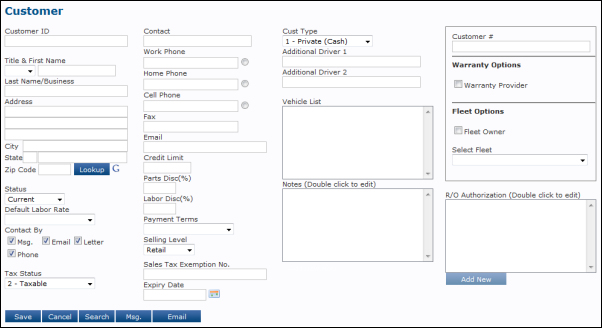
Learn more about each field:
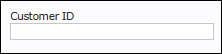
Customer ID
A Customer ID is a six-digit code used to identify a customer within the program.
- The Customer ID is automatically created (after clicking Save) using the first three letters of the customer's last name, followed by three numbers.
- Example:
- John Smith = SMI001
- Sara Smithy = SMI002
- Customer IDs cannot be edited once created.
- Note: We recommend using the automatically-created Customer ID instead of creating one yourself so that all IDs have the same format.
- For QuickBooks Online users:
- The Customer ID will show as the Account name when exporting invoices to QuickBooks Online.
- Examples:
Customer setup: 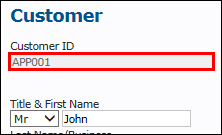
QuickBooks Online export: 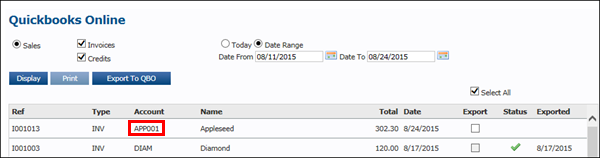
Name and Address
The Name and Address is saved here, and is referenced when using the Customer Relationship Manager (CRM), or Demandforce.
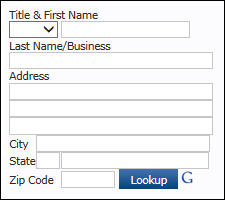
- Enter a Zip Code >> click Lookup to automatically display the City and State information based on the Zip Code.
- Click the G to show an area map of the zip code.
Status
Status refers to the customer's financial status with your shop. A status must be manually selected.
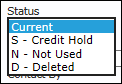
- Current: The customer is financially current and has no debt with your shop.
- S - Credit Hold: The customer is in debt to your shop.
- Selecting this option will trigger this message to show at the top of the work document.

- Selecting this option will trigger this message to show at the top of the work document.
- A customer account with a Credit Hold status will appear in red when selecting the customer.
- N - Not Used: This customer account is no longer in use.
- Selecting this option will trigger this message to show at the top of the work document.
- Selecting this option will trigger this message to show at the top of the work document.
- A customer account with a credit hold status will appear in light grey.
- D - Deleted: Selecting this will delete the entire customer account after clicking Update.
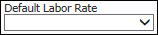
Default Labor Rate
Setting a Default Labor Rate on a customer account will automatically highlight the selected labor rate when selecting labor to build a job.
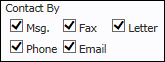
Contact By
Select the methods by which customer would like to be contacted. This is necessary when using the Customer Relationship Manager (CRM).
Tax Status, Sales Tax Exemption No. and Expiry Date
Select whether the customer will be Taxable, Resale Exempt, or Not Taxed.

- 1 - Resale Exempt
- Resale Exempt accounts also require a Sales Tax Exemption No. and an Expiry Date (provided by the customer).
- 2 - Taxable
- This Tax Status is the default selection for every customer account.
- This Tax Status is the default selection for every customer account.
- 3 - Not Taxed
- Not Taxed accounts also require a Sales Tax Exemption No. and an Expiry Date (provided by the customer).
Contact
Contact is used if the customer account information is for a business instead of a person.
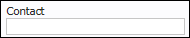
- This allows you to enter a Contact name of an individual that would represent that business account.
Work, Home, Cell, Fax and Email
Enter the Work Phone, Home Phone, Cell Phone, Fax and Email contact information.
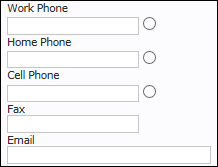
- Indicate a primary phone number by selecting the circular button associated with the number.
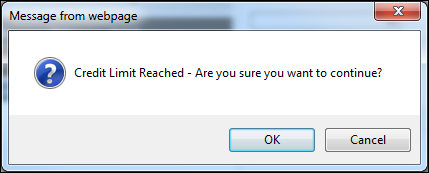
Credit Limit
Assign a credit limit to an account.

- Once a credit limit is reached, the following pop-up window will appear:
Parts Disc(%) and Labor Disc(%)
Enter a parts or labor discount to be applied when building a work document for an individual customer account.

- Note: The discounts must be manually applied to the repair order. These can be found by clicking Discounts in the Work screen.
- See Applying Discounts to learn more.
Payment Terms
Select a condition of payment by which the customer can pay.
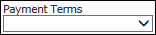
- Examples:
- 30 Days Account
- TOS - Time of Service
- Leave this blank to select the method of payment at the time of processing an invoice.
- Payment Terms are used for reporting purposes.
Selling Level
Select Retail or Wholesale to denote whether the customer will pay the Selling (Retail) or Trade (Wholesale) price for items in inventory.

- Note: This only adjusts the price of items with a set Trade price in your inventory.
Cust Type
Selecting a Customer Type will identify acceptable methods of payments for the customer.
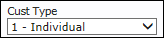
- Examples:
- Account
- Cash
- Check
- Credit
- DEBIT
- MasterCard
Additional Driver 1 and Additional Driver 2
Names of Additional Drivers or alternate contacts for the account, may be added here.
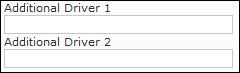
- These are mainly used for Fleet accounts, or an account that may have multiple people associated with the account.
Vehicle List, Notes and R/O Authorization
This section contains a list of vehicles associated with the account, any notes, and information of people with permission to authorize repair orders.
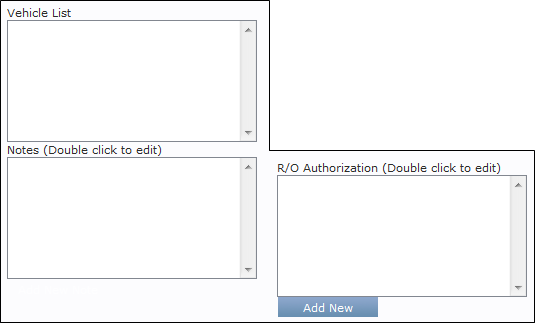
- Vehicle List:
- This section will contain all vehicles associated with the account.
- Notes:
- Allows for any notes you may want to make on the account.
- These notes will appear when clicking the paper icon under the customer name when writing a repair, and will not appear on any printed materials.
- R/O Authorization:
- Save contact information for other people allowed to authorize repairs, other than the owner.
- Examples:
- Spouse
- Family
Customer #, Warranty Options and Fleet Options
A Fleet Code is used for fleet companies that have multiple vehicles. The parent company, and the operator of the vehicle, would have a separate customer account.
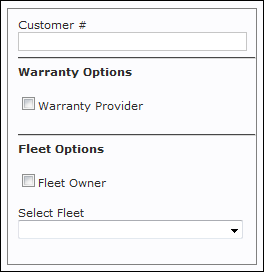
- Customer #:
- Set a Customer # to easily match the customer to an existing list outside of Manage Online.
- Warranty Options:
- Mark the Customer as a Warranty Provider in order to assign work documents to this customer and perform Split Payments.
- Fleet Options:
- Fleet Owner:
- Identify this Customer as the parent company that is financially responsible for a vehicle fleet.
- Select Fleet:
- Associate this Customer with an existing Fleet Owner to specify that they are part of a specific vehicle fleet.
- Fleet Owner:

Save/Update
Click Save/Update to save any changes made to customer accounts.
Cancel
Click Cancel to cancel any changes made to customer accounts.
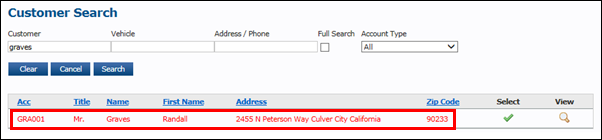
Search
Enter names into the Customer ID box and click Search to display results.
Msg.
Use Msg. to send a message from the Customer Relationship Manager (CRM).
Use Email to write and send an email to the customer on the account.
- Note: Emails cannot be received through ALLDATA Manage Online. However, the Sender Email address can be modified, so your customer can reply to an email address you have created.
- It is important to customize your Sender Email address so that customers know the emails come from your shop.
- See Customizing Your Outgoing Email Address to learn more.
Vehicle List
The Vehicle List is a list showing all of the vehicles associated with the customer account.

myCARFAX Customer Signup
The myCARFAX CUSTOMER SIGNUP button will display after the Customer has been added to the Manage Online Database if myCARFAX Customer Signup have been enabled.
Quickly sign customers up to enjoy all the benefits of the FREE myCARFAX service.
- See Enabling and Using myCARFAX to learn more.
Vehicle Setup
Filling out as much vehicle information as possible allows you to:
- Provide valuable information to your technicians
- Target your marketing to specific vehicle types
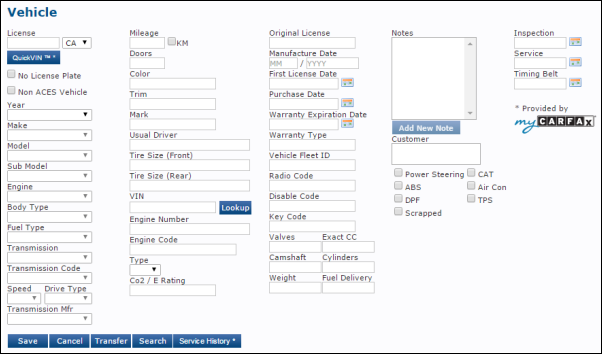
Learn more about each field:
License
Enter the License plate information, and select the state.
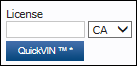
- Note: The license plate number can be used to identify the vehicle later in the program.
- Click QuickVIN™ to use myCARFAX to get the VIN.
- See Enabling and Using myCARFAX to learn more.
No License Plate
Select this check box if the vehicle does not have a license plate.
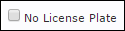
- Note: You can also select to Automatically Generate License Number and set a Licence Start Number and License Prefix in User Options >> General.
Non ACES Vehicle
Select this check box to manually enter in vehicle information that is not available in the ACES (Aftermarket Catalog Enhanced Standard) vehicle list.
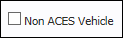
- Example: Tractors, heavy equipment, etc.
- See What Does ACES Mean? to learn more.
Vehicle Information
Select the vehicle information.
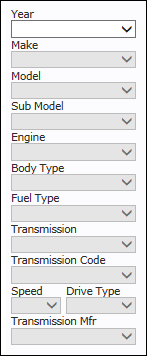
- This information is used when finding parts using electronic catalogs and in reports.
- Transmission, Transmission Code, Speed, Drive Type and Transmission Mfr information are only used when finding parts in the Transtar Industries catalog.
Type and Co2 / E Rating
Select the Type of vehicle and enter the Co2 / E (Emission) rating.
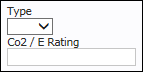
- Type:
- Select whether the vehicle is a Car or Van.
- Co2 / E Rating:
- Enter the Carbon Dioxide and Emissions rating of the vehicle.
Mileage
Enter the current mileage on the vehicle, and select KM if the mileage is measured in kilometers.
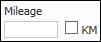
- Note: The mileage will need to be confirmed every time invoices and repair orders are created.
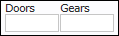
Doors and Gears
Enter the number of Doors and Gears in the vehicle.
Color, Trim and Mark
Enter the Color, Trim and Mark information for the vehicle.
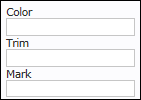
- Color:
- Color of the vehicle.
- Trim:
- The sub-model of the vehicle.
- Examples: EX, Limited, LE
- Mark:
- The generation of the vehicle, typically defined by years a model was produced.
- Examples: Mark I, Mark II, Gen 8
Usual Driver
Enter name of the Usual Driver for the vehicle.

Tire Size (Front and Rear)
Enter the front and rear tire size information.
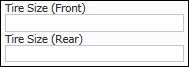
- Example: P205/55R16
VIN
Enter the VIN (Vehicle Identification Number).

- Notes:
- Click Lookup to decode the VIN.
- Click Service History to view the myCARFAX service history.
- See Enabling and Using myCARFAX to learn more.
Engine Number and Engine Code
Enter the Engine Number and the Engine Code.
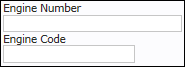
- Engine Number:
- The Engine Number can usually be found stamped or printed on the engine block.
- Engine Code:
- This is typically the eighth digit of the VIN.
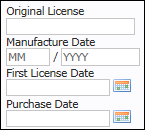
Original License, Manufacture Date, First License Date and Purchase Date
Enter the original license plate number, date the vehicle was manufactured, date the vehicle was first licensed, and the date the vehicle was purchased.
Warranty Expiration and Warranty Type
Enter the expiration date for the vehicle warranty, and the type of warranty associated with the vehicle.
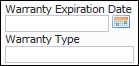
- Note: This information may be helpful with warranty claims.
Codes
Enter the Vehicle Id, Radio, Disable and Key Code.
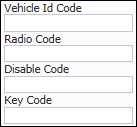
- Vehicle Id Code:
- Refers to the country of origin.
- Example: United States of America = US
- Radio Code:
- The factory security code to enable use of your stereo.
- Disable Code:
- The code to disable a vehicles security system.
- Key Code:
- The code necessary to make a new car key for your vehicle.
Vehicle Specifications
Enter detailed vehicle specifications.
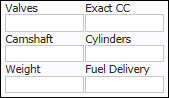
- Valves:
- The amount of exhaust and intake valves in the engine.
- Camshaft:
- Enter whether the engine is a SOHC (Single Over Head Camshaft) or DOHC (Dual Over Head Camshaft).
- Note: You may also enter any type of engine you may have here.
- Weight:
- Enter the Curb Weight (weight of the vehicle not including passengers or cargo).
- Exact CC:
- The Exact CC (Cubic Centimeters) is the engine displacement measurement in centimeters.
- Cylinders:
- Enter the number of cylinders in the engine.
- Fuel Delivery:
- Whether the engine is carbureted, multi-point injected, throttle body injected or direct injected.
Notes and Customer
Enter notes about the vehicle and view the owner's name and customer ID.
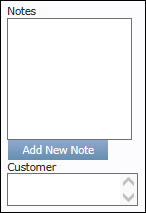
- Note: Changes made to license plate information will automatically appear as notes in the Notes box.
Service Reminders
Select a date for any service reminders.
- Note: Service reminders can also be set from the Work screen. See Assigning a Reminder to a Vehicle.

Save/Update
Click Save/Update to save any changes made to customer accounts.
Cancel
Click Cancel to cancel any changes made to customer accounts.
Transfer
Click Transfer to transfer the vehicle information to another customer account.
- This is useful when the vehicle is sold and you want to keep the vehicle history when assigning the vehicle to a new customer account.
- See Transferring a Vehicle to a Different Customer to learn more.
Change License
This option allows you to change the license plate information for the vehicle account.
Search
Enter license plate numbers or names into the License box and click Search to display results.
Click Print to view the vehicle details in a PDF file.
Service History
Enter a complete VIN or License to view the myCARFAX Service History.
- See Enabling and Using myCARFAX to learn more.
myCARFAX Customer Signup
The myCARFAX CUSTOMER (or vehicle) SIGNUP button will display after the Customer and Vehicle have been added to the Manage Online Database if myCARFAX Customer Signup has been enabled.
Quickly sign customers up to enjoy all the benefits of the FREE myCARFAX service.
- See Enabling and Using myCARFAX to learn more.