Part 6: Creating an Estimate, Repair Order or Invoice
- From the Work screen, click Estimate, Create R/O or Invoice.
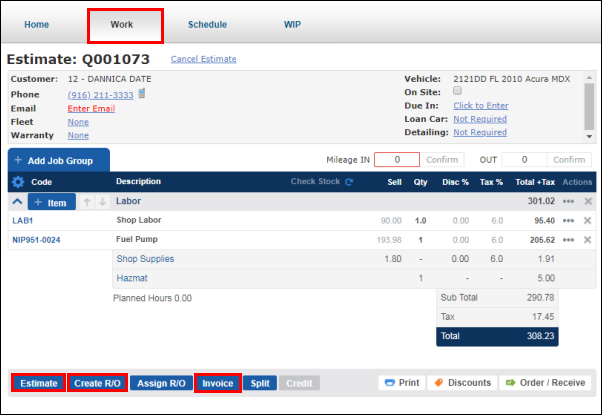
- Estimate and Create R/O
- These may be modified and saved, or turned into Invoices at a later time.
- These options will immediately display a printable PDF document.
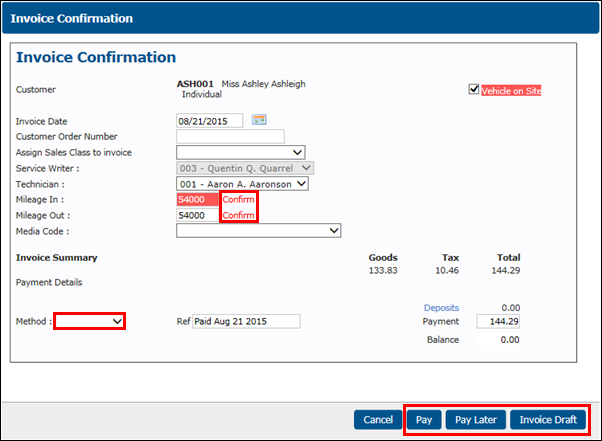
- Invoice
- Once marked as paid, Invoices are final and cannot be modified.
- Fill in/confirm all fields in the Invoice Confirmation popup window.
IMPORTANT - Assign Sales Class to invoice drop-down box:
- It is best to leave this option blank so that each item on the invoice will default to the Default Sales Class Code that you have previously assigned to it.
- If you make a selection in this drop-down, it will assign the selected Sales Class to the ENTIRE invoice. This will create accounting problems if you export data to QuickBooks.
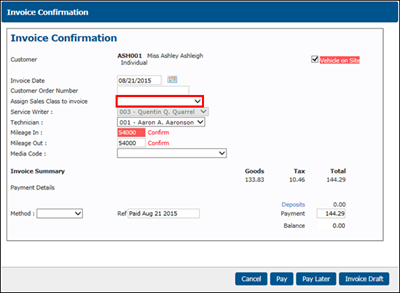
- Select Pay or Pay Later (options available based on the customer's Account Type) to close the invoice.
- Pay
- Confirms payment has been collected based on selected Method.
- When invoicing a warranty job, you will be prompted to split the invoice.
- Pay Later
- Finalizes the invoice, but sets the total as an outstanding balance.
- Outstanding balances can be viewed in the Customer Statements report and Aged Balances report.
- Invoice Draft (available if an RO has been created for the work document)
- Displays a preview of the Invoice before it is finalized.