Returning Parts to Suppliers / Using the Returns Bin
Adding items to the Returns Bin
Add items to the Returns Bin using one of the following methods:
Remove a received part from a work document
- From the Work screen, click delete ( X ) on a received part.

- Click Supplier on the Remove and Return Part pop-up.
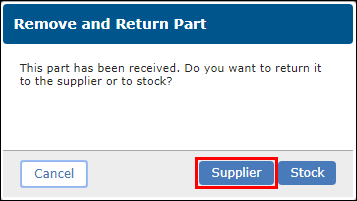
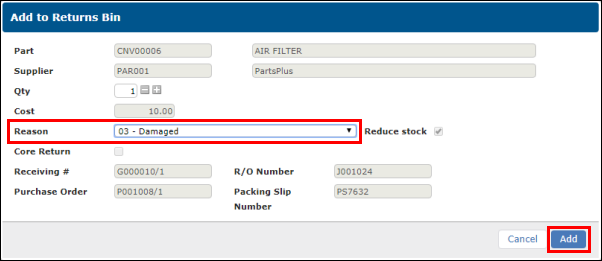
- On the Add to Returns Bin screen, select a Reason then click Add.
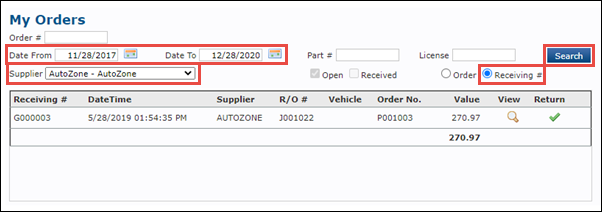
From the My Orders screen
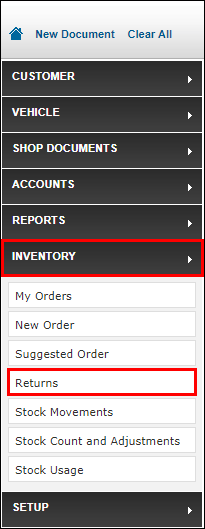
- Go to Inventory >> My Orders.
Search for received orders:
- Select a date range.
- Select a supplier (optional).
- Check the Receiving # button.
- Click Search.
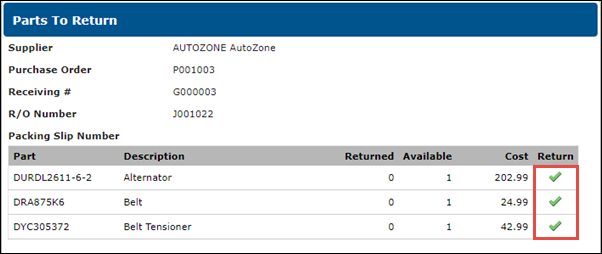
- Click Return (check mark) on the order for the part you want to return.
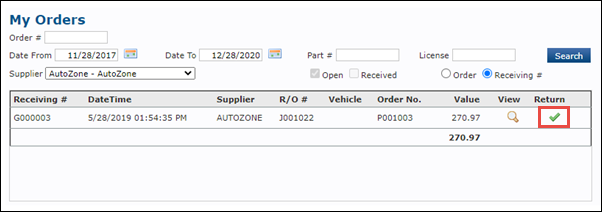
- Click Return (check mark) for the part you want to return.
- Select a return Reason.
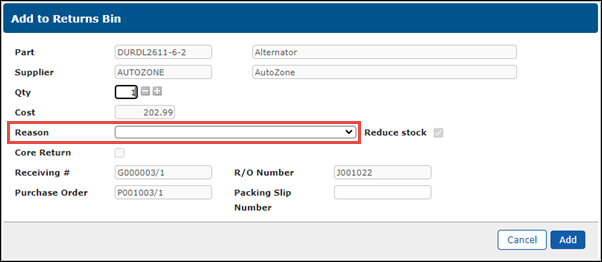
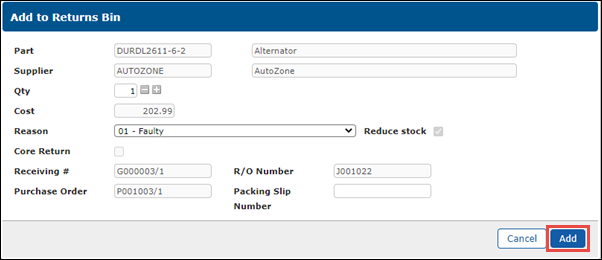
- Adjust any additional information as necessary >> click Add.
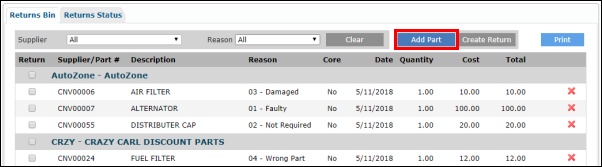
Manually add a part from the Returns Bin screen
- Go to Inventory >> Returns.
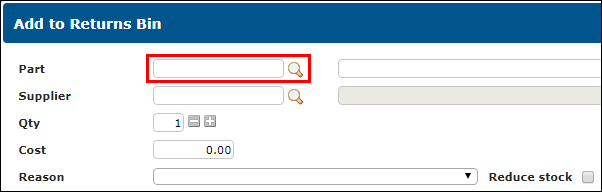
- On the Returns Bin tab, click Add Part.
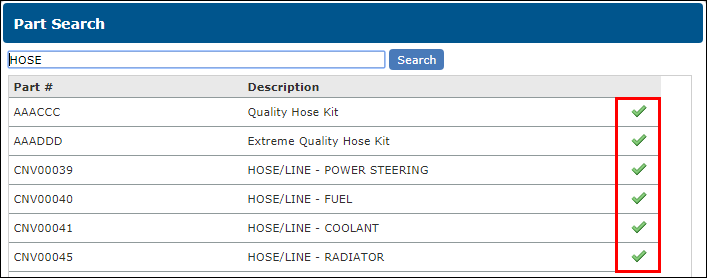
- Search for the part:
- Enter a part name and click search (magnifying glass).
- Click select (green check mark) next to the part you want to return.
- Enter a part name and click search (magnifying glass).
- Search for the supplier:
- Enter supplier name and click search (magnifying glass).
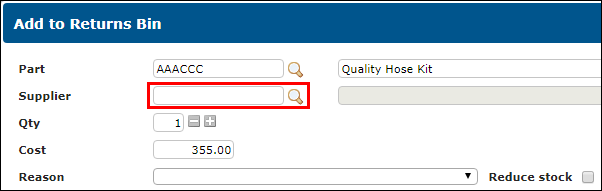
- Click select (green check mark) next to the supplier you want to return the part to.

- Enter supplier name and click search (magnifying glass).
- Select a return Reason.
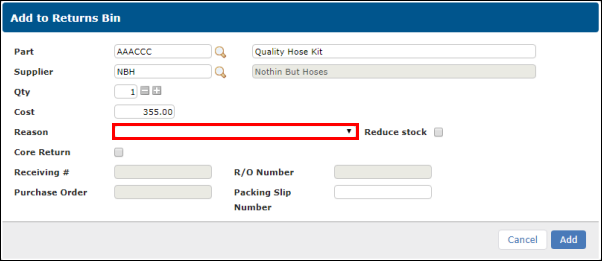
- Adjust any additional information as necessary >> click Add.

Processing Returns
Create a Return
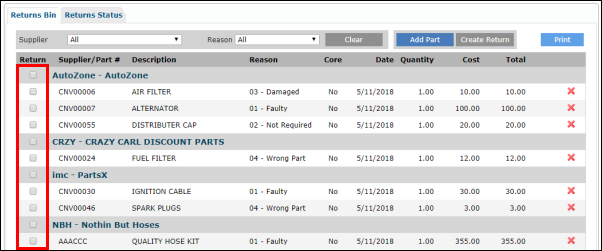
- Filter parts list by Supplier or Reason (optional).
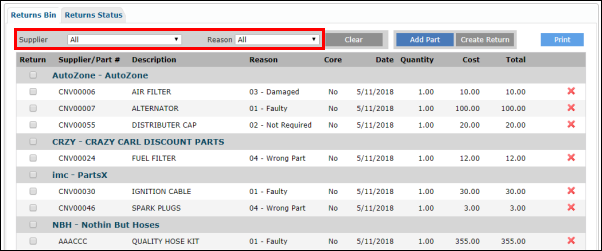
- Check the box for a supplier to select all parts for that supplier or select individual items to return.
- Click Create Return.
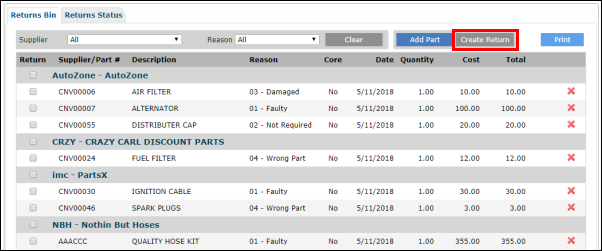
- Add any applicable Notes To Supplier >> click Create.
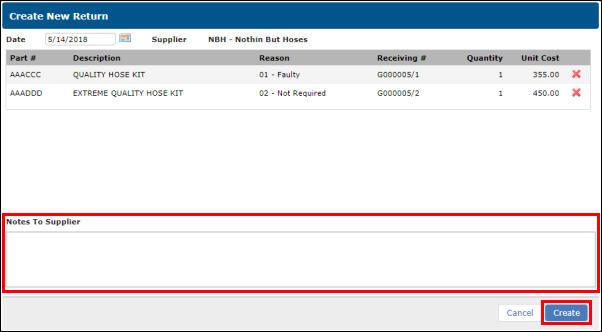
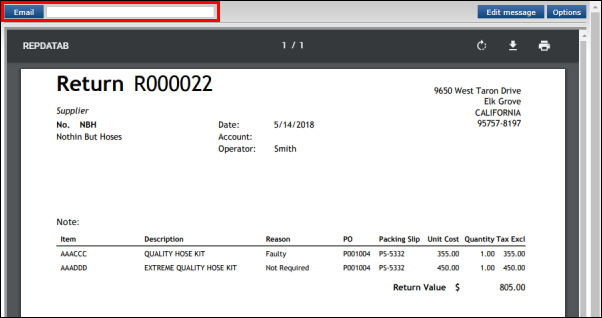
A Return will be created.
- You may choose to email the return note by filling in the Email field and clicking Email.
- Filter parts list by Supplier or Reason (optional).
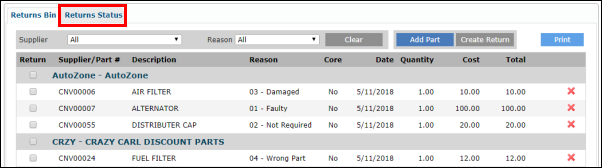
View return status and apply credit to returns
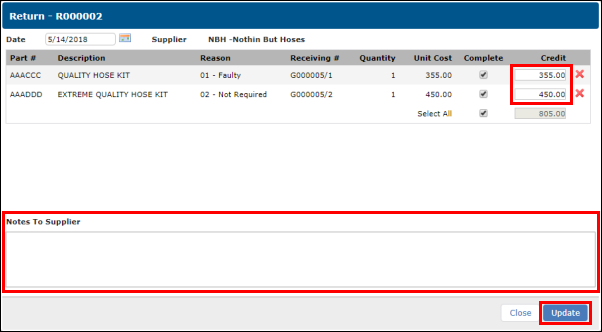
- After creating a Return from the Returns Bin, click the Returns Status tab.
- Use the search menu to locate the return, then click edit (pencil icon) on the return you want to finalize.
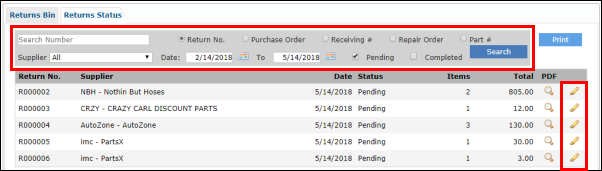
- Click the Complete checkbox to pre-fill the Credit field.

- Make any required adjustments to the Credit field (to account for restocking fee, etc.), >> add any necessary Notes to Supplier >> then click Update.
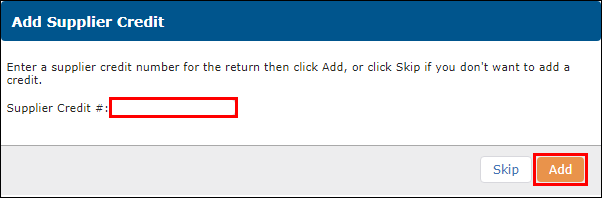
- Enter a Supplier Credit # then click Add (optional).
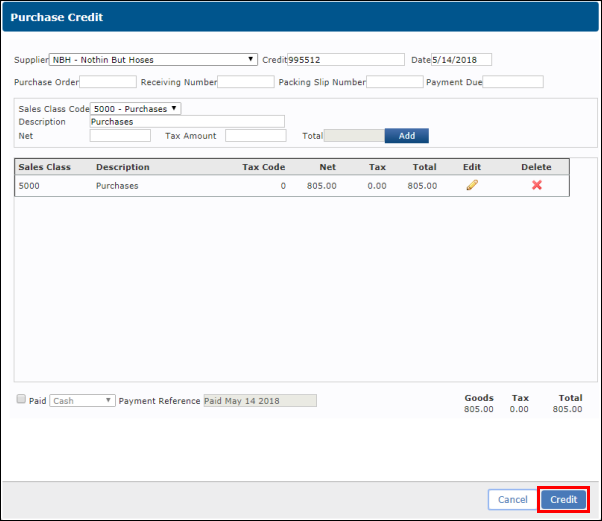
- Verify or modify any necessary information on the Purchase Credit screen then click Credit to update you accounts payable ledger.
- After creating a Return from the Returns Bin, click the Returns Status tab.