Creating a Document
NOTE - Some features and functions in this article are only accessible at certain Shop Manager subscription levels.
Create a Document from Repair/Collision
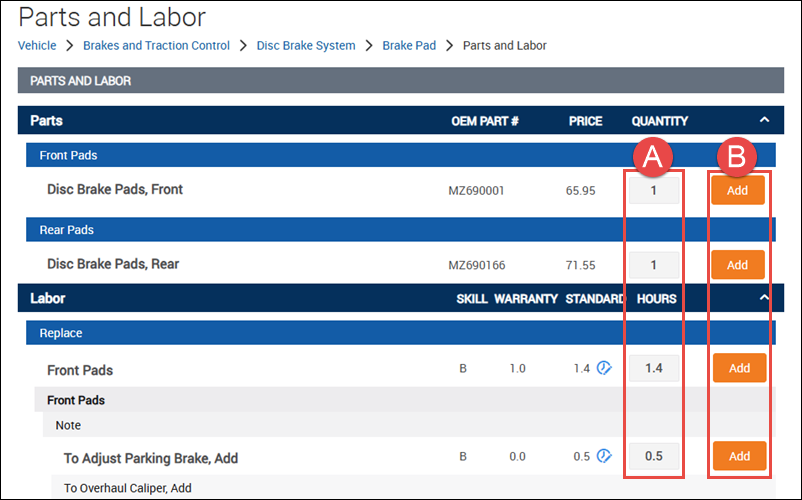
Add parts and labor from Repair / Collision
- Log in at my.alldata.com and open the Repair or Collision application from the ALLDATA Portal screen.
- Select a vehicle.
- Look up parts and labor information.
- From the parts and labor page:
- Adjust the Quantity of parts or labor time as necessary.
- Click Add on the line items you want to include on your estimate.
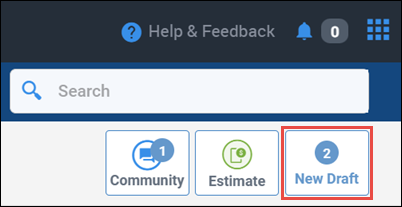
- Click (New) Draft or the associated document # if you are adding to an existing document.
- The draft screen will appear with the selected vehicle and parts and labor information added.
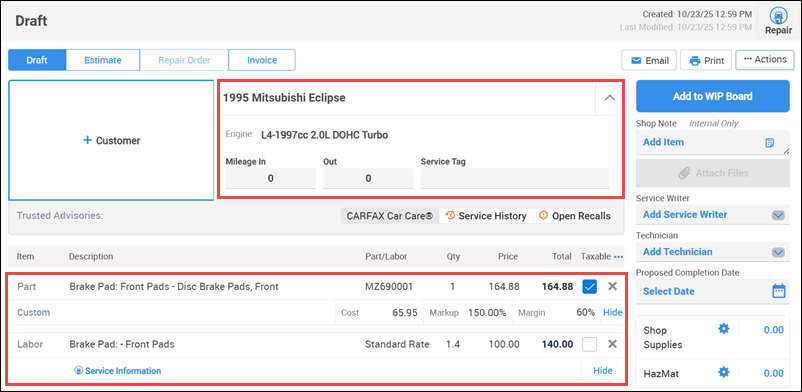
- Complete the document by adding, customer information ,vehicle details (VIN, license plate, mileage., etc.), additional parts and labor, etc.
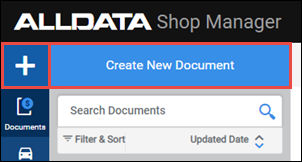
Create a Document from Shop Manager
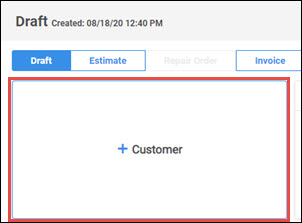
Add Customer and Vehicle information
- Click the + or Create New Document button.
- Add a customer - From the document screen:
- Click +Customer.
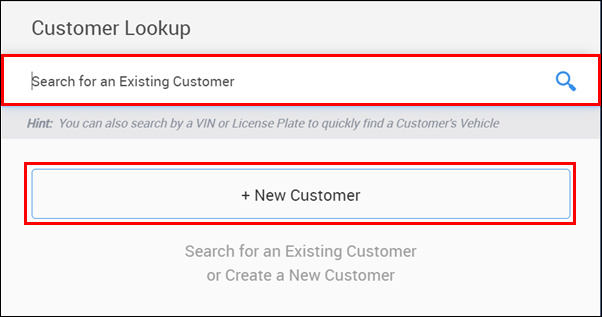
- Search for an Existing Customer or click + New Customer.
Fill out or verify customer information.
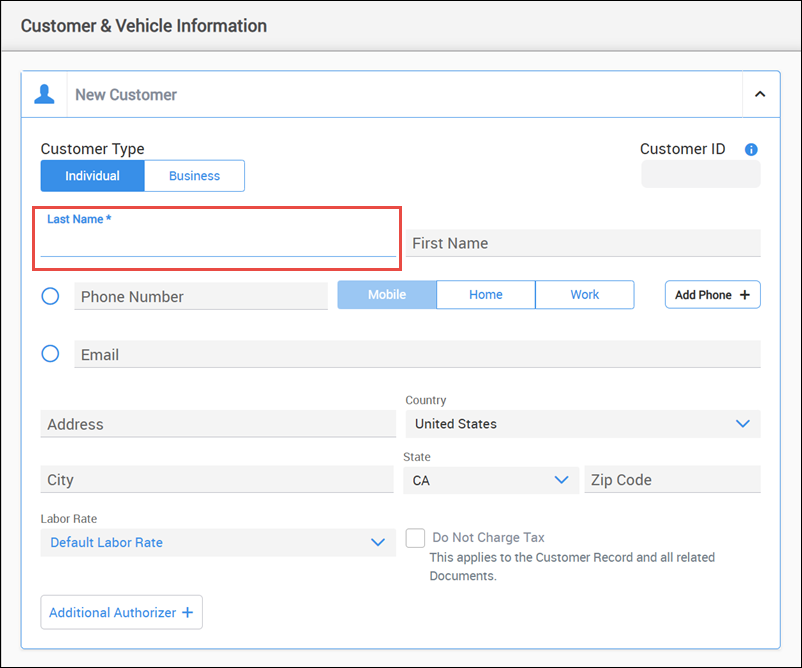
- Note: Last name is required.
- Click +Customer.
- Add a vehicle - From the Customer & Vehicle Information menu:
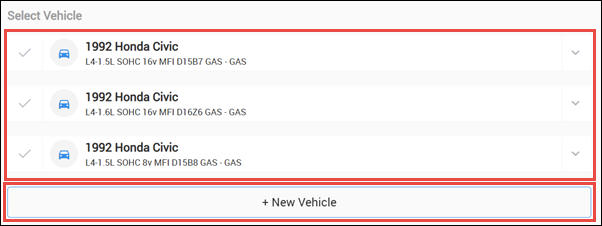
- Choose a vehicle that has been previously assigned to the customer or click + New Vehicle.
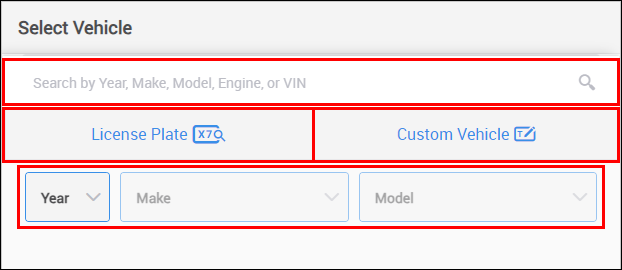
If + New Vehicle was selected:
- Search by Year, Make Model, engine or VIN.
- Use License Plate lookup (Available to Shop Manager users who have enabled myCARFAX services).
- Enter License Plate number and registration State to decode vehicle.
- Manually enter a Custom Vehicle that is not part of the ACES vehicle database.
- Note: Custom vehicles will display a "NON-ACES" label and will not be connected to ALLDATA repair information.
- Select options from the Year, Make, Model dropdown.
- Choose a vehicle that has been previously assigned to the customer or click + New Vehicle.
Add Jobs, Parts, Labor, and other line items
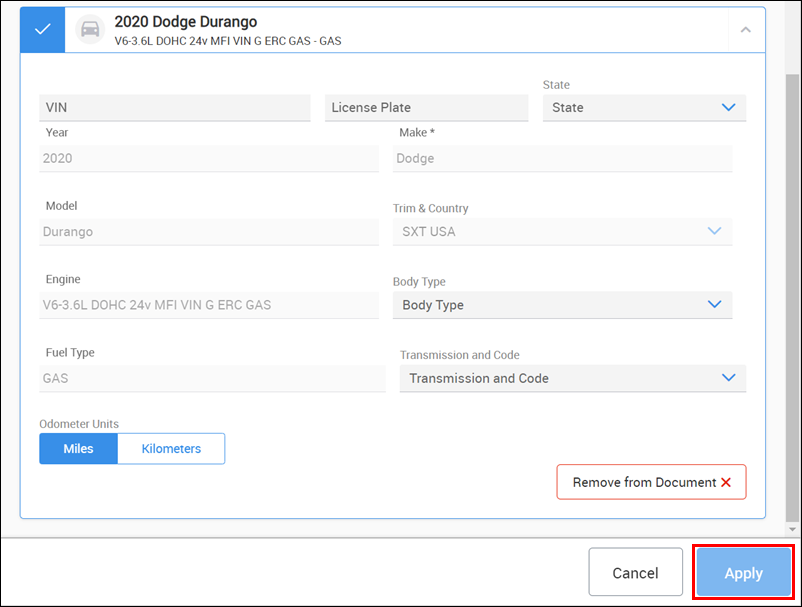
- Fill in any additional vehicle information as necessary then click Apply to add the customer and vehicle information to the estimate.
- Add Deferred Work, a previously created Shop Job, create a new Job Group or Add Items directly to the document.
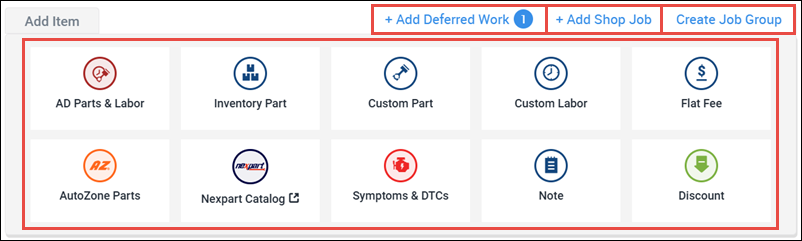
- Select from the following options on the Add Item menu:
- AD Parts & Labor - Search the ALLDATA Parts and Labor catalog.
- Inventory Part - Add commonly used parts or items that you track as stocked Inventory.
- Custom Part - Enter a Description, Part No., Qty, Price.
- Custom Labor - Enter a Description, Rate, Qty, Price.
- Flat Fee - Enter a Description and Price.
- AutoZone Parts - Search to add parts from the AutoZone Parts catalog.
- Note: Part prices will display after you add your AutoZone PIN in Settings.
- NexPart Catalog - Search the NexPart Multi-Seller catalog to add parts from various parts sources.
- Note: This button will remain inactive until after you link your NexPart account to Shop Manager in Settings.
- Symptoms & DTCs - Select from a list of system-created symptoms or DTC descriptions.
- Note - Enter a Description to one of the following:
- Custom Note
- Customer Concern
- Work Performed
- Tech Note
- Tech Recommendation
- Discount - Add a Description and Price to one of the following:
- Part
- Labor
- Flat Fee
- Select from the following options on the Add Item menu:
Add miscellaneous document information
- Upload Images or Video for reference.
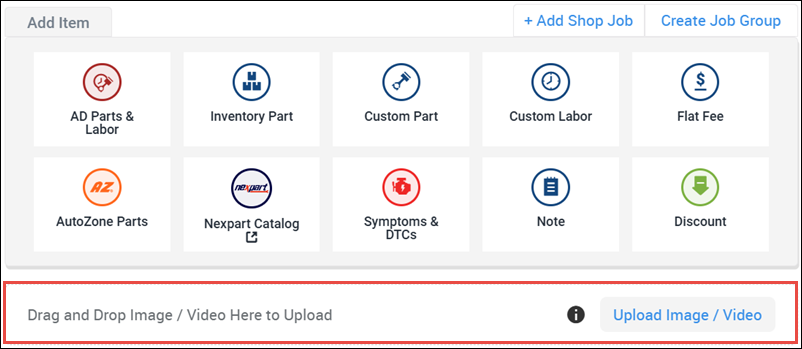
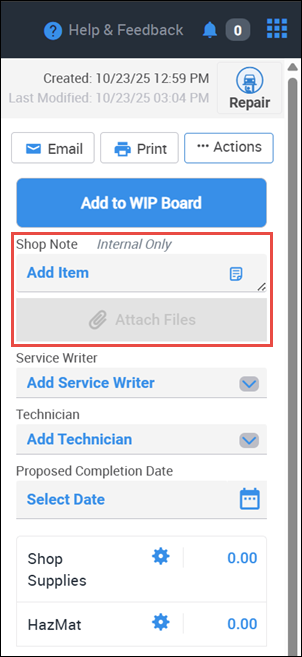
- Add a Shop Note or Attach Files (PDFs - Inspection sheets, TSBs, etc.) for future reference or to print out and attach to a customer Invoice.
Add or update Service Writer and Technician
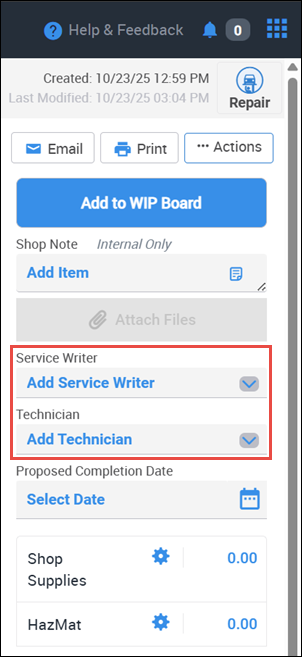
- The Service Writer and Technician fields will be prefilled if someone was marked as Default in Settings.
- Click the dropdown and select another person or type in a name if the person has not yet been added.
Set a Proposed Completion Date

- Select a date and time from the calendar popup.
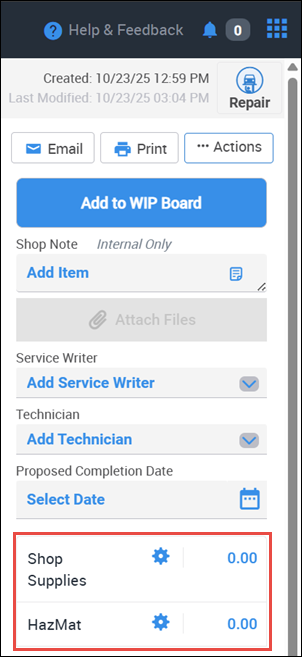
- Enter or update any applicable Shop Supplies or HazMat fees.
Finalize the Document, take a Deposit and start work
Convert the draft into a permanent document - Select a document type at the top of the page to convert your draft into an Estimate, Repair Order or Invoice.
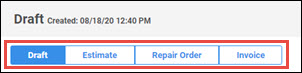
- Notes:
- Once a document is converted from a draft into a different document type, it can no longer be deleted.
- Selecting Repair Order will ask you for Authorization Details. If Authorization is not required in your location, turn off the Required toggle button at the top right corner in order to continue without filling in the authorization information.
- Selecting Invoice without a customer selected will display the customer as "Counter Sale".
- Notes:
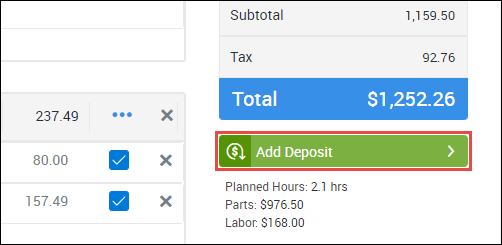
- Add a deposit (If required).
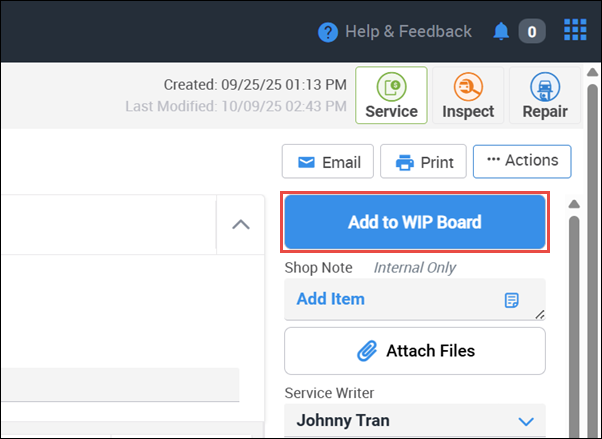
- Add the document to the WIP Board to start tracking the job progress and status.
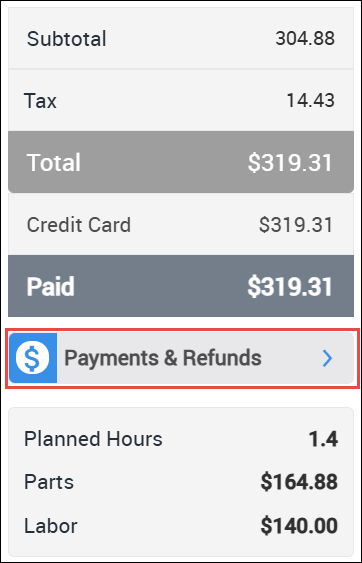
Apply an Invoiced Payment
From an Invoice, click Post Payment and fill out your Payment Details:
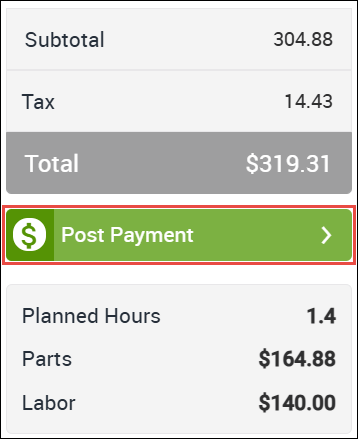
- Payment Amount
- Method of Payment
- Reference ID (Optional)
- Notes (Optional)
- The payment history will now be available from the Payment Details button at the bottom right corner of the Invoice screen.