Deposits
NOTE FOR ESTIMATOR USERS - Some features and functions in this article are accessible only with a subscription to Shop Manager.
| Feature / Function | Shop Manager Pro | Shop Manager | Estimator |
|---|---|---|---|
Repair Orders
| |||
Invoices
|
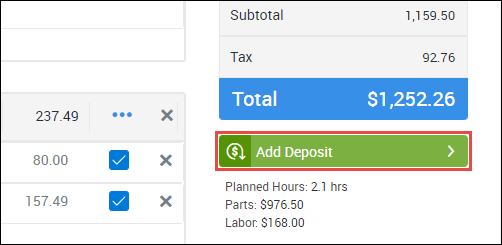
Deposits allow you to accept a partial payment prior to work completion. Doing so may help reduce the impact from non-payment by covering parts costs or other unrecoverable expenses.
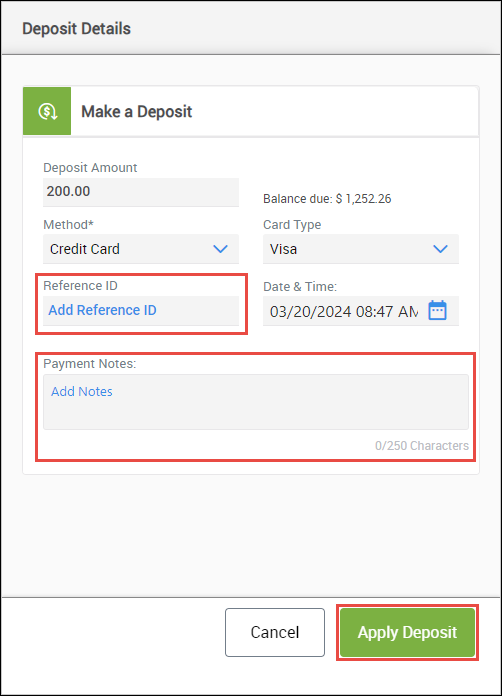
Create a Deposit
- Click Add Deposit.
- Change the Deposit Amount.
- IMPORTANT - The total balance due will be prefilled by default. If you do not update the value in this box, the entire remaining balance will be paid as a "deposit".
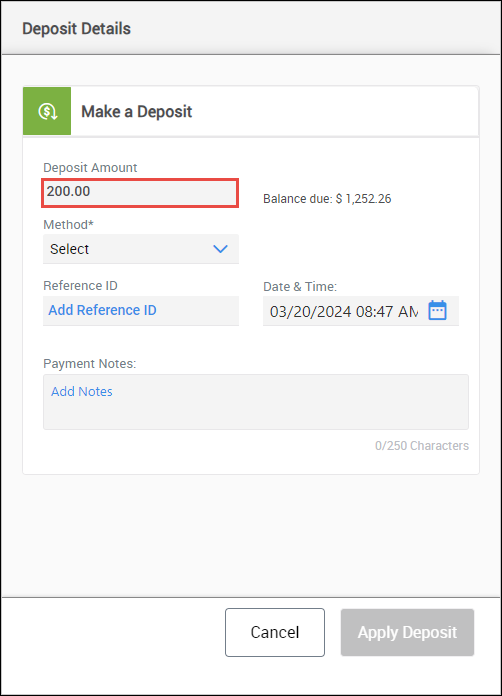
- IMPORTANT - The total balance due will be prefilled by default. If you do not update the value in this box, the entire remaining balance will be paid as a "deposit".
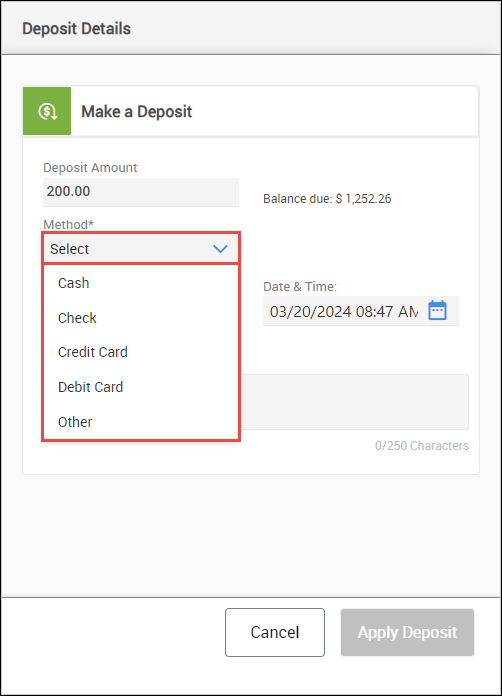
- Select a payment Method.
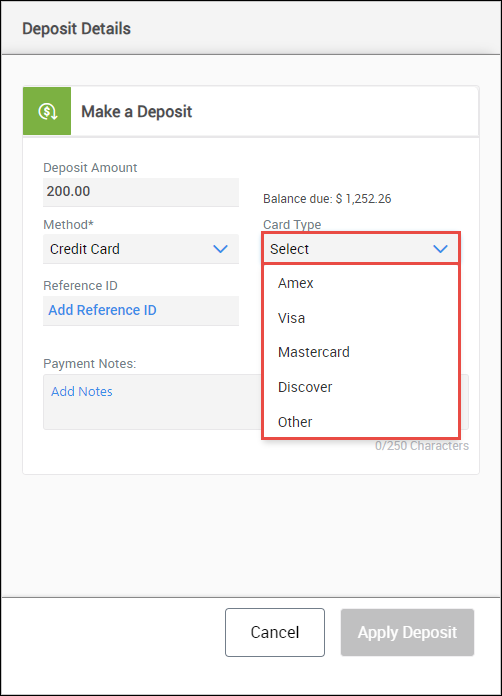
- For payment methods other than cash, choose an option from the Card Type dropdown.
- If required, add a Reference ID and Additional Payment Notes then click Apply Deposit.
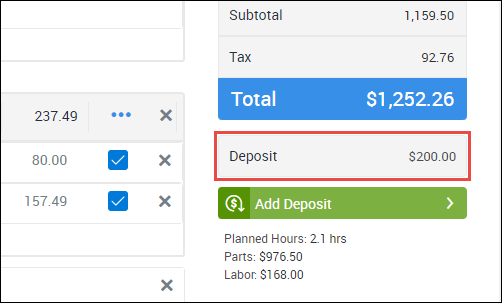
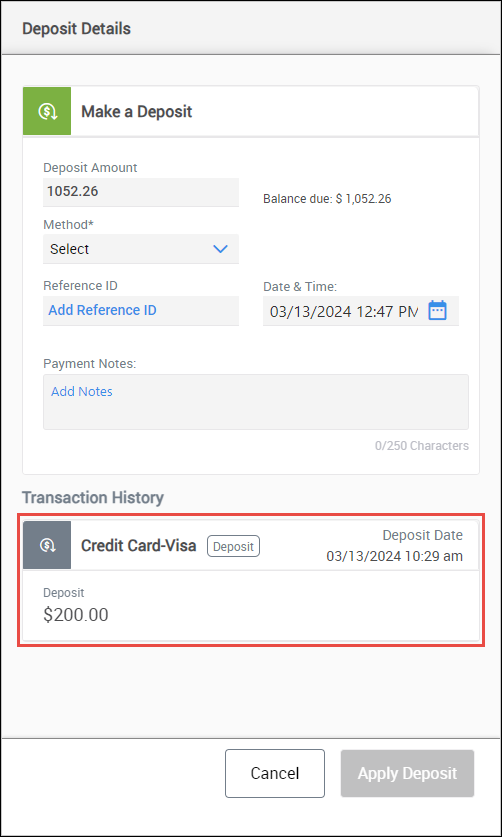
Deposit Tracking
Deposits will appear in the following locations:
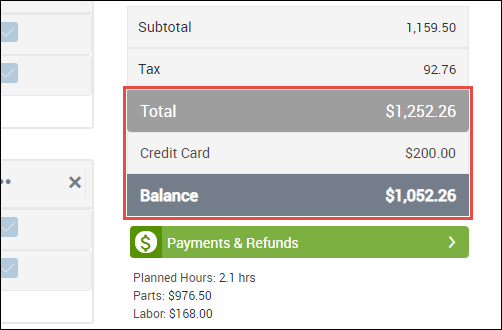
- On the document screen under the Total
- In the Transaction History section of the payment drawer
Apply a Deposit to an Invoice
- Click Invoice.
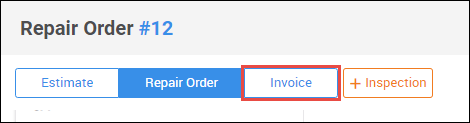
- Click Yes, Create the Invoice on the notification to convert the document to an Invoice and automatically apply the deposit.
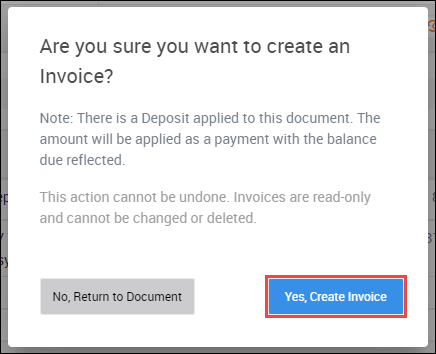
- The outstanding balance will now reflect the total minus the deposit.
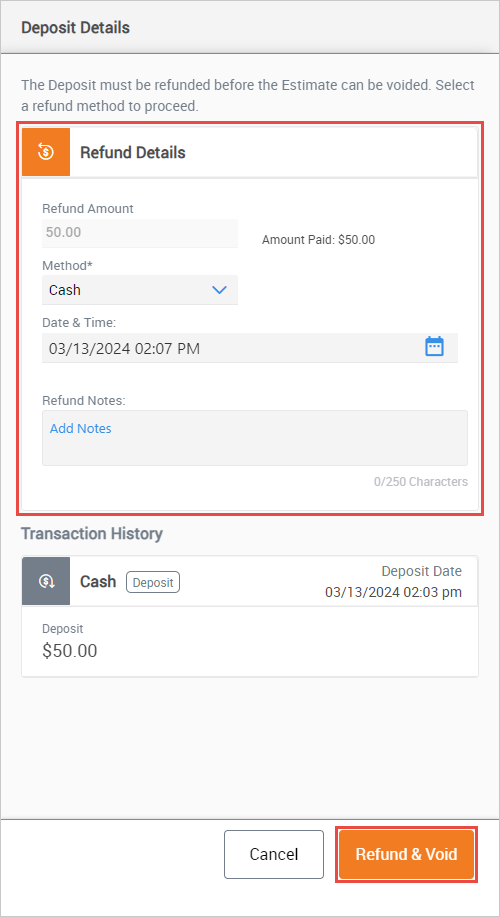
Refund a Deposit
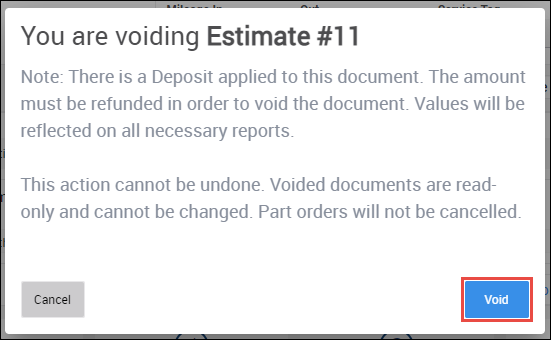
Deposits cannot be refunded while the RO is still active.
You must complete one of the following actions to refund a deposit:
- Convert the RO to an Invoice and use the normal refund process.
- Void the RO and the refund process will start automatically.
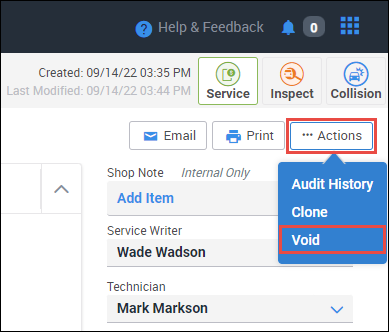
- Click Actions >> Void.
- Click Void on the notification.
- Fill in the Refund Details >> click Refund & Void.
- Click Actions >> Void.