Part 5: Adding and Editing Parts
Parts can be added to the Work Document from:
Manual part entry
Note: Using this method will not automatically apply a parts markup.
- To learn how to enable markup pricing, see Pricing.
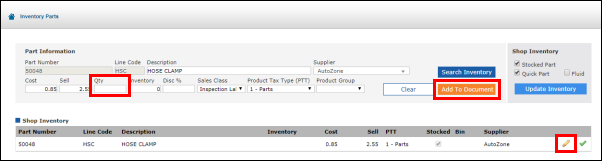
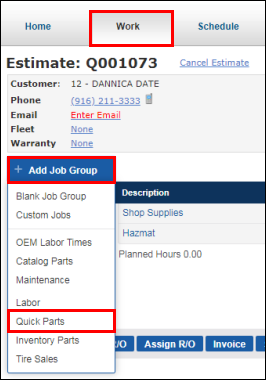
- From the Work tab, select Add Job >> Inventory Parts.
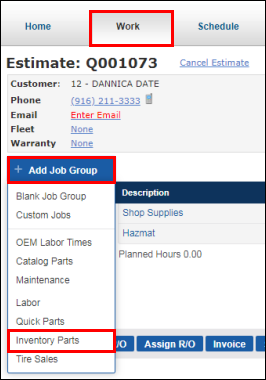
- Enter a Part Number, Description and all other relevant information, then click Add to Document.
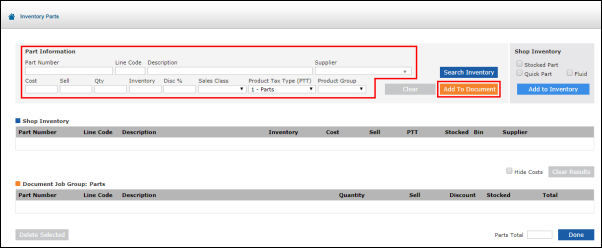
- Note: Clicking Add to Inventory instead will save the part directly to your parts inventory without adding it to the Work Document.
- A Supplier must also be selected in order to add the part to inventory.
- Note: Clicking Add to Inventory instead will save the part directly to your parts inventory without adding it to the Work Document.
- Click Done.
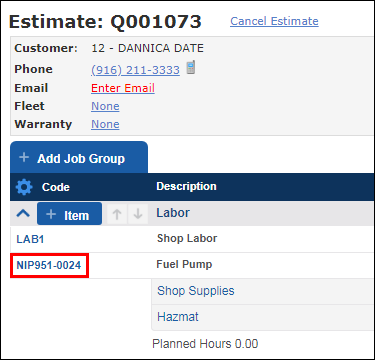
- Upon clicking Done, the part entered will add to your Work Document under a new job grouping.
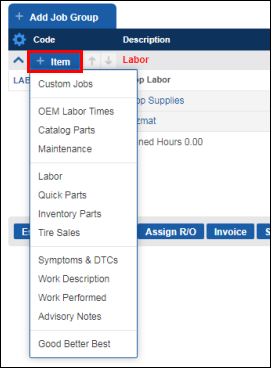
- Clicking the + icon on the job grouping provides additional options to add to the Job.
Inventory Parts
- From the Work tab, select Add Job >> Inventory Parts.
- Enter a Part Number or Description >> click Search Inventory.

- Click the Check Mark icon for a part to add 1 part item, or...
- to add more than 1 of a specific item, click the Pencil icon >> change the Quantity >> click Update Document.
- to add more than 1 of a specific item, click the Pencil icon >> change the Quantity >> click Update Document.
- Click Done.
- Upon clicking Done, the part entered will add to your Work Document under a new job grouping.
- Clicking the + icon on the job grouping provides additional options to add to the Job.
Quick Parts
- From the Work tab, select Add Job >> Quick Parts.
- Enter the Quantity for the parts that are needed >> click Done.

- Upon clicking Done, the part entered will add to your Work Document under a new job grouping.
The Parts and Labor Catalog
To learn how to add parts using the Parts and Labor Catalog, click HERE.
Parts can be edited from the:
Work Document
Making changes to part information on the Work document will only change the information on the current document.
- Click the Code (part number).
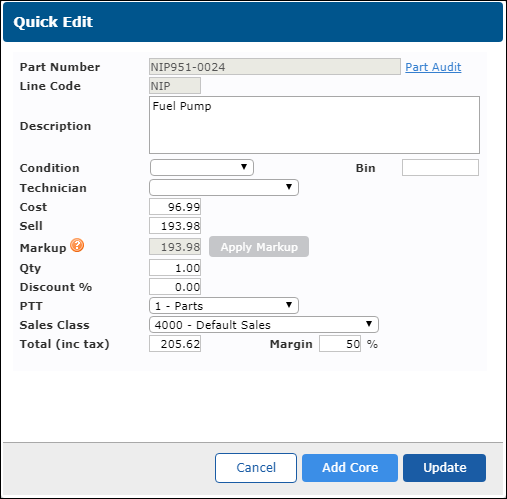
- Edit the following as needed:
- Description: Name of the part.
- Condition: Mark the part as Used, Reconditioned or Rebuilt.
- Bin: Location where the part is stored
- Technician: Select to assign a technician to the part.
- Cost: Enter a new cost. This is the price that you will pay from your parts supplier.
- Sell: Enter a new Sell price. This is the price your customer will pay.
- Markup: Click Apply Markup to adjust the Sell price based on the Markup set by the Supplier-Specific Price Matrix.
- Qty: Quantity of the part.
- Discount%: Add a discount percentage to the part.
- PTT (Product Tax Type): This determines how the item will be taxed.
- Sales Class: This determines how the item will be classified when paying taxes.
- Total (inc tax): Calculates the total by adding the Sell price, discount, and taxes.
- Margin: Displays the percentage of profit made between the cost price and the sell price of the part.
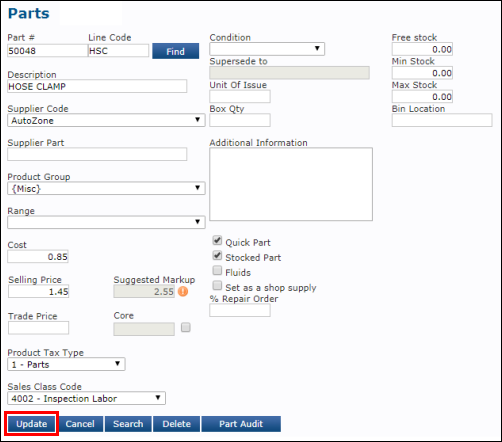
Parts
Making changes to part information on the Parts screen will change the information throughout the program.
- Note: Parts can also be added from here.
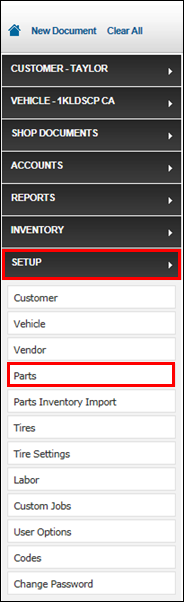
- Click Setup >> Parts.
- To look up a part:
- Enter a Part No then click Find or...
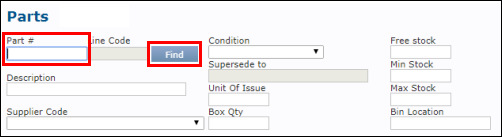
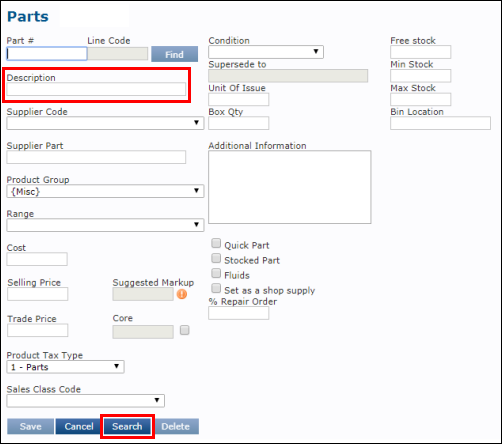
Enter a Description then click Search.
- Hint: To see your parts list, enter a % sign in the Description field.
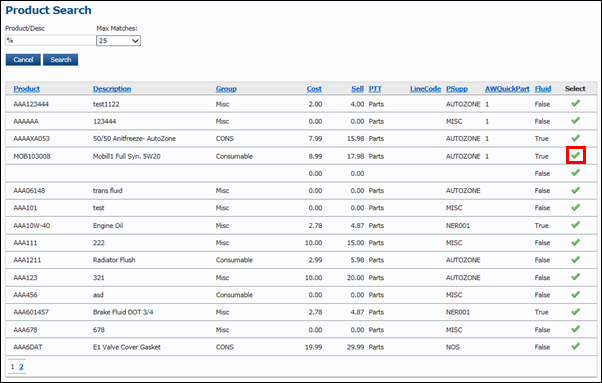
- Click the green check mark associated with the part you want to edit.
- Enter a Part No then click Find or...
- Edit the part information >> click Update.
- See Adding Parts to Inventory to learn more.