Setting Up QuickBooks Online
IMPORTANT - The images used in the instructions are examples.
- Consult your tax professional to confirm you are using the correct accounting information when exporting to QuickBooks.
- QuickBooks has ended support for Internet Explorer 11.
- We now recommend using Google Chrome when using a QuickBooks Online integration.
- Get more information about QuickBooks Online
Set up QuickBooks Online:
Part 1: Create Sales Class Codes
In ALLDATA Manage Online
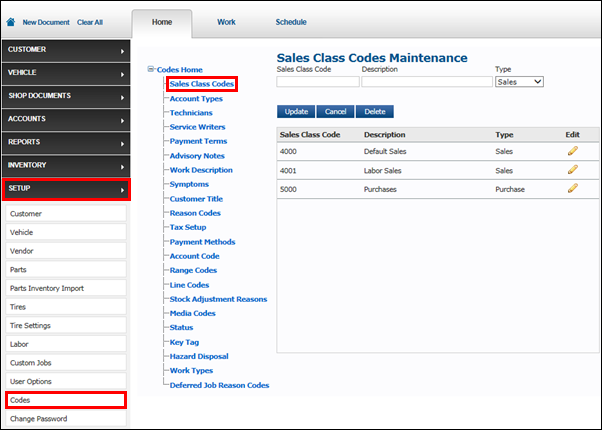
Sales Class Codes can be created and modified under Setup >> Codes >> Sales Class Codes Maintenance.
- It is not necessary to match your Sales Class Codes from Manage Online to QuickBooks because the export will create their own income accounts in QuickBooks.
- The account codes can consist of numbers and letters and have a maximum length of eight characters.
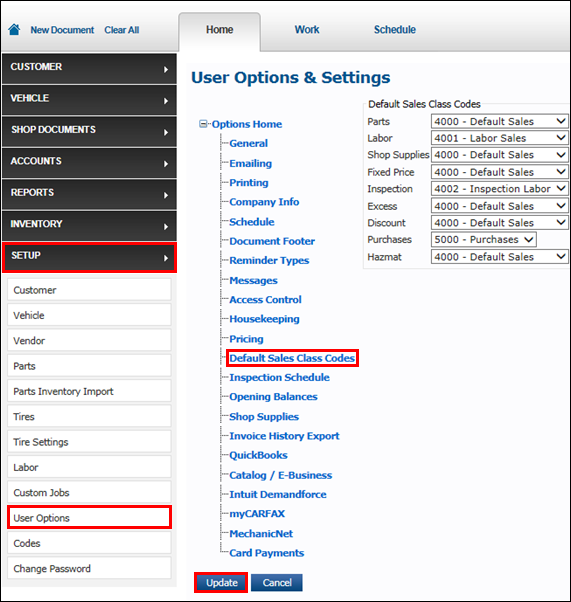
Once the Sales Class Codes have been added to Manage Online, the Default Sales Class Codes can be set under Setup >> User Options >> Default Sales Class Codes.
- This will assign the codes to the relevant transaction lines automatically when creating an invoice.
- Note: Sales Class Codes can still be manually assigned to individual parts and labor items instead of using the defaults.
Part 2: Enabling QuickBooks Online
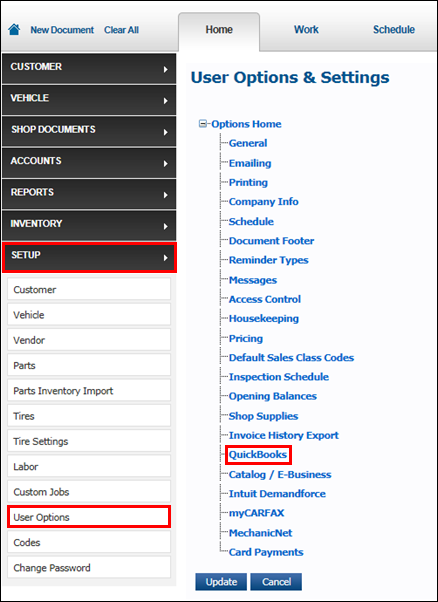
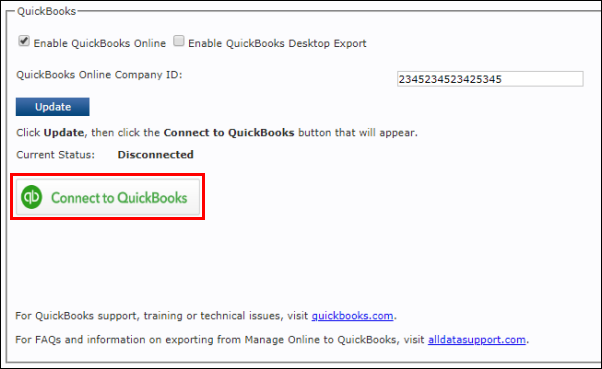
- Click Setup >> User Options >> QuickBooks.
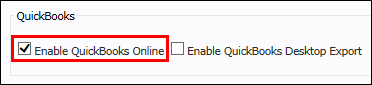
- Click the Enable QuickBooks Online check box.
- Enter your QuickBooks Online Company ID >> click Update.
- Notes:
- Your QuickBooks Online Company ID is assigned to your shop by QuickBooks. This will link your program to QuickBooks Online.
- When entering the QuickBooks Online Company ID, do not include spaces.
- Notes:

- The page will reload. Click the Connect to QuickBooks button that displays.
- A new window will open that will allow you to finish connecting Manage Online to QuickBooks Online.
- Click the Expense Account "..." button.
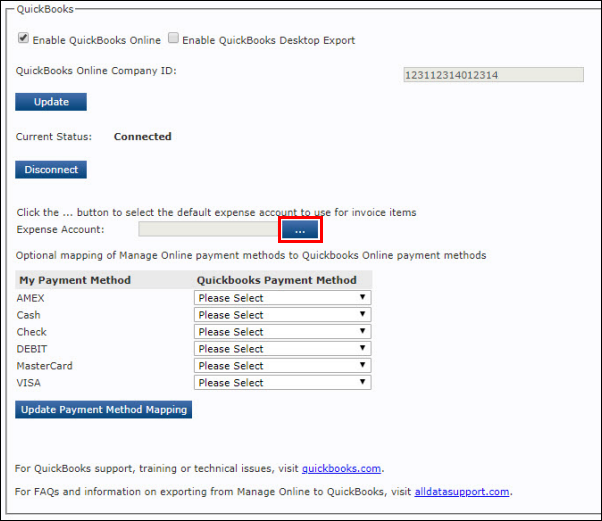
- In the Accounts List popup window, select an Expense Account >> click Update.

- Note: Contact your accountant or local tax professional to determine the appropriate Expense Account to select.
- Select which Payment Method will be assigned in QuickBooks when a specific Payment type is used in Manage Online.
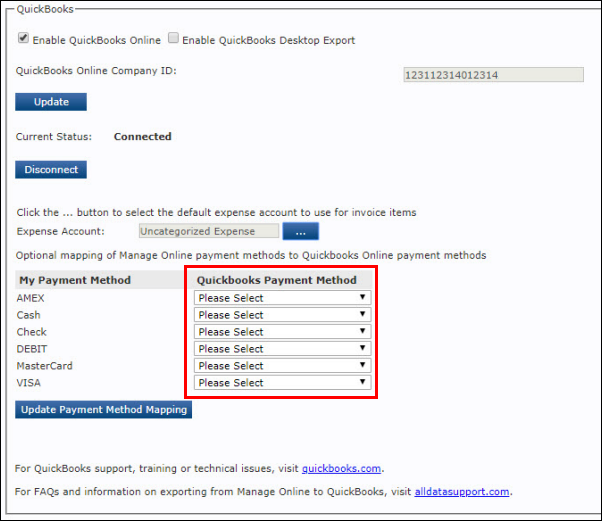
- Confirm the Current Status is Connected and the Expense Account is selected >> click Update.