Making Deposits on Repair Orders
Make deposits on repair orders at any time before invoicing.
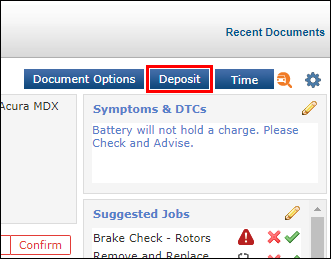
- From a Repair Order, click Deposit.
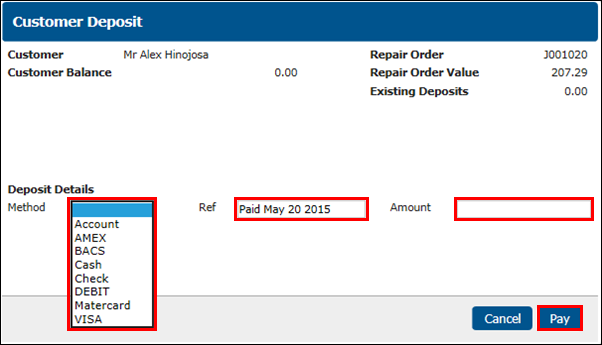
- In the pop-up screen, select a Method >> enter a Ref (date is automatically filled in) >> enter the deposit Amount >> click Pay.
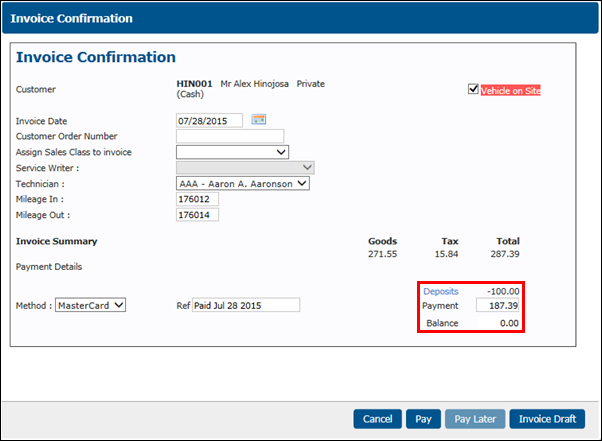
- Note: The deposit and the total will be displayed in the Invoice Confirmation screen.
- This process can be repeated for additional deposits.
- Previous deposit amounts are listed in Existing Deposits.
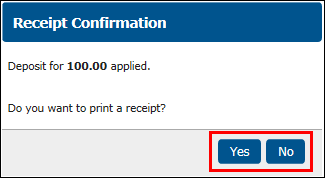
- In the Receipt Confirmation popup, click Yes or No to print a receipt for the deposited amount.
The total deposit amount will show on the Invoice Confirmation screen.
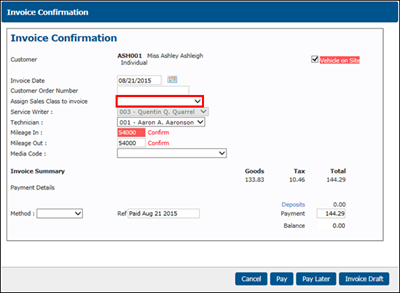
IMPORTANT - Assign Sales Class to invoice drop-down box:
- It is best to leave this option blank so that each item on the invoice will default to the Default Sales Class Code that you have previously assigned to it.
- If you make a selection in this drop-down, it will assign the selected Sales Class to the ENTIRE invoice. This will create accounting problems if you export data to QuickBooks.
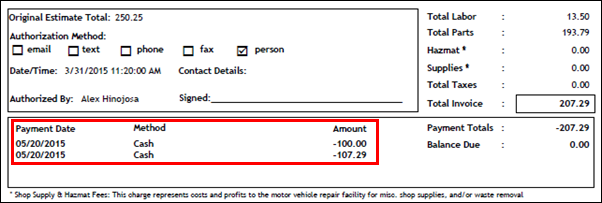
- The deposit(s) will also be shown on the printed invoice.
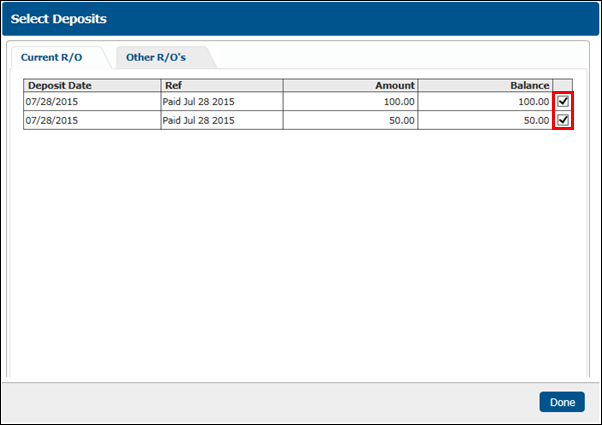
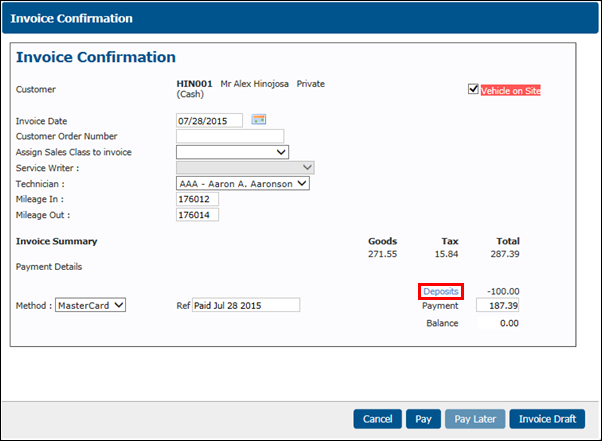
To remove Deposits from a repair order:
Click Deposits.
IMPORTANT - Assign Sales Class to invoice drop-down box:
- It is best to leave this option blank so that each item on the invoice will default to the Default Sales Class Code that you have previously assigned to it.
- If you make a selection in this drop-down, it will assign the selected Sales Class to the ENTIRE invoice. This will create accounting problems if you export data to QuickBooks.
- Uncheck the Deposits you want to remove >> click Done.
- Note: Although deposits can be removed from a repair order, they will still be saved in this section.
- Click Other R/O's to apply unused deposits made on other repair orders.
- This is mainly used for Fleet accounts.