Adding and Invoicing Warranty Jobs
Note: If the warranty options are not displaying, uncheck the Hide Warranty Details checkbox in Setup >> User Options >> General.
Adding a Warranty Provider
- Warranty Providers (such as third-party warranty companies or parent companies) must be set up under their own Customer record.
- Customers that are having vehicle work done can be assigned to a Warranty Provider.
- This allows you to split the invoice:
- Bill the Warranty Provider for work covered under the warranty.
- Bill the vehicle owner for any remaining charges.
To Set a Customer as a Warranty Provider:
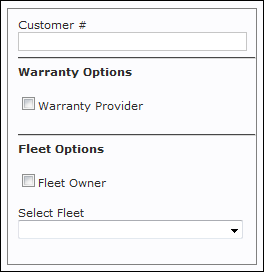
- When Adding a New Customer, check the Warranty Provider checkbox to identify this Customer as a warranty company that may be financially responsible for repairs.
Invoicing Warranty Jobs
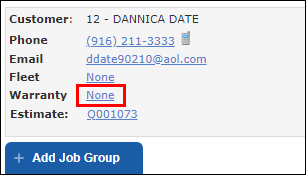
- Add or Select a Customer.
- On the Work screen, click the None link next to Warranty.
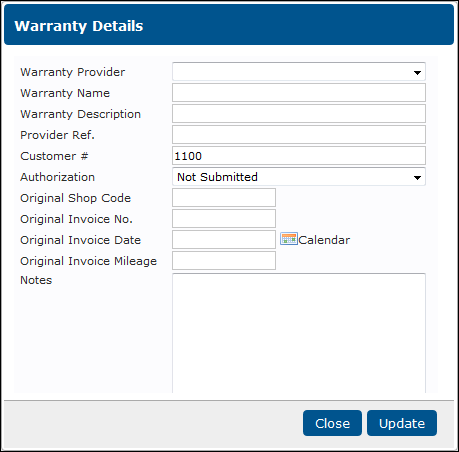
- Select the Warranty Provider >> Complete any of the applicable boxes on the Warranty Details screen >> click Update.
- Create the Work document as usual.
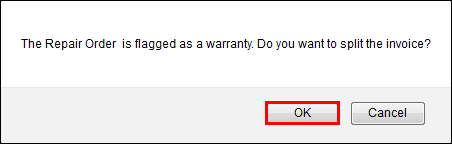
When converting the RO to an invoice, you will be asked to split the invoice.
- Click OK.
- Create a Split Invoice to take payment from both parties.